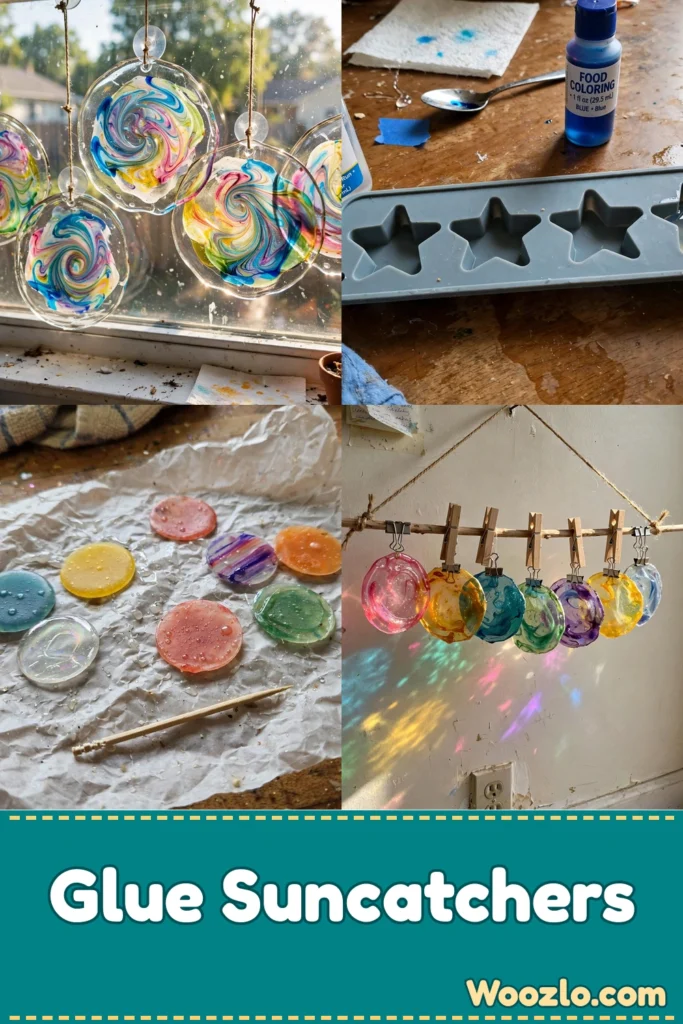
Cozy DIY Glue Suncatchers for Thoughtful Craft Time with Kids
A sliver of afternoon light slides through the kitchen window as you press the nozzle gently, watching clear glue pool and catch the light like tiny glass moons. These DIY glue suncatchers turn ordinary light into a small, glowing calm — a slow, hands-on project that rewards patience with simple, shimmering quiet.
The craft has a little chemistry lesson tucked in: school glue dries transparent as the water evaporates and the polymer chains set, leaving a flexible, clear layer. A drop of pigment or glitter changes how light bends through the finished piece. Prep takes about 15 minutes; pieces need 24 to 48 hours to dry, depending on thickness.
Materials You’ll Need
- Clear school glue (PVA glue), 4–8 ounces
- Disposable plastic lids or silicone molds (flexible and nonstick)
- A thin plastic sheet or acetate, optional for tracing
- Food coloring or liquid watercolors, a few drops
- Fine glitter or mica powder, optional for shimmer
- Wooden craft sticks or toothpicks, for stirring and spreading
- A small funnel or syringe, helpful for precise filling (optional)
- Waxed paper or parchment, for drying surface
- String, fishing line, or thin ribbon, for hanging
- A craft knife or thin spatula, for gentle lifting once dry
- Small rubber gloves, if you prefer to avoid sticky fingers
- A well-ventilated, warm spot for drying, safe and out of reach of pets
Step 1: Prepare Your Workspace
Cover a table with waxed paper and set out molds, glue, and colorants.
Step 2: Add a Puddle of Glue
Add a small puddle of glue to a clean lid or cup — start with a tablespoon for a small suncatcher and adjust as you learn the thickness you like.
Step 3: Mix in Color
Mix in color or glitter gently. A single drop of food coloring shifts the glue to a soft wash; stir with a wooden stick until even.
Step 4: Fill the Mold
Fill the mold or shape on acetate. Pour slowly, letting the glue find its level. Watch the surface smooth and catch the light.
Step 5: Create Textures
Drag a toothpick through the wet glue to make waves, dots, or veins that will show when dry.
Step 6: Remove Air Bubbles
Tap the mold lightly on the table and let smaller bubbles rise and pop. This keeps surfaces clear and glass-like.
Step 7: Let Pieces Dry Undisturbed
Place in a warm, dry spot for 24 to 48 hours, depending on thickness. Check by gently touching the edge — it should feel firm and cool.
Step 8: Release from Molds
Peel silicone molds back slowly, or lift acetate pieces with a craft knife. Move with steady hands to avoid bending.
Step 9: Attach Hanging Loops
Punch a small hole at the top, reinforce with a tiny dot of glue if needed, and thread your string.
Step 10: Finish with a Soft Cleaning
Wipe any rough edges with a damp cloth and place the suncatcher in light to test how it refracts and glows.
Enjoying the Finished Piece
Hang one near a window and watch color spill onto the windowsill. Place a group at different heights and notice how light moves through them. Make a set of tiny disks and clip them to a thin dowel for a lazy mobile. They make gentle gifts too — wrap a few in tissue paper with a note about slowing down.
Caring for Your Suncatchers
They resist shattering but can scratch — keep out of direct heat. Clean with a soft, damp cloth; avoid harsh chemicals. Store flat between sheets of tissue or waxed paper in a shallow box, in a cool, dry place.
Tips and Variations
- Layered colors: Pour a thin clear base, let it set, and add a contrasting top layer for a stained-glass effect.
- Nature textures: Press tiny pressed flowers or leaf fragments into the wet glue.
- Stencils: Use simple paper stencils on acetate for moons, leaves, or little animals.
- Different shapes: Shallow bowls for domed pieces, flat lids for disks.
- Repairing: Small bends relax under a flat weight for a day; cracks can be bonded with a tiny dot of fresh glue.
Quick Questions
Will the glue stay clear? Clear PVA dries transparent; rotate away from intense midday sun to prevent slight yellowing.
Are they safe for children? Child-friendly with close supervision — use non-toxic school glue and keep drying pieces out of reach until set.
How do I avoid fingerprints and dust? Work in a clean area, let pieces dry undisturbed, and wear thin gloves.
Can I hang them outside? Short-term in calm weather, but prolonged rain or heat can degrade the glue — bring them inside.