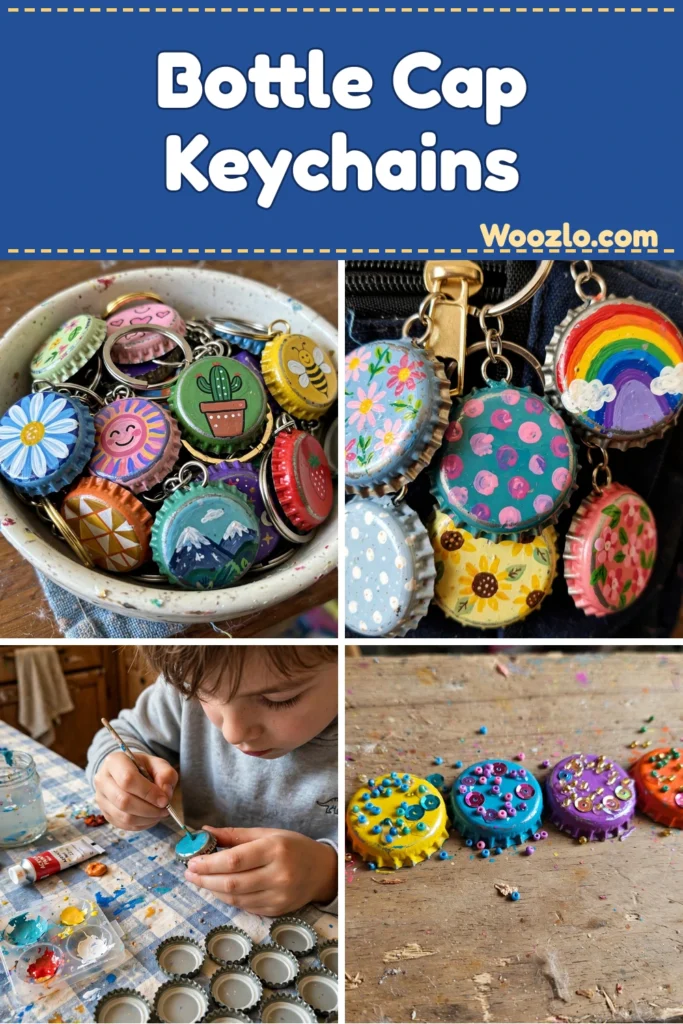
Create Playful DIY Bottle Cap Keychains with Kids Today
Are you looking for a fun, super cheap craft for your next craft day with the kids? These playful bottle cap keychains are perfect! All you need are metal bottle caps, some acrylic paint, and keychain rings. My little ones love turning each cap into a tiny canvas — every keychain ends up completely personal.
The best part? It’s so easy and inexpensive. You probably have bottle caps already, paint is cheap, and the whole project costs next to nothing. Plus, painting and decorating builds fine motor skills and hand-eye coordination while the kids are having a blast.
What You’ll Need
- Metal bottle caps (from craft stores, or save them from drinks)
- Colorful acrylic paint (dries quickly and bonds well to metal)
- Paintbrushes (various sizes for detail work)
- Optional: small beads or sequins for embellishing
- Keychain rings (available at craft stores)
- Strong adhesive or hot glue gun
- Optional: Mod Podge or sealant for durability
- Protective table covering
Step 1: Prepare Your Workspace
Lay down a protective covering to keep your table clean. (Trust me on this one — paint and kids love to travel.)
Step 2: Choose Your Caps
Let each child pick their own bottle caps. While metal caps work best, plastic or cork caps are fun to try too — each type has its own texture.
Step 3: Paint the Base Layer
Paint the entire surface of each cap with a base color. Set aside to dry. Acrylic dries quickly, so you won’t be waiting long.
Step 4: Add Personal Designs
Once the base coat is dry, let imaginations run wild — patterns, animals, rainbows, favorite colors. My kids love painting little stories on theirs.
Step 5: Embellish with Beads or Sequins
If you’d like, glue on beads or sequins for extra flair and shimmer. Take your time — this is the step where the keychains really come to life.
Step 6: Seal Your Creation
Once everything is dry, brush on Mod Podge or a sealant to protect the artwork and make it last.
Step 7: Attach the Keychain Ring
Use strong adhesive or hot glue to attach the keychain ring to the cap — a gentle twist and press bonds them together. (This step is for grown-ups or older kids.)
Step 8: Let It Set
Allow everything to dry fully. This is a great time to admire your creations!
Tips from My Kitchen Table
- Try sponge painting: Sponges or even fingers give a fun different texture.
- Decoupage: Cut out tiny pictures or symbols from paper and decoupage them onto the caps.
- Themes: Make animal keychains, nature ones, or a set in everyone’s favorite colors.
- Sweet messages: Let kids write short quotes or affirmations on the caps — each keychain becomes a personal little gift.
- Little hands: Brushing, gluing, and placing tiny beads is a fantastic fine-motor workout.
These make the sweetest gifts — hang them on backpacks, brighten up a set of house keys, or display them in a cherished bowl. My kids love gifting theirs to friends and grandparents!
Caring for Your Keychains
Keep them in a dry, safe place. If they get dirty, a gentle wipe with a damp cloth does the trick. If you used beads, check now and then that they stay secured.
Quick Answers
What if I don’t have a glue gun? Double-sided tape works for a temporary hold, though it won’t last as long.
Alternatives to keychain rings? Ribbon or string makes a cute hanging loop instead.