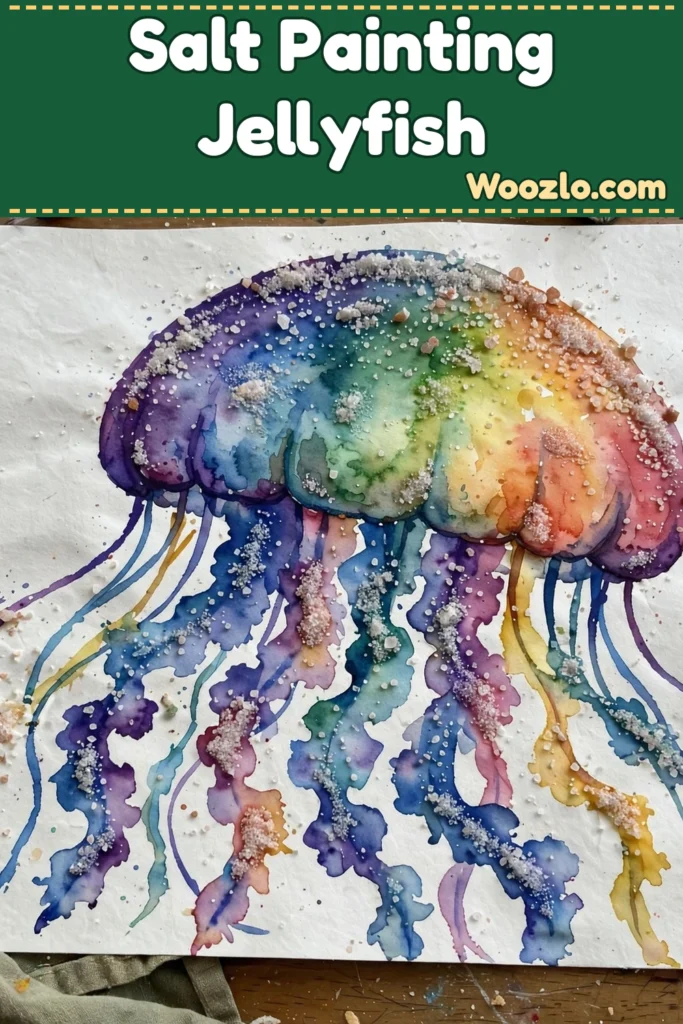
A Calm Way to Create Rainbow Salt Painting Jellyfish with Kids
Watch watercolor spread through salt crystals, glistening like sunlight dancing on ocean waves — this rainbow salt painting jellyfish is one of the most soothing crafts you can do with kids. It’s a sensory-rich project that invites everyone to slow down and embrace the moment.
The rhythm is gentle: pour, sprinkle, dab color, and watch the magic happen. Salt painting highlights the interplay between color and texture in a way that’s delightful for both children and adults — cultivating focus as you watch each stroke of color mingle with the salt.
Materials You’ll Need
- Heavyweight watercolor paper
- Fine table salt (easy to find — regular table salt works perfectly)
- Watercolor paints or liquid watercolors
- Paintbrushes (various sizes)
- A container for mixing watercolors
- Water
- Optional: spray bottle for creating textures
- Optional: cardboard or plastic sheets to protect work surfaces
Step 1: Prepare Your Workspace
Lay down newspaper or plastic sheets to protect the surface. This creates a calming environment so you can focus on your creation.
Step 2: Cut Your Jellyfish
Cut your watercolor paper into a jellyfish shape. This step is simple yet satisfying — you might enjoy tracing around fun jellyfish templates available online.
Step 3: Sprinkle the Salt
Once you have your jellyfish cut out, sprinkle a generous layer of salt over the entire surface of the paper. This tactile moment is essential — it enhances the overall effect of your watercolor.
Step 4: Mix Your Watercolors
In a separate container, mix your watercolors with water to achieve your desired consistency. Aim for a flowy texture that will spread easily over the salt.
Step 5: Apply the Colors
Starting with one color, use your paintbrush to apply the watercolor to the salt-covered paper. Notice how the colors run and mingle, creating beautiful patterns. Allow each color a moment to interact with the salt before adding another.
Step 6: Add Texture (Optional)
Consider adding textures by spraying water gently from a spray bottle. This encourages the colors to move and blend more freely, mimicking an underwater scene.
Step 7: Let It Dry
Once you’re happy with your design, let your jellyfish dry completely. This could take a few hours — the anticipation builds a lovely sense of completion.
Step 8: Shake Off Excess Salt
When the jellyfish is dry, gently shake off any excess salt. You’ll be left with a vibrant piece of art showcasing the beautiful colors and textures you created.
Display and Storage
Frame it and hang it in your living space, or set it in a calm corner of your home. Store in a cool, dry place away from direct sunlight to prevent fading. If you’re concerned about excess salt affecting the artwork over time, seal it in a picture frame or display it under glass.
Tips and Variations
- Experiment: Create multiple jellyfish in varying sizes and unique palettes.
- Metallic magic: Iridescent or metallic watercolors catch the light beautifully.
- Other sea creatures: Try the same technique for octopuses or sea turtles.
- Make it a group activity: Crafting together fosters shared moments of mindfulness.
- No watercolors? Liquid food coloring mixed with water produces a similar effect.
Quick Questions
What ages is this suitable for? A wide range — younger children may need assistance, while older kids and teens can explore independently.
Can I use regular salt? Yes! Regular table salt works perfectly and carries watercolor beautifully.
How long does it take to dry? Typically a few hours, depending on conditions — patience is key.
What if I don’t have watercolor paints? Use liquid food coloring mixed with water as a fun substitute.