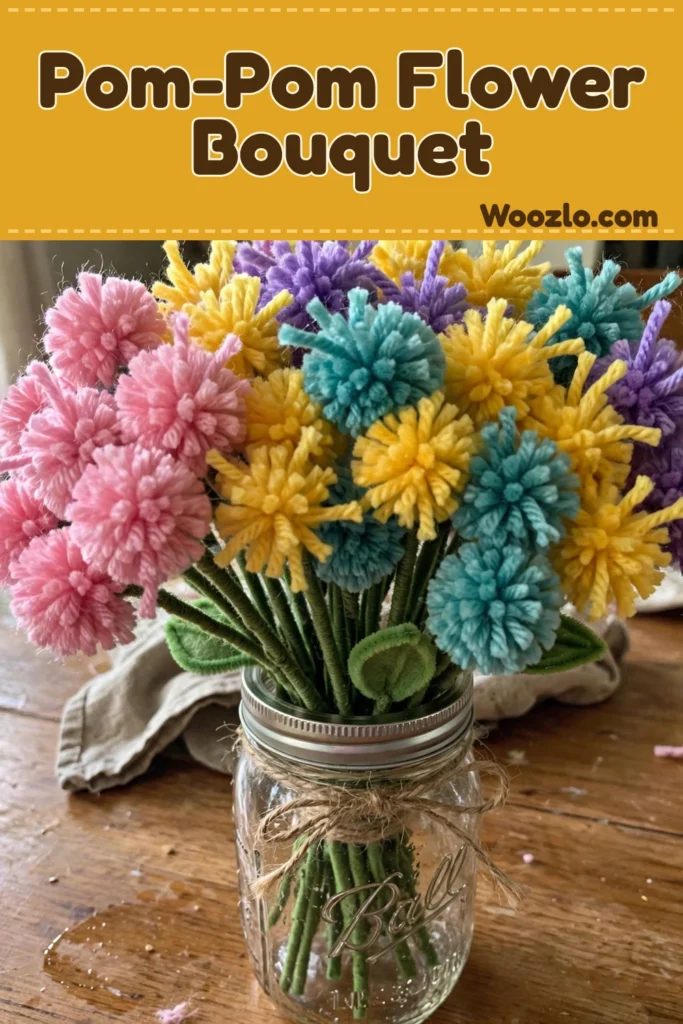
Create a Cozy DIY Fork Pom-Pom Flower Bouquet for Home
Are you looking for a cozy, inexpensive craft to brighten up your home? This fork pom-pom flower bouquet is it! You wrap yarn around a regular kitchen fork, tie it off, snip the loops — and you have a fluffy little flower. Make five to ten, stick them in a jar, and you have a bouquet that never wilts.
The best part? It’s super cheap and easy. Yarn from your stash, a fork from your drawer, and you’re crafting. My kids love the wrapping part — it’s wonderfully repetitive and calming, and wrapping and snipping builds great hand strength and coordination.
What You’ll Need
- Yarn in various colors (acrylic yarn is popular for its wide color range and affordability; wool or cotton work beautifully too)
- A standard fork
- Scissors
- Cardboard or cardstock (for pom-pom templates, if you like)
- Hot glue gun or craft glue
- Green floral wire (optional, for stems)
- A decorative vase or container for display
Step 1: Cut the Yarn
Cut several lengths of yarn, about 12 to 15 inches each. Choose a mix of colors you love.
Step 2: Wrap the Yarn
Take the fork and wrap the yarn around the center prongs. Aim for about 50 to 70 wraps for a fuller pom-pom — the more you wrap, the fluffier your flower will be. Kids can do this part; the repetitive motion is wonderfully soothing.
Step 3: Secure the Pom-Pom
Cut a piece of yarn about 10 inches long. Slide it through the center prongs and tie it tightly to secure the wrapped yarn.
Step 4: Trim the Loops
Gently slide the wrapped yarn off the fork and cut the loops at both ends. A fluffy pom-pom appears!
Step 5: Shape It
Trim any uneven ends to form a round shape, then fluff it up with your fingers.
Step 6: Add Stems (Optional)
For added realism, attach green floral wire to the base of each pom-pom. This creates flower stems and gives the bouquet more dimension.
Step 7: Assemble the Bouquet
Gather your pom-poms — typically five to ten make a lovely bouquet — and arrange them in a vase or container. Mix sizes and colors for a playful look. No vase? A mason jar, a cup, or even a tin can works beautifully.
Step 8: Display Your Creation
Find a cozy spot — a windowsill, the dining table, a centerpiece for gatherings — and let its cheerful presence brighten your space.
Tips from My Kitchen Table
- Play with color: Mix bold and soft hues for stunning, personal results.
- Vary the sizes: A larger fork makes bigger pom-poms, a smaller one makes tiny blossoms. Mix them!
- Add embellishments: Beads or small decorative items tucked into the pom-poms add tactile fun.
- Go natural: Pair the pom-poms with dried flowers or greenery for an organic feel.
- Little hands: Wrapping, tying, and snipping are fantastic for building hand strength and patience.
Caring for Your Bouquet
Store in a cool, dry place away from direct sunlight, which fades the colors. If pom-poms flatten over time, give them a gentle fluff with your fingers. Want to reuse the yarn? Unravel the pom-poms and start something new!
Quick Answers
What yarn works best? Acrylic is the crowd favorite — wide colors, affordable. Wool and cotton work great too.
Can I use other tools? Yes — cardboard circles or pom-pom makers give a more consistent shape.
Can kids help? Absolutely, with supervision for scissors and the hot glue gun.