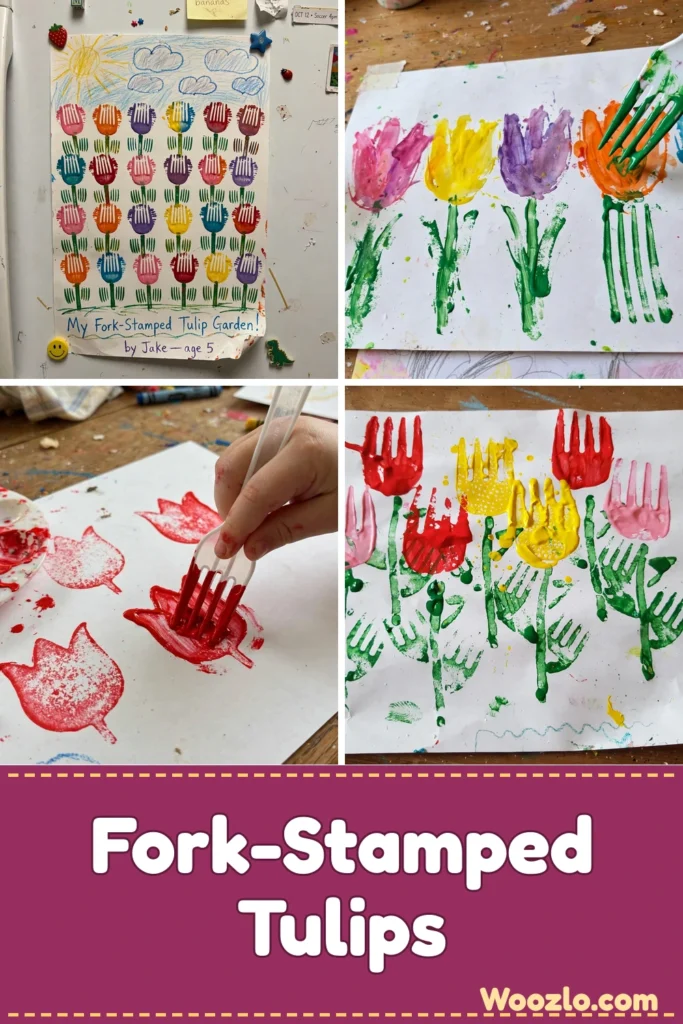
Brighten Your Garden with Fun DIY Fork-Stamped Tulips
Are you looking for a fun, super simple painting activity for your little ones? These fork-stamped tulips are it! You just dip a plastic fork into acrylic paint and stamp rows of bright tulips onto paper. That’s the whole technique — and kids absolutely love it.
The best part? It’s so cheap and easy. A plastic fork, some acrylic paint, and a piece of sturdy paper are all you need. The rhythmic dipping and stamping is wonderfully calming, and stamping builds great hand-eye coordination for little hands.
What You’ll Need
- Colorful acrylic paints
- A sturdy piece of paper or canvas (thick enough to hold the paint)
- A plastic fork (the hero of this project!)
- A small plate or palette
- A cup of water (for rinsing the fork)
- Paper towels
- Optional: a paintbrush for details or a background
Step 1: Prep Your Workspace
Lay down a cloth or newspaper to catch wayward paint drops.
Step 2: Set Out Your Paints
Squeeze a small amount of each paint color onto your plate or palette.
Step 3: Stamp the Tulips
Dip the tines of the plastic fork into your chosen paint. Gently press the fork onto the paper to create a tulip shape, then lift it straight up to keep a lovely impression. Repeat for a row of colorful flowers — kids will find their own happy rhythm here.
Step 4: Add the Stems
Dip the edge of the fork into green paint and lightly press it down to create stems beneath each flower.
Step 5: Add the Leaves
Dip the fork into lighter or darker shades of green and stamp leaves with the same gentle motion.
Step 6: Let It Dry
Let your artwork dry completely before touching it.
Step 7: Clean Up
Rinse the fork in the cup of water — it’s ready for the next crafting session.
Step 8: Add Details (Optional)
Once dry, use a paintbrush to add details or a background — clouds, a sun, a whole garden scene.
Tips from My Kitchen Table
- Try different forks: A salad fork or dessert fork makes unique flower shapes — let the kids experiment!
- Sponge backgrounds: Dab paint on with a sponge for a textured sky.
- Grow the scene: Add clouds, a sun, or grass around the tulips.
- Make it a family garden: Let each person design their own row of flowers.
- Little hands: Pressing and stamping is a fantastic hand-eye coordination builder.
Display your garden where you’ll see it often — on the fridge, in the living room, or frame it! A hand-painted card with these cheerful tulips also makes any message feel more personal.
Caring for Your Artwork
Store in a cool, dry place away from direct sunlight, which can fade colors over time. Framing gives it protection and a finished feel. The fork and paper can be reused for new projects — try seasonal decorations or new color palettes.
Quick Answers
Can I use other paints? Absolutely — tempera or watercolors work too, though some paints need different paper types to hold well.
What if the paint smudges? Step back and look fresh — smudges can often be worked into the design or covered with new details.
Is it good for all ages? Yes! The simple stamping technique invites everyone, from toddlers to grandparents.