Craft a Sparkling DIY Glitter Dragonfly Keychain in Easy Steps
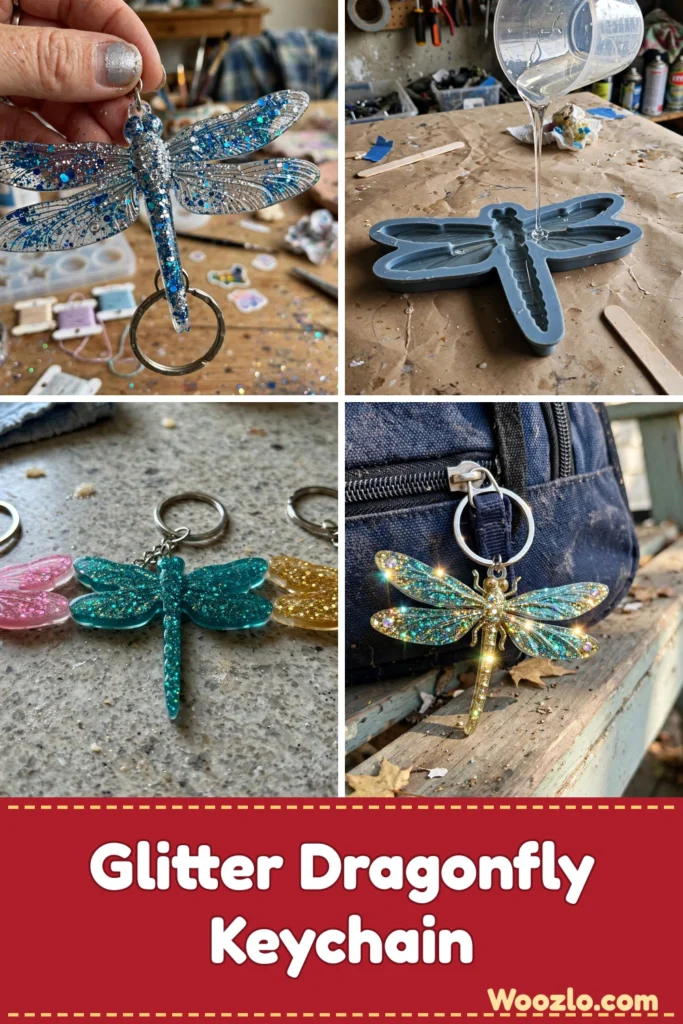
Here is a weekend project with a seriously satisfying payoff: a glitter dragonfly keychain cast in clear resin. It is a straightforward pour-and-cure build — mix, stir, pour into a silicone mold, wait 24 hours, done — and you end up with a tough little piece of art that rides on your keys or backpack.
Fair warning: resin is not a kids-alone project. With gloves on and a ventilated workspace, though, it is an easy family build with adult supervision. One mold makes one dragonfly, so this is also a great excuse to batch a few as gifts.
What You’ll Need
- Clear casting resin (easy to find in craft stores)
- Glitter in your favorite colors
- Dragonfly-shaped mold (silicone molds work best)
- Mixing cups (disposable or reusable)
- Stirring sticks (wooden or plastic)
- Keychain hardware (rings and chains, found in craft aisles)
- Protective gloves
- Masking tape (to stabilize your mold)
You can substitute materials based on what you have on hand to personalize the build. The resin is the canvas; the glitter brings the sparkle.
Step 1: Prep Your Work Area
Lay down paper or a cloth to keep your space clean, and gather all your materials close at hand. Resin does not forgive a messy bench.
Step 2: Gear Up
Put on your protective gloves before you touch the resin. Work in a well-ventilated area.
Step 3: Measure the Resin
Measure equal parts of resin and hardener into a mixing cup. Take a moment to note the clarity and viscosity.
Step 4: Stir Gently
Slowly stir the mixture with a stick for about 2-3 minutes of gentle stirring. You will feel the texture change from thick to smooth.
Step 5: Add the Glitter
Add your chosen glitter and fold it into the resin slowly, watching the colors swirl and blend. This is where the piece gets its character.
Step 6: Pour Into the Mold
Pour the mixture into your dragonfly mold. Start from one corner and let it fill the shape gradually so you do not trap air.
Step 7: Even It Out
If needed, use a stir stick to adjust any spots and make sure the mold is filled evenly.
Step 8: Release the Bubbles
Tap the mold lightly on the table to release any air bubbles that may have formed.
Step 9: Let It Cure
Allow the resin to cure as directed — often 24 hours. Do not rush this; a full cure is what makes the keychain strong and durable.
Step 10: Demold
Once cured, carefully remove the dragonfly from the mold and check out the gleam.
Step 11: Attach the Hardware
Attach the dragonfly to the keychain hardware. Secure it carefully so it connects easily to bags or keys.
Make It Your Own
- Layer glitter colors for a sunset-like gradient effect.
- Embed extras: drop in tiny beads or natural elements before pouring for added depth and texture.
- Add scent: resin-safe essential oils give the piece a calming aromatherapy element.
- Batch them: craft a series in different colors or designs as gifts.
- Embrace imperfections: a small bubble or uneven edge adds charm and character.
FAQs
Can I use different types of glitter? Yes — fine, chunky, or holographic glitters all work. Just make sure they are compatible with resin.
Is the resin safe to work with? Most casting resins are safe with proper precautions: gloves and a well-ventilated area.
How do I make the keychain durable? Let the resin cure completely as instructed. Avoid extreme heat or harsh chemicals afterward.
Can I make this with kids? With adult supervision, yes — guide them through the process and handle the resin carefully.
What if I make a mistake? Pour another layer of resin over it or cast a fresh piece. Each attempt teaches you something.
Keeping It Looking Good
Store the keychain in a soft pouch or a dedicated spot to prevent scratches. To refresh the look, add more charms, and if the resin loses its shine, gently polish it with a soft cloth to restore the sparkle.