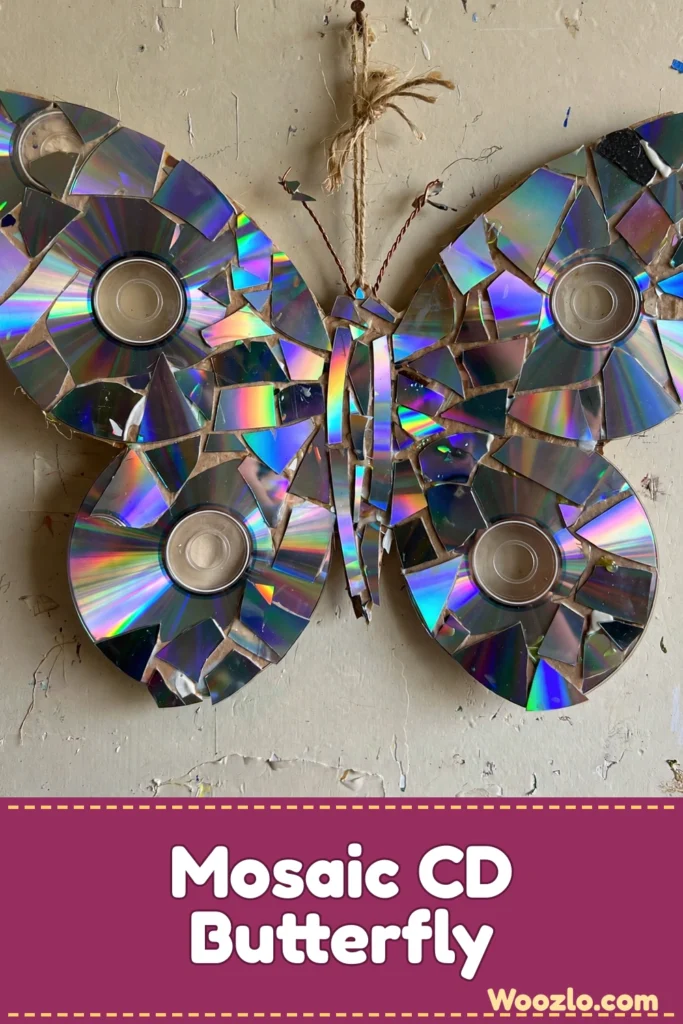
Transform Old CDs into a Stunning DIY Mosaic Butterfly Wall Hanging
Got a stack of old CDs gathering dust? Do not toss them — cut them up and turn them into a shimmering mosaic butterfly for the wall. The iridescent shards catch light beautifully, and the whole build is just cut, arrange, and glue. This is a great rainy-weekend project that costs essentially nothing.
One practical note: CDs are tough to cut, so use sturdy scissors or a craft knife and keep your fingers clear. Once you get a rhythm going, the cutting is the longest part — the mosaic itself goes fast.
What You’ll Need
- Old CDs (enough to create the butterfly shape)
- Cardboard or a thick canvas (as a sturdy base)
- Scissors or a craft knife (be gentle and careful)
- Strong adhesive (like craft glue or a glue gun)
- Paint (optional, for background color)
- Paintbrush (if using paint)
- Decorative elements like glitter or beads (optional)
Step 1: Cut the Base Shape
Cut your cardboard or canvas into the butterfly shape — a simple oval for the body and a pair of wings will do it.
Step 2: Cut the CDs
Carefully cut your CDs into smaller pieces. Aim for a mix of shapes and sizes; the variety adds texture to the mosaic. Tip: scoring the CD with a craft knife first makes cutting easier. Always keep your hands safe.
Step 3: Arrange Before Gluing
Lay out your CD pieces on the base before you glue anything. Play around with arrangements and watch how the light interacts with the shapes and colors. Try a gradient, a random scatter, or a pattern — whatever your eye likes.
Step 4: Glue the Pieces
Once you are happy with the arrangement, glue the pieces on one by one. Take your time with this step.
Step 5: Let It Dry
Give the piece time to dry thoroughly. If you used regular craft glue instead of a glue gun, give it a little extra time.
Step 6: Add Final Touches
Optional: add paint or decorative elements like glitter or beads to enhance your butterfly. Paint the base a soft hue — gentle pastels or earth tones add depth — before gluing if you want a colored background.
Step 7: Hang and Enjoy
Once everything is set and dry, hang your butterfly in a cozy spot with some light — a window or a living room wall creates beautiful reflections.
Make It Your Own
- Experiment with patterns: gradients, random arrangements, or color-blocked wings.
- Add natural elements: leaves or flowers blend beautifully with the shiny CD surfaces.
- Play with size: make smaller or larger butterflies, or a whole series for a gallery wall.
- Make it social: invite friends or family to make their own — comparing color choices is half the fun.
- Swap materials: scrapbook paper, tiles, or plastic lids work as mosaic pieces too.
FAQs
How do I get the CDs to cut easily? Use sturdy scissors or a craft knife, and score the CD with the knife first. Keep your hands safe as you work.
Can I use materials besides CDs? Absolutely — scrapbook paper, tiles, or plastic lids all work.
What if I don’t have a glue gun? Regular craft glue works fine; just give it extra drying time.
Where’s the best place to hang it? Somewhere with light — a window or a cozy living room wall.
How long will the colors last? The CD colors stay vibrant for years as long as you keep them out of direct sunlight for extended periods.
Care
Hang it where it will not be disturbed or exposed to dampness, which can affect the glue. A gentle dusting now and then keeps it bright. If you ever want a change, remove it with care — the pieces can be repurposed for another mosaic project, gift embellishments, or cards.