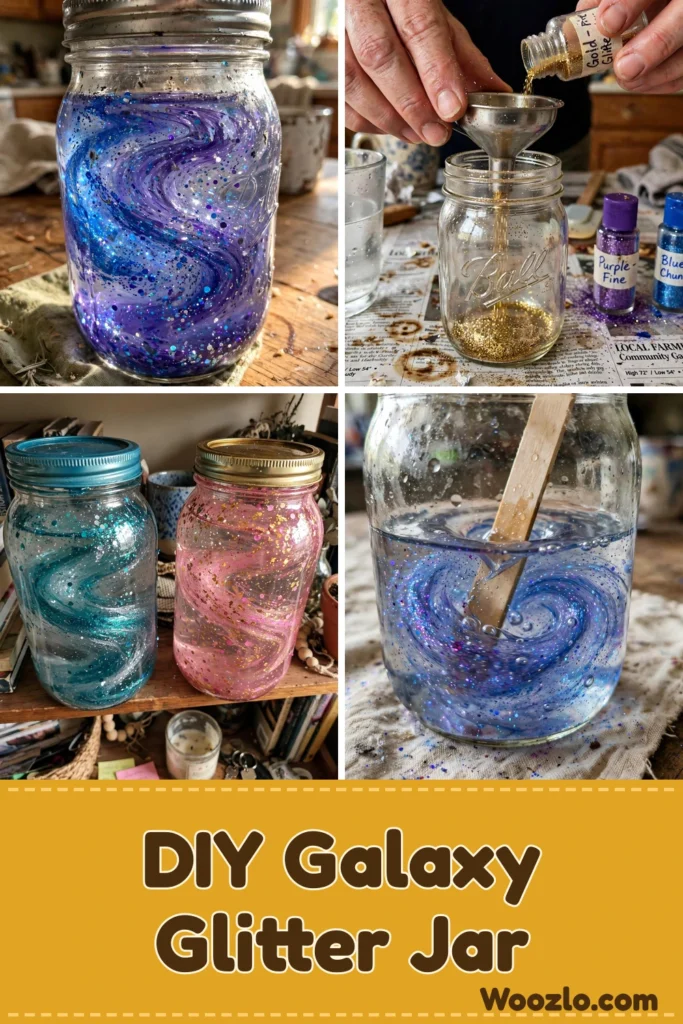
Create a Calming DIY Galaxy Glitter Jar for Relaxation
Some projects are about the finished piece; this one is about the process. Shaking up a galaxy glitter jar is one of the most satisfying things you can do in 45 minutes with stuff from your craft stash — and when you’re done, you’ve got a mesmerizing little universe sitting on your bookshelf that actually helps you decompress. Give it a shake after a long day and just watch.
This is a true beginner project: no tools, no cutting, nothing to mess up. Active time is 30 to 45 minutes, it needs 2 to 3 hours to settle (overnight is even better), and it costs about $10 to $20.
What You’ll Need
- Clear glass jar, 8 to 16 ounces, with a tight-fitting lid (mason jars are great; any clear cylindrical container with a lid works)
- Glitter in various colors, about 1/2 cup total
- Distilled water, 1 cup (helps the glitter move freely)
- Clear glue, 1/4 cup (a thick craft type like Aleene’s works well)
- Glycerin, optional, 1 tablespoon (slows the glitter for a mesmerizing effect — skip it if you can’t find it)
- Funnel (plastic or paper)
- Mixing stick (a popsicle stick or wooden skewer)
- Measuring cup
- Drop cloth or old newspapers (protect your workspace)
- Nitrile gloves, optional (easy clean-up)
Step 1: Prep and Wash
Lay down a drop cloth or old newspapers. Choose your jar, wash it, and let it dry completely before starting.
Step 2: Add the Glitter
Using the funnel, pour 1/2 cup of glitter into the jar. Layer your colors for a cosmic effect — the sparkle will dance when mixed.
Step 3: Add the Water
In a separate cup, measure 1 cup of distilled water and pour it into the jar over the glitter to create the swirling galaxy.
Step 4: Add the Glue
Add 1/4 cup of clear glue into the jar. This binds the glitter and creates the shimmering effect.
Step 5: Glycerin (Optional)
If using glycerin, add 1 tablespoon now. It’s optional, but it enhances the slow, mesmerizing movement of the glitter.
Step 6: Stir and Seal
Use the mixing stick to gently stir the contents — take your time and watch how the colors blend. Then put the lid on tightly and give it a gentle shake to mix everything together, like activating a snow globe.
Step 7: Settle and Dry
Observe your creation — the glitter will begin to settle, revealing beautiful patterns. Place the jar in a safe spot to dry for at least 2 to 3 hours; overnight is even better for a perfect finish.
Step 8: Finish and Display
Once dry, give it another gentle shake to see the magical swirling. Clean up spills, wipe the top of the jar, trim any excess glue for a neat finish, and store leftover glitter or glue in sealed containers. Find a cozy spot where sunlight can catch the glitter and let your jar take center stage.
Tips from My Workbench
- Play with colors: Try pastels, neons, or metallics to match your mood or the season — rich reds and greens for Christmas, warm oranges and browns for fall.
- Size matters: A small jar makes a delightful gift; a larger one becomes a stunning statement piece.
- Gift it right: Wrap simply with natural twine or a piece of fabric for a handmade charm.
- Add elements: Toss in small nature finds like dried flowers, shells, or tiny figurines that float among the glitter.
- Keep it out of direct sun: Prolonged heat can degrade the materials over time.
Good to Know
Complete beginner? Yes, this is perfect for beginners — basic materials, easy to follow. Kids 5 and up can help with supervision; they’ll love choosing colors and pouring glitter. Bubbles or uneven glitter? Give the jar a gentle shake, let it settle, and shake again or add more glitter. To care for it, dust gently with a soft cloth, keep it out of humidity, and if you move it, wrap it in tissue paper and box it — travel vibrations can disrupt the glitter.
Source inspiration: inspiringhomedecor.com — a mesmerizing DIY galaxy glitter calm-down jar.