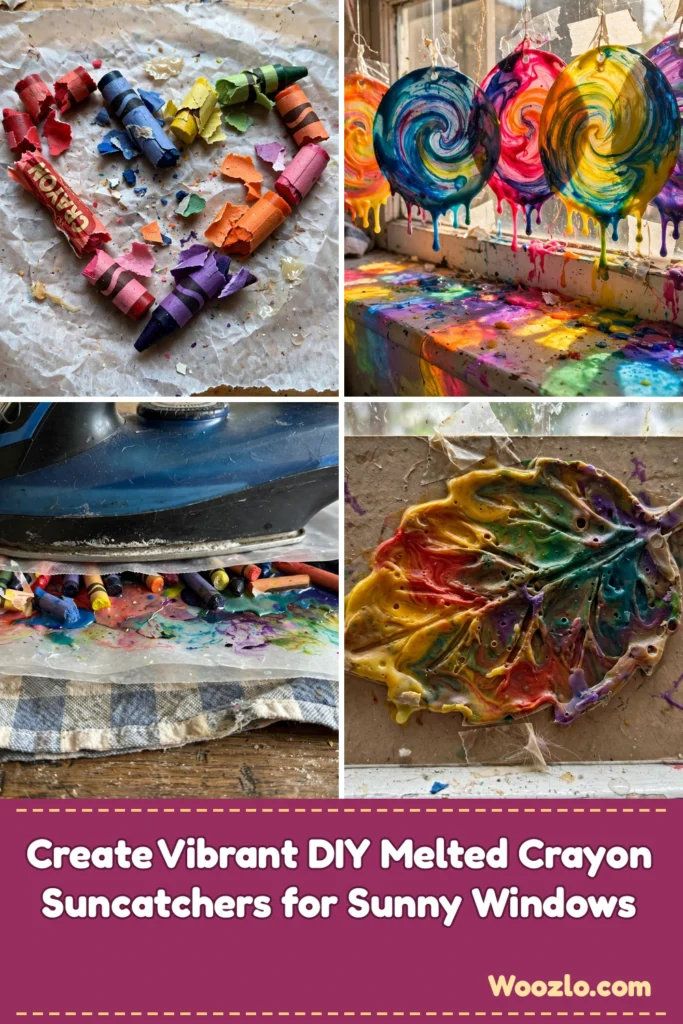
Create Vibrant DIY Melted Crayon Suncatchers for Sunny Windows
Are you looking for a cheap, easy craft that uses up all those broken crayons? These melted crayon suncatchers are pure joy — imagine transforming simple crayons into art pieces that dance with light! My kids love peeling the wrappers (honestly, that’s half the fun) and watching the colors blend under the iron. Hung in our sunniest window, they cast the prettiest patterns around the room.
This delightful DIY combines creativity with vivid colors to bring warmth into your living spaces. It’s fantastic for all ages — kids explore their artistic side while adults revisit a childhood classic — and the materials are easy to find and can even be reused. Best of all: broken crayons get a second life!
Materials
- Crayons, broken or whole (use broken ones to reduce waste!)
- Wax paper or parchment paper (1 sheet)
- Iron (preheated on a low setting)
- Cardstock or frame backing (optional — for displaying your sun-catcher)
- Scissors (for trimming your design)
- Pencil (optional — for drawing designs)
- Protective cloth (to protect the iron and work surface)
Step 1: Preparing the Crayons
Choose a variety of crayons that complement each other. Peel the paper off the crayons — a fun task for kids! Then snap them into smaller pieces for easier melting.
Step 2: Setting Up
Place a piece of wax paper on a clean, flat surface. Lay the broken crayons on one half of the wax paper in a design you like.
Step 3: Melting the Crayons
Carefully fold the wax paper over the crayon pieces. Preheat the iron on a low setting, place a protective cloth over the wax paper, and gently iron over it. Watch the magic as the vibrant colors blend together — be cautious not to overheat!
Step 4: Final Touches
Allow the wax paper to cool completely before handling. Once cooled, trim around your melted design to create your sun-catcher. Hang it in a window using tape or string — or put it inside a frame.
Tips & Variations
- Color mixing: experiment with color combinations for unique effects.
- Shape making: use cookie cutters to create different shapes when cutting.
- Add glitter: sprinkle glitter onto the melted crayons before they cool for extra sparkle.
- Layering: create multiple layers by melting several sheets of wax paper together.
Frequently Asked Questions
Can I use non-crayon wax materials?
Yes — you can use wax from old candles too, just ensure it’s safe for this craft.
What if I don’t have an iron?
Use a hairdryer on a low setting to melt the crayons instead.
How do I clean up melted crayon wax?
Warm soapy water works well — just be mindful of where it spills.
Can I use colored pencils instead?
They can be used, but they won’t melt the same way as crayons.
Make It an Event
Try theme-based sun-catchers for different seasons — autumn leaves, winter snowflakes! Or host a crafting day where each person makes a unique design and shares their techniques. Happy crafting!



