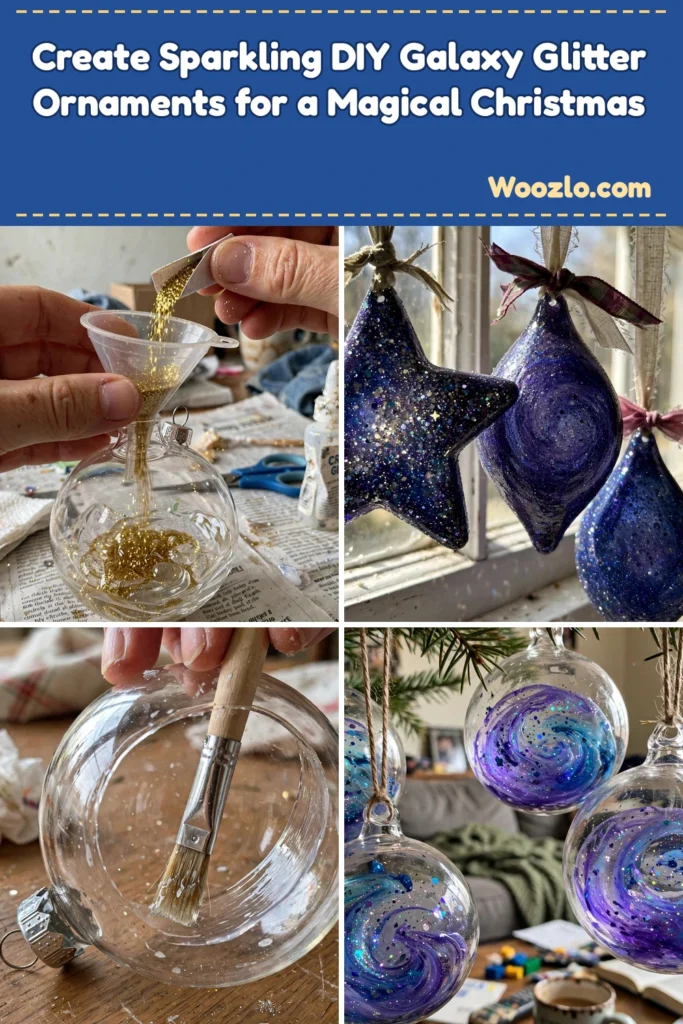
Create Sparkling DIY Galaxy Glitter Ornaments for a Magical Christmas
Are you looking for a cheap, easy Christmas craft that feels like pure calm? These galaxy glitter ornaments are my meditation in craft form — pick up the glitter, watch its tiny particles shimmer and catch the light, and feel the holiday spirit drift into the room. Each ornament becomes a tiny universe, a swirling cosmos birthed from the mindful act of creation. My kids are mesmerized by the pouring and swirling!
Making these ornaments helps you slow down, focusing on the delicate, soothing motions of your hands. The smoothness of the glass, the crisp sound of glitter sliding through your fingers, the rich hues mingling together — it’s a sensory-rich moment that invites peace into your day.
Materials You’ll Need
- Clear glass or plastic ornaments (easy to find)
- Glitter (mix different colors to create unique galaxies)
- Craft glue or a clear-drying adhesive (substitute-friendly)
- Paintbrushes (for applying glue)
- Funnel (to help with pouring glitter)
- Tray or newspaper (to catch extra glitter)
- String or ribbon (for hanging)
- Optional: small decorative elements like stars or sequins (to enhance the galaxies)
Step-by-Step Directions
Step 1: Ensure your workspace is clean and comfortable. Lay out your materials, taking a moment to appreciate each one.
Step 2: If using glass ornaments, gently remove the tops and set them aside.
Step 3: With a paintbrush, apply a thin layer of craft glue inside the ornament, feeling the smooth glass beneath.
Step 4: Using the funnel, pour glitter into the ornament — watch it dance and settle into swirls of color like a night sky.
Step 5: Tip the ornament to coat the interior evenly. The sound of the glitter moving will soothe your mind as you work slowly.
Step 6: If desired, add small decorative elements for a personal touch — let each piece find its place in your galaxy.
Step 7: Allow the ornament to dry completely, placing it gently on a tray.
Step 8: Once dry, replace the ornament tops. Tie a ribbon or string for hanging.
Step 9: Take a moment to appreciate your work — each ornament now holds a small universe of creativity and intention.
Using Your Ornaments
Hang them on the tree where they catch the light and twinkle like stars in a clear night sky. Or place a few in a sunny window or nestled among other decorations — each glance brings a sense of accomplishment and peace.
Gentle Tips & Variations
- Use different ornament shapes — hearts, stars, or teardrops give a fresh twist.
- Experiment with themes: a collection based on your favorite colors or a specific holiday palette.
- Add a few drops of essential oil to the glue for a calming aroma.
- Involve family or friends — making together deepens the connection to the ornaments.
- Create a memory: write a small note to place inside one or more ornaments — a moment or a wish for the season.
FAQs
Can I use plastic ornaments instead of glass?
Yes — plastic works beautifully, and it’s lighter, less fragile, and safer for kids.
How do I clean up excess glitter?
Use a damp cloth to wipe surfaces, or painter’s tape to pick up stray pieces gently.
Will the glitter fall off over time?
With proper adhesive and good drying time, it stays intact for a long time. Reapply glue if any loosens.
What if I don’t have a funnel?
Fold a piece of paper into a cone, or use a small cup to guide the glitter in.
Can I include personal items?
Absolutely — small charms, dried flowers, or tiny photographs make truly personalized galaxies.
Storing & Reusing
Wrap each ornament in a soft cloth or tissue paper and store in a sturdy box until next season. To refresh them later, add more glue and glitter in new colors. Treasure the quiet spaces you created — enjoy the gentle beauty of your work!



