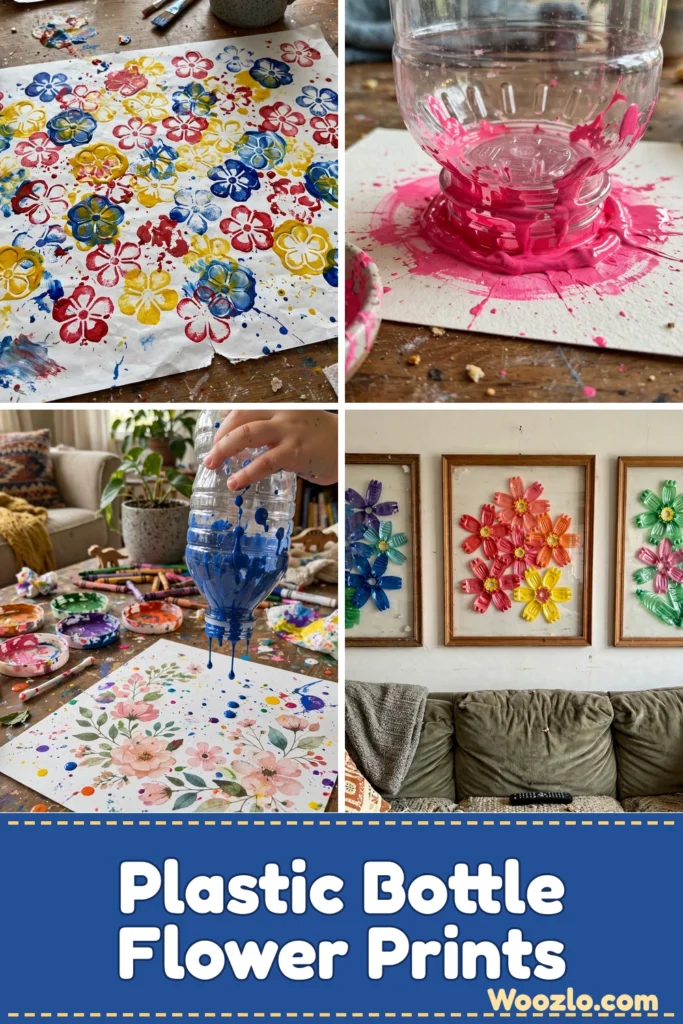
Create Stunning DIY Plastic Bottle Flower Prints with Kids
Are you looking for a fun, creative activity for your little ones that also happens to be eco-friendly? Painting flowers with a plastic bottle is pure magic — dip the bottom of the bottle in paint, press it on paper, and lift to reveal a perfect little flower. My kids gasp every single time, and the best part is it costs almost nothing.
This is a wonderfully forgiving project. There is no drawing skill required, no wrong pressure, no bad color choice. Just press, lift, and admire. Set up takes five minutes, and you will have a stack of gorgeous floral prints before you know it.
What You’ll Need
- A clean plastic bottle (one with a wide mouth is easier to handle)
- Acrylic paint in various colors
- A shallow dish or palette for the paint
- Plain paper or canvases (smooth surfaces work best for printing)
- Soft brushes or sponges (optional, for added textures)
- Paper towels (for messes and cleaning hands)
- A water container for rinsing
Step 1: Set Up Your Space
Lay out your materials and take a moment to settle in. Put down newspaper or a washable cloth if little ones are joining — acrylic paint and kids are a joyful but messy combination.
Step 2: Pour the Paint
Pour a small amount of acrylic paint onto your dish or palette. Let the kids choose colors that call to them — bright, bold, or soft pastels all work.
Step 3: Dip the Bottle
Take your plastic bottle and dip the bottom gently into the paint. Feel the bottle warm slightly against the cool paint.
Step 4: Press to Print
Press the bottle onto your paper, applying light pressure. Watch how the paint spreads, revealing a flower shape.
Step 5: Lift and Admire
Lift the bottle smoothly from the paper to unveil your print. Every lift is a little surprise — the patterns are never quite the same twice.
Step 6: Layer Colors
Repeat the dipping and pressing with different colors, letting prints overlap to create a vibrant bouquet. For added depth, let one layer dry before adding another.
Step 7: Experiment
Play with angles and pressures while printing. Each choice produces unique results — embrace the unexpected. This is great fine-motor practice for little hands, by the way.
Step 8: Let Them Dry
Allow your prints to dry completely on a flat surface. Acrylic usually dries within a couple of hours, but for thick layers it is best to wait overnight.
Step 9: Display or Gift
Once dry, frame your favorite pieces or use them as cards or gift wrap. They make thoughtful, personal gifts that grandparents especially adore.
Tips from My Craft Table
- Try different surfaces: fabric or wood give varied textures and effects.
- Go natural: plant-based paints create a lovely earthy palette.
- Make it a party: invite friends or family and turn it into a delightful afternoon of shared creativity.
- Preserve the color: use glass frames or protective coverings, and avoid direct sunlight for extended periods so colors do not fade.
- Reuse the bottles: try different bottle shapes and sizes for future projects — each yields unique prints.
FAQs
Can I use different types of bottles? Absolutely! Experiment with various bottles — each shape and size creates different prints.
What if the paint isn’t sticking well? Check that your bottle is clean and dry. A soft, textured paper can also help the paint adhere better.
How do I clean up? Wipe surfaces with a damp cloth; wash brushes and bottles with warm, soapy water.
Can kids join in? Yes, this project is perfect for kids! Just supervise their use of paint and encourage them to explore freely.
How long do the prints take to dry? Typically a couple of hours for acrylic, but wait overnight for thick layers.