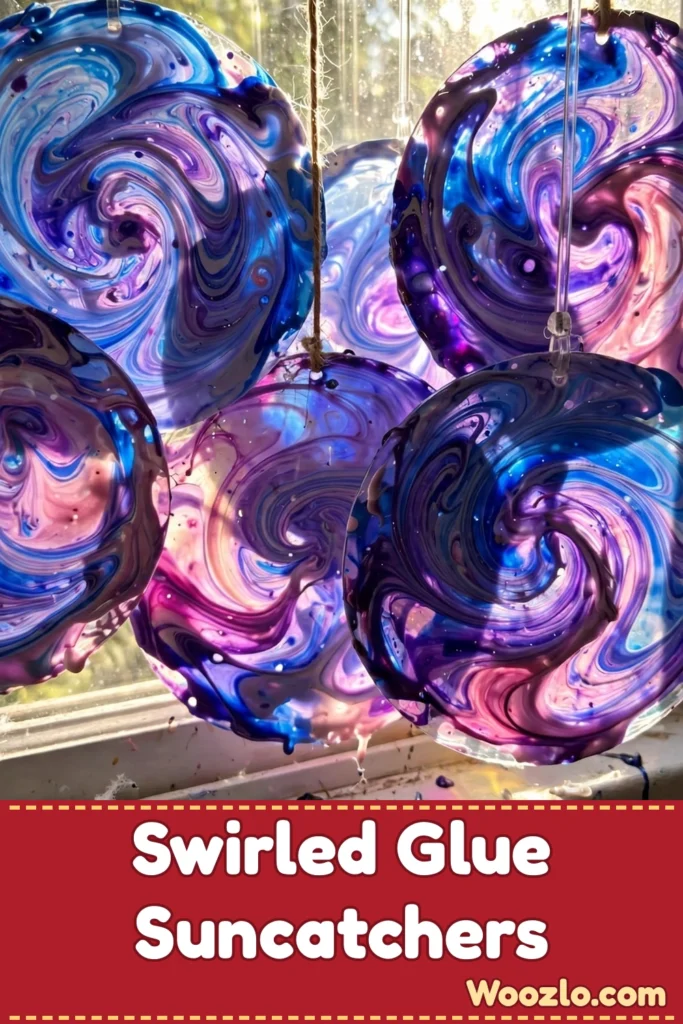
Create Peaceful DIY Swirled Glue Suncatchers for Kids
Are you looking for a craft that is equal parts art project and quiet-time ritual? These swirled glue suncatchers are it! When the sun streams through the window and dances through all that swirled color, the whole room feels a little bit lighter. My kids find the slow, deliberate swirling almost meditative — and I have to admit, I do too.
The best part? This is super cheap and easy — clear glue, food coloring, and wax paper are all you need, and most of it is probably in your kitchen already. Just 15 minutes of prep, then the waiting (at least 24 hours) builds the sweetest anticipation. Kids get wonderful fine-motor practice pouring, swirling, and peeling, and no two suncatchers ever come out alike!
Supplies Needed
- Clear glue (your main medium)
- Food coloring or liquid watercolors (for vibrant hues)
- Wax paper or smooth plastic sheets (for the suncatcher base)
- A mixing stick or toothpick (to create swirls)
- Small container for mixing colors (optional)
- Scissors (to cut your suncatcher later)
Step 1: Lay Your Canvas
Start by laying down a piece of wax paper or a smooth plastic sheet on a flat surface. This will serve as the canvas for your suncatcher.
Step 2: Mix Your Colors
In a small container, mix your desired colors of food coloring with clear glue until you achieve the brightness you like. Tailor the colors to match your own personal aesthetic!
Step 3: Pour the Glue
Take the glue mixture and gently pour it onto the wax paper. Let your creativity flow as you create different shapes and sizes.
Step 4: Swirl!
Use a toothpick or mixing stick to swirl the colors together. Let each movement be slow and deliberate — enjoy how the colors blend. If colors mix more than you intended, embrace the unexpected! For more distinct separation, try different techniques to apply and swirl the colors.
Step 5: Dry for 24 Hours
Once you’re satisfied with your design, set your creation aside to dry completely for at least 24 hours.
Step 6: Peel It Off
After drying, carefully peel off the suncatcher from the wax paper or plastic.
Step 7: Cut Shapes (Optional)
If desired, cut your suncatcher into specific shapes for added interest, such as hearts or circles.
Step 8: Hang in the Window
Finally, hang your suncatchers in a window where sunlight will illuminate the beautiful colors, creating lovely patterns in your space. Use clear tape or suction hooks — just make sure they’re secure and stable.
Fun Variations
- Add glitter: Stir glitter into the glue mixture for extra sparkle.
- Go seasonal: Warm colors for autumn, pastels for springtime — switch it up with the seasons.
- Layer colors: Layering creates a deeper visual effect, letting some hues stand out against a soft background.
- Use cookie cutters: Place cookie cutters on the wax paper as molds to guide your glue shapes.
- Craft together: Invite friends or family to join — it turns the craft session into a delightful social experience.
Quick Questions
How long do they last? When made correctly and stored properly, your suncatchers can last for months. Keep them out of direct sunlight when not on display to prevent fading.
Can I use different glue? Clear glue works best for a smooth finish, but craft glue works too if it’s also translucent.
Can I make them for different seasons? Absolutely! Change colors and designs based on themes, seasons, or holidays.
What’s the best way to hang them? Clear tape or suction hooks — just ensure they’re secure.
Storing Your Suncatchers
Store finished pieces flat in a safe place, away from direct sunlight when they’re not on display. And if you ever want to refresh your display, the suncatchers can be remade with your original designs or entirely new color combinations — endless possibilities to explore!