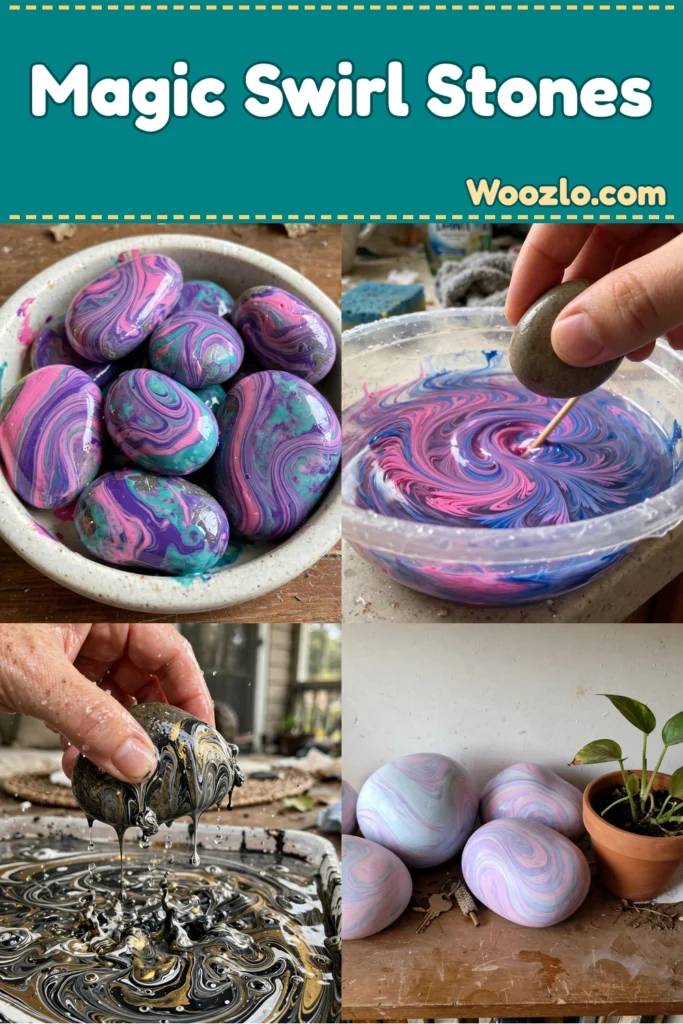
Create Magical DIY Swirl Stones for Calm Kids
Are you looking for a creative activity that is calm, colorful, and completely mesmerizing? These Magic Swirl Stones are it! I am honestly obsessed with how a few drops of nail polish floating on water turn plain old river stones into tiny swirled masterpieces. My kids could watch the colors spread across the water for ages — it is the kind of project where the process is every bit as fun as the finished stones.
The best part? This is a super cheap and easy craft. Smooth river stones cost next to nothing, and you probably already have old nail polish sitting in a drawer. The technique is called water marbling: drops of polish float on the water’s surface, and when you dip a stone through them, the marbled pattern transfers right on. No painting skill needed — the water does most of the creative work for you!
A Quick Safety Note Before You Start
Because this version uses nail polish rather than acrylic craft paint, a few precautions matter. Nail polish has strong fumes, so always work in a well-ventilated area (open a window!), protect your work surface, and keep nail polish and remover away from heat, sparks, and open flames. Use an old or disposable container for the water and do not reuse it for food afterward. This one is best as an adult project or for older kids and teens with adult supervision — for little ones, pick a rock-painting craft with washable non-toxic paints instead.
What You’ll Need
- Smooth river stones
- 2–4 colors of nail polish
- Room-temperature water
- An old or disposable bowl or container (craft-only — never reuse for food)
- Toothpicks or wooden skewers
- Paper towels or scrap cardboard
- Disposable gloves, if desired
- Clear craft sealer, optional
- Nail polish remover for adult cleanup, if needed
Gather everything before you start, because nail polish begins setting fairly quickly once it touches the water. Choose stones with relatively smooth, clean surfaces — pale stones make bright colors pop beautifully, but any stones you have will work.
Step 1: Clean the Stones
Wash your stones with soap and water to remove dirt, dust, and oils. Rinse them thoroughly and allow them to dry completely before marbling. Nail polish won’t adhere as well to a wet or dirty surface.
Step 2: Prepare Your Workspace
Cover your table with paper, cardboard, or another protective material. Fill your old or disposable container with room-temperature water — enough to comfortably lower the stone’s surface through the floating polish. Open a window or work in another well-ventilated location, and have your stones and nail polish ready before moving on.
Step 3: Add Nail Polish to the Water
Choose two or three nail polish colors. Hold the first bottle close to the water’s surface and gently add a drop — it should spread across the surface. Add several drops of your other colors, working fairly quickly. You don’t need much polish! Start with just a few drops and experiment.
Step 4: Create the Swirl
Use the tip of a toothpick or wooden skewer to gently drag through the floating colors. Make only a few movements — pull outward for wispy patterns, move through several colors for curved lines, or lightly swirl them together. Avoid stirring aggressively: you’re creating a thin pattern floating on top of the water, not mixing the polish into it.
Step 5: Dip the Stone
Hold a clean, dry stone securely and carefully lower the side you want decorated through the floating nail-polish design. As the stone passes through the surface, the thin film of polish transfers onto it and creates the marbled pattern. Lift the stone out carefully. Don’t worry if your first stone isn’t perfect — water marbling is experimental, and slightly irregular patterns are part of its charm.
Step 6: Remove Leftover Polish
Before making another stone, use a toothpick or skewer to collect the leftover polish floating on the water. This gives you a cleaner surface for your next color combination. Then add fresh drops of nail polish and repeat the process for each stone.
Step 7: Let the Stones Dry
Place the finished stones on paper towels, scrap cardboard, or another protected surface. Leave them untouched until the nail polish has completely dried and hardened. Drying time varies depending on how much polish transferred, so don’t rush this step.
Step 8: Seal the Finished Stones
Once completely dry, you can leave your stones as they are or apply a compatible clear craft sealer for additional protection. Follow the manufacturer’s directions for the sealer, including ventilation and drying recommendations. Allow everything to cure completely before handling or displaying your stones.
What If the Nail Polish Doesn’t Spread?
Water marbling takes a little experimentation. If the nail polish immediately sinks instead of spreading, try another polish or move the bottle closer to the surface before releasing the drop. If the polish becomes sticky before you dip the stone, you may simply be working too slowly — remove the old film and start again with fresh polish. Room-temperature water generally gives you a good starting point, and different nail polish formulas behave differently, so don’t be surprised if one color spreads beautifully while another doesn’t.
Color Combination Ideas
This project becomes especially fun when you experiment with palettes. Two or three colors are usually enough for an interesting marble effect without getting overly busy. Try:
- Pink + purple + white
- Turquoise + blue + white
- Lavender + pink + silver
- Blue + purple + teal
- Red + pink + white
- Black + white + metallic gold
- Pastel pink + lavender + pale blue
Tips for the Best Stones
- Start with two colors. It’s easier to see how the technique works before experimenting with larger palettes.
- Work quickly. Nail polish can begin setting soon after reaching the water.
- Don’t over-swirl. A few gentle passes with a toothpick usually create a prettier pattern than vigorous stirring.
- Try different stone shapes. Flat stones provide a broad canvas, while small rounded stones create interesting curved patterns.
- Experiment with metallic polish. A small amount of silver or gold adds beautiful detail.
- Make a coordinated collection. Use the same three colors across several stones while changing the swirl each time.
- Protect your table. Nail polish can damage or stain some surfaces.
- Use a craft-only container. Don’t reuse the marbling bowl for food.
Enjoying Your Finished Stones
Once they’re completely dry, these marbled stones become sweet little decorative accents around the house. Arrange several together in a little dish, display them on a shelf, place them beside a houseplant, or add them to a craft-room display. They also make lovely handmade keepsakes — because every dip produces a slightly different pattern, each finished stone feels one-of-a-kind.
Remember: there’s no need for every stone to look perfect or identical. The unpredictable marbling is exactly what makes each Magic Swirl Stone unique. Have fun experimenting, and don’t forget to open that window!