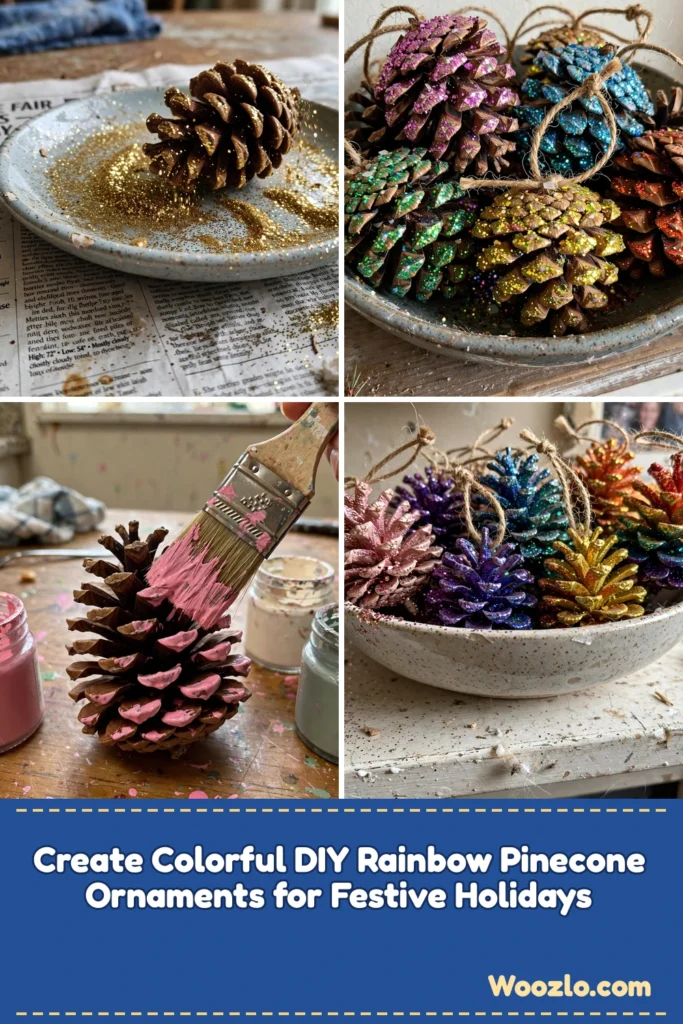
Create Colorful DIY Rainbow Pinecone Ornaments for Festive Holidays
Are you looking for a cheap, easy holiday craft that gets you out in nature first? These rainbow frosted pinecone ornaments start with a pinecone walk — my kids love hunting for the perfect ones — and end with the sparkliest ornaments on our tree. There’s a stillness in the air as you reach for a pinecone and feel its textured surface; transforming it into something beautiful is pure mindful joy.
Using safe, simple materials, you slow down and breathe. You’ll hear the rustle of the paintbrush gliding across the pinecone and watch colors come to life before your eyes. Each pinecone carries natural warmth from the outdoors, while soft rainbow colors invite a sense of playfulness.
What You’ll Use
- Pinecones (easy to find outdoors)
- White glue (or glue like Mod Podge)
- Glitter (choose your favorite colors)
- Acrylic paint (various colors for the rainbow)
- Paintbrushes (soft bristles work best)
- Shallow dish or tray (for holding glitter)
- String or twine (for hanging)
- Optional: sealant (to protect your finished design)
Step-by-Step Directions
Step 1: Gather your pinecones — feel their textured surfaces as you select your favorites.
Step 2: Set up your workspace: lay down newspaper or an old tablecloth and create a cozy crafting nook.
Step 3: Choose your colors — enjoy the vibrant shades and imagine how they’ll look on your pinecones.
Step 4: With a soft paintbrush, apply a thin layer of paint to the pinecone, working your way around.
Step 5: Let the paint dry completely — enjoy watching the colors transform.
Step 6: Apply a thin layer of white glue over the painted surface — this helps the glitter stick and adds shimmer.
Step 7: Gently roll the glue-covered pinecone in glitter held in a shallow dish.
Step 8: Shake off excess glitter and let it dry — admire the light catching the sparkle.
Step 9: Tie string or twine around the top of the pinecone for hanging.
Step 10: Find a place for your ornament — and remember the journey you took to create it!
Bringing Them Into Your Space
Hang them on your holiday tree, dangle them from a window for soft light reflections, or place them gently on a mantel or in a cozy bowl. Each piece carries a bit of your creative journey.
Gentle Tips & Variations
- Experiment with textures: add twigs or dried flower petals for a layered effect.
- Play with colors: try a monochromatic theme or unexpected shades for a lively look.
- Create a series — invite family or friends to join and share the joy of making.
- Use different sizes of pinecones for delightful visual interest.
- Dedicate a special ornament to each family member in their favorite colors.
FAQs
Are the materials safe for kids?
Absolutely — the glue and paint are generally safe and non-toxic (adult supervision is always a good idea).
How long does it take to dry?
About an hour for paint and a few hours for glue and glitter to set fully.
Can I reuse materials?
Yes — store leftover glitter or paint in clean containers for future projects.
What if I don’t have pinecones?
Substitute acorns or other natural items — crafting is about exploration.
Can I make ornaments for other occasions?
Definitely — adjust colors and themes for any season or holiday.
Storing & Reusing
Store in a soft box or wrap individually in tissue paper to protect the glitter. Next year, adapt them to new themes — pastel for spring, deeper hues for autumn. May your ornaments bring warmth, joy, and sparkly wonder into your space!



