Create an Adorable DIY Polymer Clay Cat for Home Decor
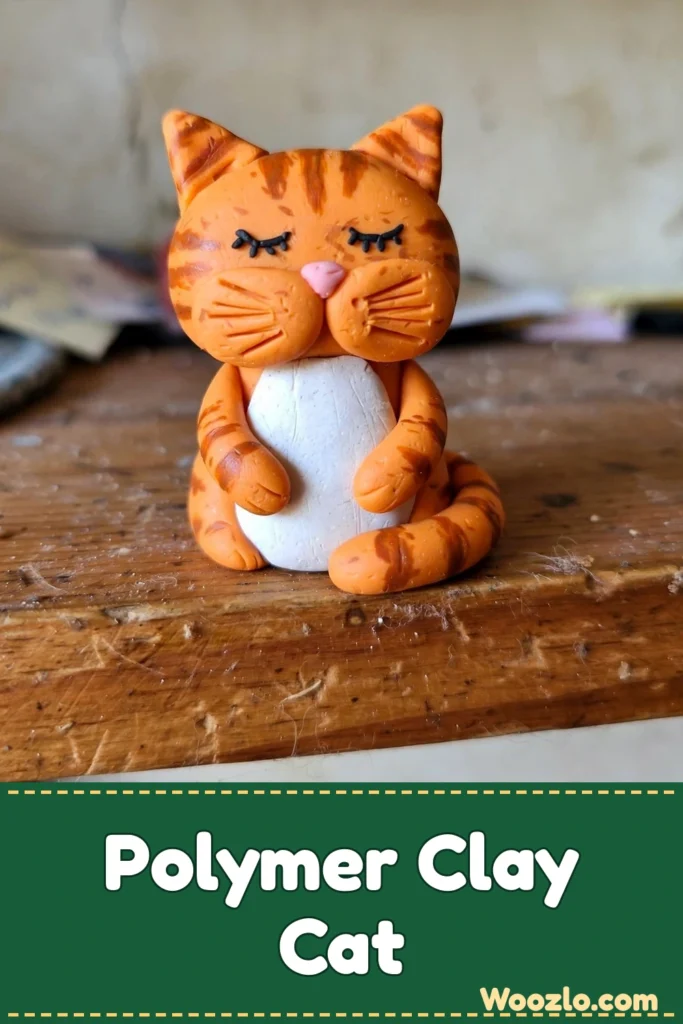
A palm-sized polymer clay cat is the kind of project that eats an afternoon in the best way. Roll, pinch, sculpt, bake — the process is genuinely relaxing, and you end up with a little figure that sits on a shelf looking smug forever. Any brand of polymer clay works; pick colors that feel right in your hands (white, gray, black, and orange are classics).
The one rule: follow the baking instructions on your clay’s packaging exactly. Underbaked clay stays fragile, overbaked clay burns. The package knows best.
What You’ll Need
- Polymer clay in various colors (white, gray, black, orange — or your own palette)
- A small rolling pin or smooth bottle (to flatten the clay)
- A craft knife or sharp tool (for cutting and detailing)
- Ceramic tile or parchment paper (to work on)
- A baking tray
- Optional: acrylic paint for details after baking
Step 1: Pick Your Colors
Select your clay colors and break off manageable portions of each. Condition the clay by kneading it until it’s soft and pliable.
Step 2: Form the Body
With your rolling pin, flatten a piece of clay into a disc. This is the cat’s body.
Step 3: Form the Head
Shape another smaller piece into a ball for the head, pressing it into a round form.
Step 4: Attach the Head
Gently press the head onto the body. The softness of the clay makes a seamless join.
Step 5: Add the Ears
Roll out two small triangles from another piece of clay and attach them to the head with a light touch, forming them with a slight curve for a soft look.
Step 6: Add the Paws
Roll small balls of clay, flatten them slightly to mimic little feet, and secure them beneath the body.
Step 7: Carve the Face Details
Use your craft knife to carve whiskers and a mouth into the face. The small tool gives you fine control — go slow.
Step 8: Add the Eyes
Roll two small balls of clay for the eyes — a contrasting color makes them stand out — and attach them gently.
Step 9: Prep for Baking
Place your cat on a baking tray lined with parchment paper.
Step 10: Bake It
Transfer the tray to the oven and bake following the instructions on the clay packaging. Let it cool completely afterward.
Variations Worth Trying
- Gradient body: Blend two clay colors for a gradient effect on the body.
- Other animals: The same steps make a dog, a rabbit, or a whimsical mythical creature.
- Glitter: Press a touch of glitter into parts of the cat for playful sparkle.
- Accessories: Mold a tiny collar, bow, or toy to go with it.
- Paint it: After baking, add details with acrylic paint — a whole new layer of customization.
Care and Storage
Store in a cool, dry place away from direct sunlight. Polymer clay is durable, but avoid excessive heat or pressure so the features stay intact. A gentle wash with a damp cloth refreshes its appearance.
Quick Answers
What if it cracks? Fill small cracks with a bit of fresh clay and smooth carefully. Keeping the clay at room temperature while you work helps prevent them.
Is it safe for kids? Polymer clay is safe for creative projects, but adult supervision is recommended — especially for the baking step.
Can I bake too long? Yes — be cautious. Follow the packaging instructions to set the piece without burning it.