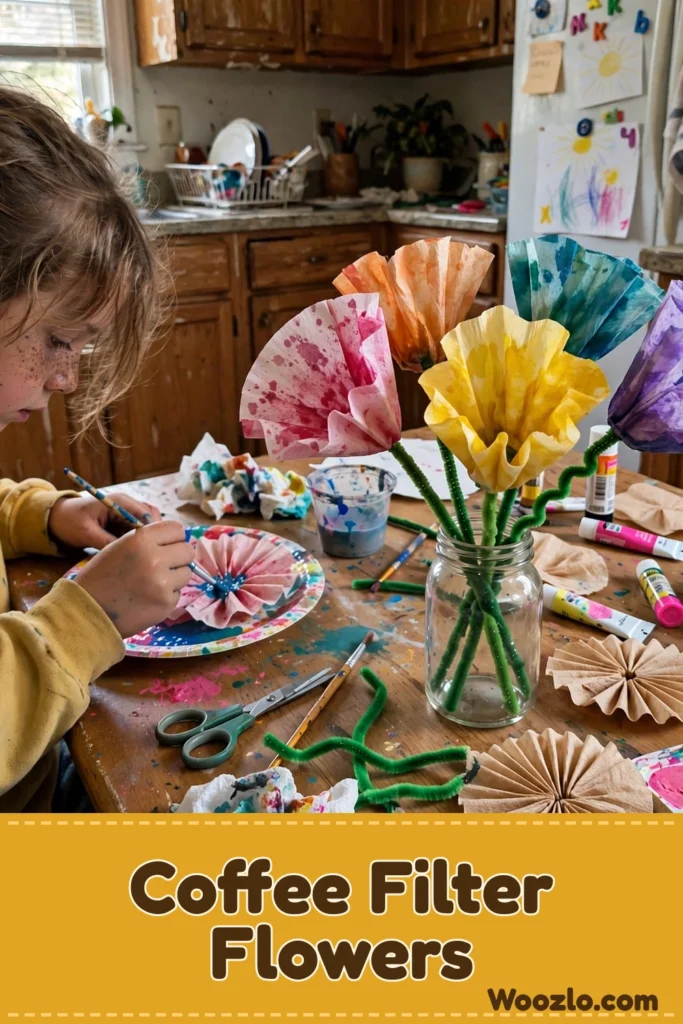
Create Beautiful and Easy DIY Coffee Filter Flowers for Kids
Mamas, this is one of those crafts that is pure joy from start to finish. A few coffee filters, a pipe cleaner, and maybe some food coloring become beautiful flowers your kids will be so proud of. It’s easy enough for little hands, and pretty enough that you will actually want to display them.
The whole magic is in the pinch-and-twist: stack two or three filters, gather the center into a little bundle, and twist the bottom with floral wire or a pipe cleaner for the stem. Done — a flower. The coloring part is optional but so fun, and kids can doodle on the filters with markers before twisting for extra personality.
What You’ll Need
- Coffee filters (white or colored are lovely)
- Water-based markers or food coloring (optional, for vibrant hues)
- Scissors
- Floral wire or pipe cleaners (for stems)
- A small bowl of water (for the dyeing process)
- A surface to work on
- Optional: a spray bottle (for added fun with water coloring)
Step 1: Stack
Take your coffee filters and stack two or three together. This gives your flower more fullness. (Using older or stained filters? Embrace them in a “vintage” bouquet!)
Step 2: Pinch and Gather
Gently pinch the center of your stacked filters, gathering the material into a little bundle.
Step 3: Twist the Stem
Twist the bottom and secure it with floral wire or a pipe cleaner. This becomes the flower’s stem — make sure it feels snug.
Step 4: Add Color (Optional)
Dip the edges of the filters into your bowl of water with a few drops of food coloring for soft, beautiful gradients. Or let the kids draw and doodle on the filters with water-based markers before twisting.
Step 5: Dry
Allow the colors to spread and mingle, then carefully lift the filters out and let them dry.
Step 6: Shape the Petals
Once dry, scrunch and shape the petals to your delight. Flipping the edges outward gives them a blooming effect. Feel free to adjust the number of filters or the style as you go.
Display
Gather the blooms in a vase, brighten a room, or give them as thoughtful gifts. On a windowsill, sunlight filters through the delicate layers creating soft shadows and a gentle ambiance. A cozy corner or a festive table both work beautifully.
Make It Your Own
- Color play: try swirling colors or splashes for vibrant effects.
- Fuller flowers: use more filters, or crinkle and fold them differently for texture.
- Nature’s touch: bits of dried lavender or herbs add a subtle scent.
- Personal messages: write small notes on the filters before shaping — unique keepsakes for loved ones.
- Gather a group: craft with friends or family and enjoy shared creativity.
FAQs
What colorants can I use? Water-based markers and food coloring are excellent; fabric dye and natural dyes from fruits or vegetables give unique results.
How long do they last? Months, even years, when properly stored.
Safe for kids? Absolutely — just supervise little ones with scissors and colorants.
Can I make larger flowers? Certainly! Stack more filters and adjust petal size to your vision.
What if I make a mistake? Crafting is exploration — every flower can carry its story, including its little imperfections.
Care
Store the flowers in a box in a cool, dry area. Avoid high humidity and direct sunlight, which can change shape or color. To repurpose, flatten and reshape them, storing between sheets of absorbent paper with gentle weight when needed.