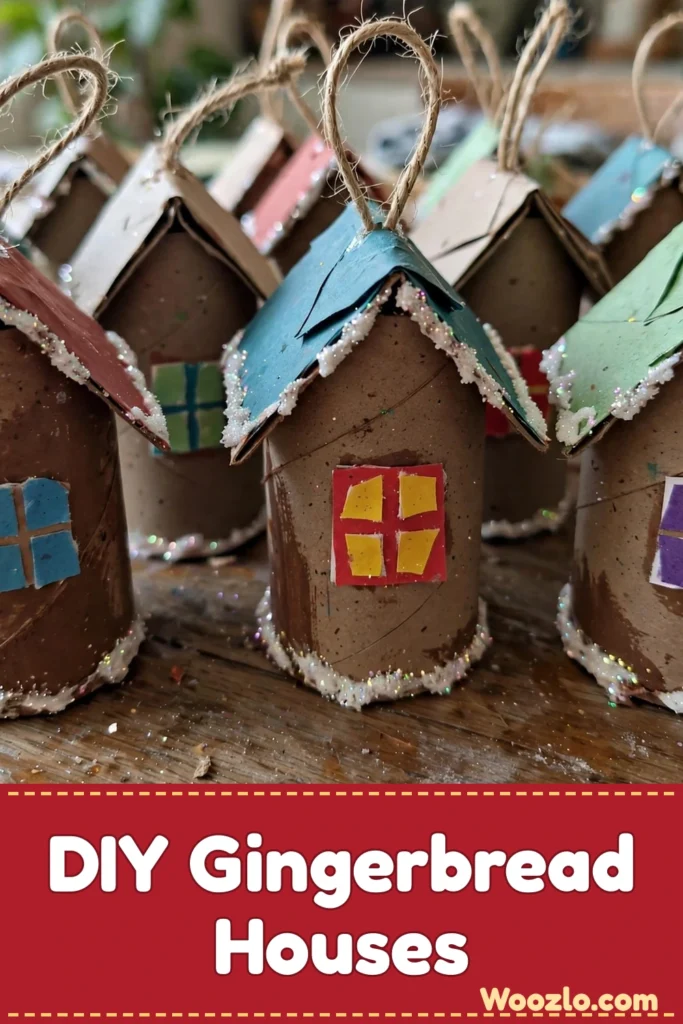
Create Adorable DIY Gingerbread House Ornaments for the Holidays
Are you looking for a fun, inexpensive Christmas craft to do with your little ones this year? These gingerbread house ornaments made from toilet paper rolls are it! I love a project that turns trash into treasure — and when my 4-year-old finished her very first tiny house, she was beaming with pride.
The best part? This craft is super cheap and easy. You probably have everything you need already: empty toilet rolls, some brown paint, glue, and a few scraps of paper. It is a fantastic little fine motor skills workout for kids, too — cutting, gluing, and decorating tiny windows builds hand strength and patience.
What You’ll Need
- Toilet paper rolls (easy to find, even recycled)
- Brown acrylic paint or brown craft paper (for the gingerbread effect)
- White glue or hot glue (for strong bonds)
- Sharp scissors (handle with care)
- Assorted colored paper (for decorations)
- Glitter or sprinkles (optional, for a festive touch)
- Mini pom-poms or buttons (to enhance the decorations)
- Markers or paint pens (for adding details)
- Twine or string (for hanging your ornaments)
- Clear sealant spray (optional, for durability)
Step 1: Cut the Rolls in Half
Begin by cutting each toilet paper roll in half. Each half will serve as the base of one gingerbread house — so one roll gives you two ornaments!
Step 2: Make Them Gingerbread Brown
Paint the outer surfaces with brown paint or wrap them in brown craft paper. Spread the paint evenly with gentle strokes, then let them dry completely.
Step 3: Cut Your Decorations
While the paint dries, cut out various shapes from your colored paper. Think small squares for windows or triangles for roofs. This is a great step for the kids — every house can look completely different!
Step 4: Glue Everything Together
Once dry, start gluing the pieces to your houses. Apply glue generously but thoughtfully, and place each decoration just right.
Step 5: Add the Frost and Flair
Layer on your decorations with joy. Sprinkle some glitter for frost or add buttons and mini pom-poms for extra flair. Markers or paint pens are perfect for adding tiny details like door handles and icing swirls.
Step 6: Add Hanging Loops
To finish each house, use twine or string to create loops for hanging. Gently poke a hole at the top with scissors, keeping your fingers safe, and thread the string through.
Step 7: Seal (Optional)
If you want them to last for years, spray a clear sealant over the finished ornaments once everything is completely dry.
Tips from My Kitchen Table
- Mix the palette: Soft pastel hues make a whimsical twist, while classic reds and greens give that traditional holiday feel.
- Go rustic: Glue on tiny pinecones or dried fruit pieces for a nature-inspired look.
- Personal touches: Write sweet messages on miniature paper signs and hang them outside the houses.
- Build a village: Vary the sizes (paper towel rolls make bigger houses!) and cluster them together as a festive centerpiece or mantle display.
- Store them safely: Keep your ornaments in a padded box or cloth bag so they stay safe from dust and bumps until next Christmas. A fresh coat of paint or a sprinkle of glitter renews any that lose their sparkle.



