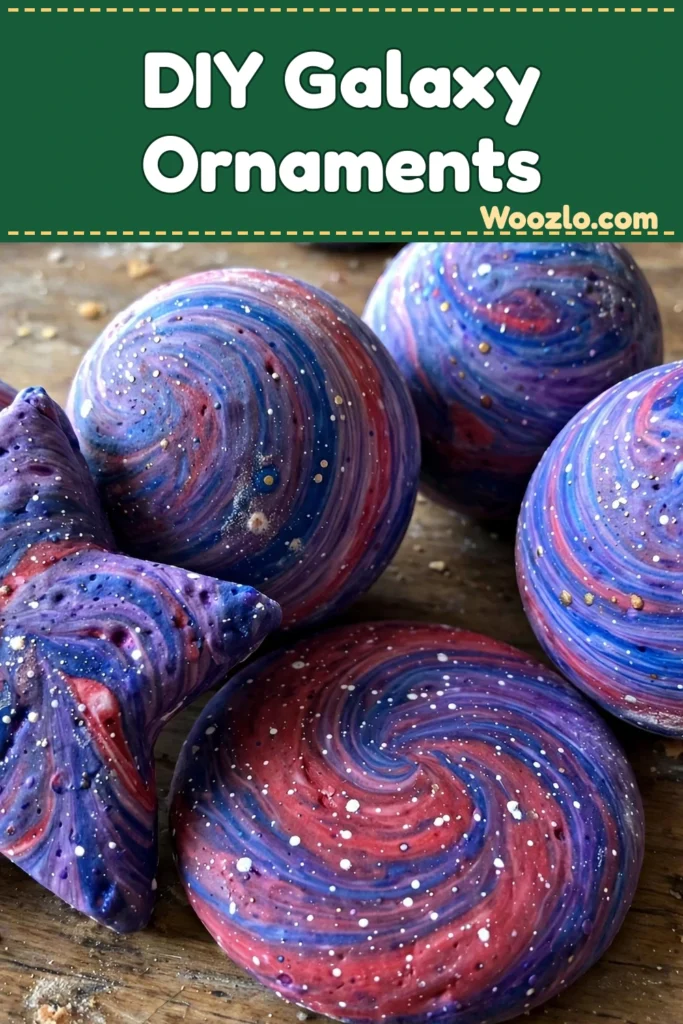
Create Stunning DIY Baking Soda Galaxy Ornaments for Any Occasion
Are you looking for a fun, creative activity for your little ones that is super cheap and easy? These DIY baking soda galaxy ornaments are pure magic. My kids were absolutely mesmerized — the moment the vinegar hits the baking soda, the whole bowl fizzes up like a science experiment, and then you get to swirl the colors into tiny galaxies you can actually hold in your hands.
Honestly, this is one of those crafts that feels way fancier than it is. Three pantry ingredients, a handful of food coloring, and some cookie cutters are all you need. The ornaments look absolutely gorgeous hanging in a bright window, on the Christmas tree, or as little handmade gifts — and they are inexpensive enough that the kids can make a whole batch for friends and teachers.
What You’ll Need
- 1 cup baking soda (the base of the ornaments)
- 1/2 cup white vinegar (creates a delightful fizz when it hits the baking soda)
- 1/4 cup cornstarch (makes the dough smooth)
- Food coloring (pick your favorite hues, or mix your own shades)
- Cookie cutters or molds (to shape your ornaments)
- Optional: a few drops of essential oils (for a calming scent)
- Parchment paper (to protect your work surface)
- Rolling pin (for flattening the dough)
- A straw (for poking holes if you want to hang them)
- A mixing bowl
Step 1: Mix the Dry Ingredients
In a mixing bowl, combine 1 cup of baking soda and 1/4 cup of cornstarch. Let the kids get their little hands in there and feel the fine, silky texture as they mix — it is wonderful sensory play all on its own.
Step 2: Pour in the Vinegar (the Fun Part!)
Slowly pour in 1/2 cup of white vinegar and watch it fizz! The bubbling reaction is my kids’ favorite moment — they gasped the first time and begged to do it again. Let the fizzing settle, then stir the mixture until it resembles a thick paste.
Step 3: Knead the Dough
Use your hands to knead the mixture gently until it all comes together into a soft, pliable dough. If the mixture feels too dry, add a tiny bit more vinegar. Too wet? Sprinkle in a little more baking soda or cornstarch until it feels right.
Step 4: Add the Galaxy Colors
Divide your dough into smaller portions and add food coloring to each one, kneading until the colors blend. Watch how the deep blues, purples, and reds swirl and dance together — every portion turns into its own little galaxy. This step is fantastic for hand strength and fine motor skills, by the way.
Step 5: Roll and Cut
Roll out the dough on a sheet of parchment paper with your rolling pin, keeping the surface nice and even. Then let the kids press cookie cutters or molds into the dough to cut out their shapes — stars, circles, hearts, whatever you have in the drawer.
Step 6: Poke the Hanging Holes
If you want to hang your ornaments, press a straw through the dough near the top of each shape to make a clean hole. Easy and tidy.
Step 7: Air Dry
Transfer the ornaments to a drying area and let them air dry for 24-48 hours, depending on how thick you rolled them. Thicker ornaments need the full two days. Once they are dry, they are ready to be displayed or gifted!
Displaying Your Galaxy Ornaments
Hang them in a bright window where the sunlight catches the colors, dangle them from a tree branch, or line them up on a shelf. They make the sweetest handmade gifts — my daughter wrapped hers in tissue paper for her teacher and was beaming with pride.
Tips from My Kitchen Table
- Layer, don’t just swirl: For extra depth, roll two or three different colored pieces together instead of blending them into one — you get gorgeous marbled layers.
- Add natural elements: Press dried flowers or herbs into the dough for extra texture and a lovely fragrance.
- Write a message: Before they dry, etch a small message or blessing into each ornament for a personal touch.
- Little hands: The kneading and rolling is a wonderful hand-strength workout, and cutting shapes builds patience and coordination.
- Storage: Keep finished ornaments in a cool, dry place away from direct sunlight — stored properly, they last for years.
Source project: the colorful baking soda galaxy ornaments tutorial from dogsrecipes.com — I rewrote it in my own words, but every measurement and step comes straight from the original.



