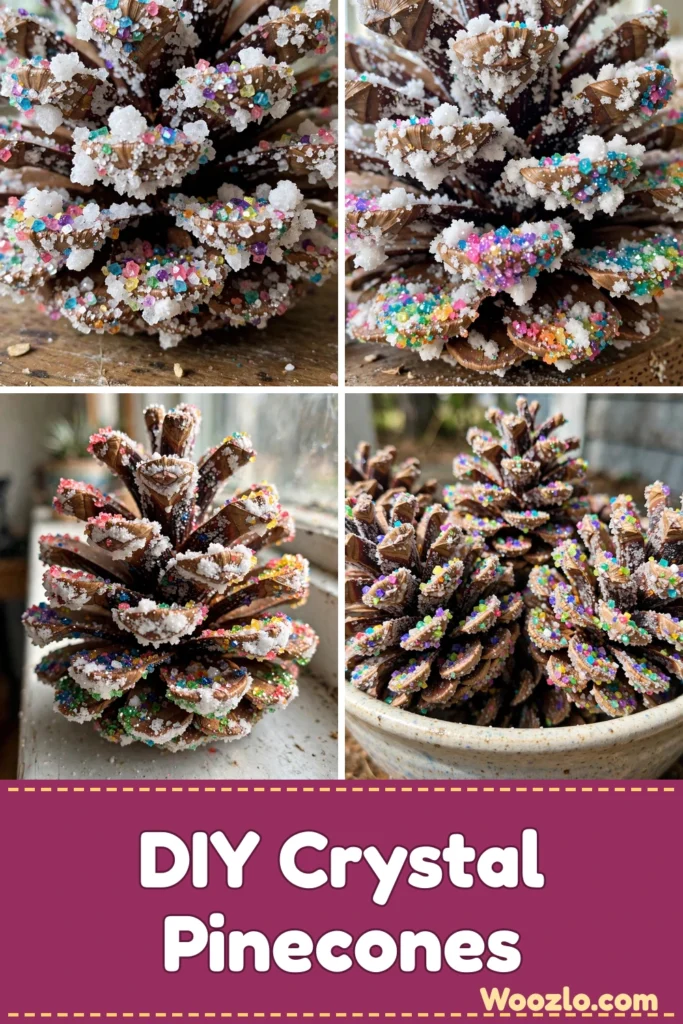
Create Stunning DIY Crystal Pinecones for Cozy Winter Days
Are you looking for a cheap, easy winter craft that feels a little bit magical? These DIY crystal pinecones are exactly that — plain pinecones dipped in a baking soda solution that grow sparkly, rainbow-colored crystals right on the scales. My kids were absolutely mesmerized watching the colors swirl in the bowl, and the finished pinecones look like tiny frozen rainbows sitting on our mantel.
The best part is how inexpensive this is. Baking soda, water, and food coloring from the pantry, plus pinecones gathered on a walk or grabbed at the craft store. Prep takes about 15 minutes, and then the pinecones dry for 24 hours while the kids check on them every hour like little scientists.
What You’ll Need
- Pinecones (natural ones — easy to find at craft stores or gather in your backyard)
- Baking soda
- Water
- Food coloring
- Small mixing bowls
- Baking sheet
- Wax paper
Step 1: Prepare Your Workspace
Lay down wax paper to protect your surface and arrange all your materials within easy reach. This is a dip-and-dry project, so having everything set before little hands get busy makes the whole thing calmer.
Step 2: Mix the Crystal Solution
In a small bowl, mix 1 cup of water with 1/2 cup of baking soda. Stir until the baking soda fully dissolves — you’ll notice a soft, calming fizz as the two combine.
Step 3: Add the Food Coloring
Choose your favorite colors and add a few drops to the solution, stirring gently. Watch as the colors blend into a delightful palette reminiscent of a rainbow. Try mixing different colors or layering them for a unique effect on each pinecone.
Step 4: Dip the Pinecones
Hold each pinecone by its tip and dip it into the solution, making sure it is fully submerged so the crystals cling to the surface. Artificial pinecones work too — just make sure they can hold the weight of the crystals. If your mixture seems too thin, simply add a bit more baking soda, stirring until the consistency feels right.
Step 5: Let Them Dry
Place each pinecone on a baking sheet and let it dry for 24 hours. You will notice a subtly sparkling texture beginning to develop — embrace the anticipation! Placing the pinecones in a warm, dry area can help speed things up without compromising the crystals.
Step 6: Decorate and Display
Once dried, place your crystal pinecones around your home. Let the light catch their iridescence — they look beautiful in a bowl on the coffee table, scattered on a mantel, or given as meaningful gifts. Group several in varying sizes and colors for a delightful centerpiece.
Tips from My Kitchen Table
- Make it a nature walk first: Gather pinecones (and leaves or twigs) on a walk with the kids, then craft when you get home. Two activities in one!
- Mark the occasion: Add a little label or date to each pinecone to turn them into sentimental keepsakes from a winter afternoon.
- Keep them dry: Store finished pinecones in a cool, dry place away from direct sunlight and damp areas. If they collect dust, wipe gently with a soft cloth.
- Kid-safe: Absolutely a lovely family activity — just supervise little ones during the dipping step.



