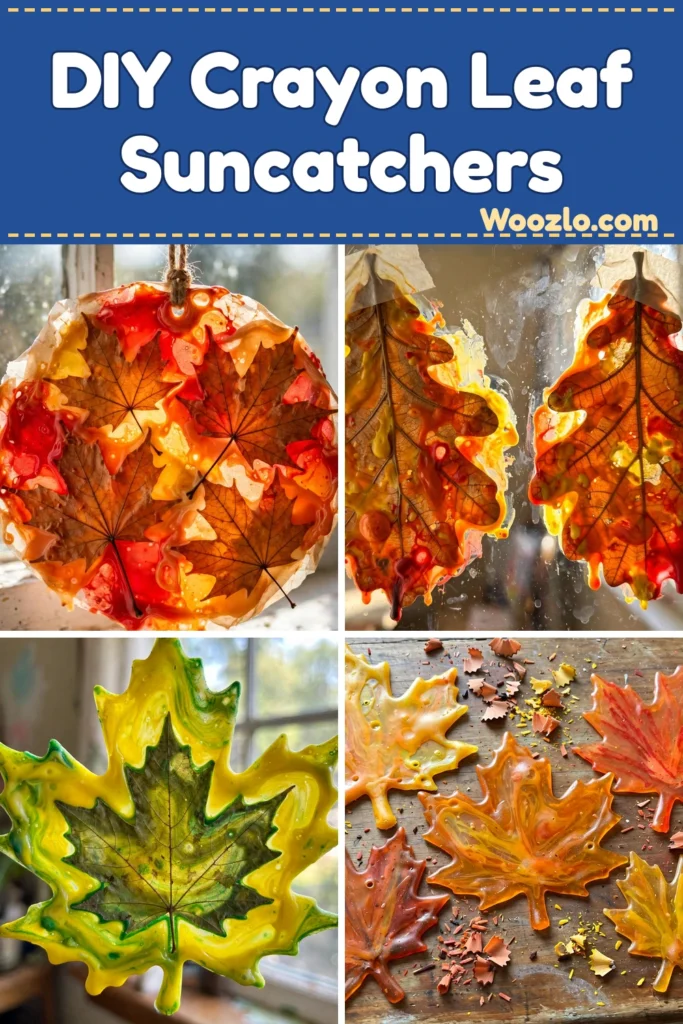
Create Stunning DIY Crayon Leaf Suncatchers for Fall
Are you looking for a fun, super cheap fall craft to do with your kids on a rainy afternoon? These DIY crayon leaf suncatchers are one of my favorites — real leaves and melted crayon shavings that turn into gorgeous stained-glass-style decorations for any sunny window. My kids were beaming with pride when they saw their finished suncatchers glowing in the light.
All you need are wax crayons, fresh leaves, parchment paper, and an iron. Everything is inexpensive and easy to find, and the whole project is simple enough for preschoolers (grown-ups handle the iron step, of course).
What You’ll Need
- Wax crayons (various colors — traditional wax crayons work best)
- Fresh leaves (maple or oak are great; pick ones that are flat and intact)
- Parchment paper or wax paper
- An iron (or a hair straightener on low as a backup)
- Scissors
- String or tape for hanging
Step 1: Prepare Your Workspace
Set up your flat surface with parchment or wax paper for protection, and lay out all your materials for easy access. Covering the work area first saves you from a waxy mess later.
Step 2: Gather Your Leaves
Choose fresh, clean leaves that are flat and intact. Grab various shapes and sizes — the mix of leaf silhouettes is what makes each suncatcher unique. This is a lovely excuse for a leaf-collecting walk before you craft.
Step 3: Prepare the Crayons
Peel the paper off the crayons and break them into small pieces. Use vibrant colors to create a beautiful mix — the kids will love this hands-on part.
Step 4: Layer Leaves and Crayons
Place a layer of leaves on the parchment paper, then scatter the broken crayon pieces around and on top of the leaves. Experiment with color combinations — different colors mixed together give unique, stunning effects.
Step 5: Cover and Melt
Place another layer of parchment or wax paper on top. Gently press down and use the iron on a low setting to melt the crayon, moving it in circular motions for even melting. Enjoy the smell of melting crayons as the color fuses! No iron? A hair straightener on low works too.
Step 6: Cool and Cut
Once melted, remove the top layer and let everything cool for a few minutes. Then carefully cut around the leaf shapes to create your suncatchers. Cookie cutters make fun shape guides if you want specific designs.
Step 7: Hang and Admire
Use string or tape to hang the suncatchers in a sunny window and enjoy the colorful display! Try making a set for each season with matching leaves and colors.
Tips from My Kitchen Table
- Personal touch: Have kids add their drawings or names with a permanent marker after the suncatchers cool.
- Keep them dry: Moisture can affect the melted crayon and leaves, so hang them indoors in a dry spot. Direct sunlight may fade the colors over time.
- Scissor skills: Cutting around the leaf shapes is wonderful practice for little hands — hand strength, patience, and hand-eye coordination all in one.
- Rainy-day win: Pair the craft with some lemonade or herbal tea and turn it into a cozy afternoon memory.



