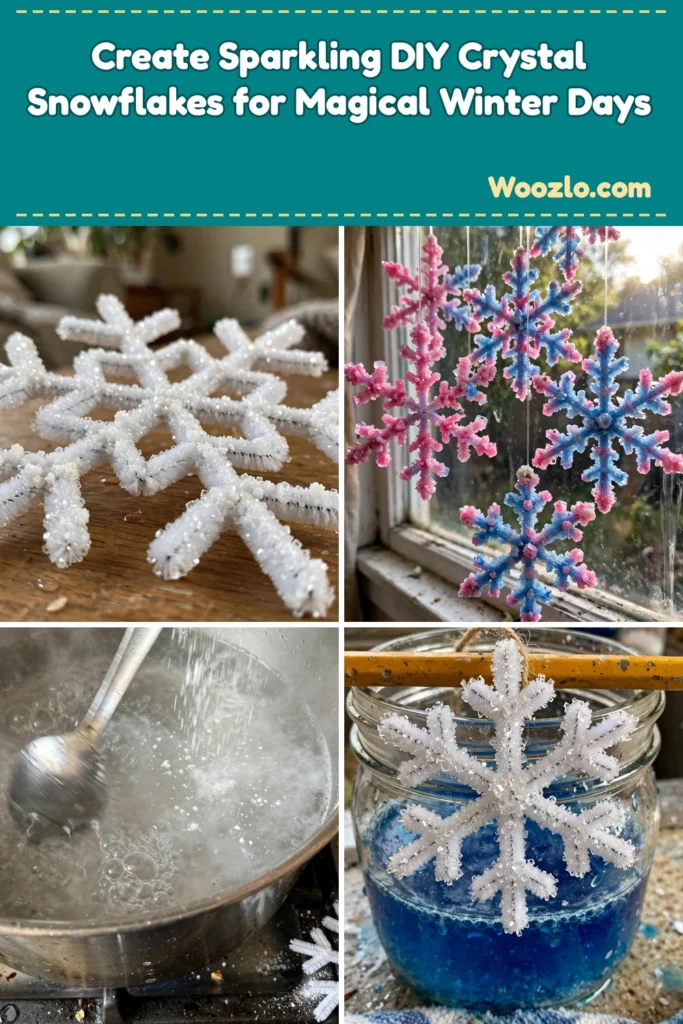
Create Sparkling DIY Crystal Snowflakes for Magical Winter Days
Are you looking for a super cheap and easy winter craft that feels like actual magic? These DIY crystal snowflakes are the one! My kids were completely glued to the jar, checking every hour to see the crystals growing. And honestly, watching plain pipe cleaners turn into shimmering snowflakes never gets old — it is the perfect mix of cozy craft and hands-on science.
Creating beautiful, shimmering crystal snowflakes is a delightful winter project for children and adults alike. In just a few simple steps, you transform basic materials into stunning decorative pieces that mimic the elegance of real snowflakes — while getting a fantastic hands-on lesson in crystallization. Whether you want a festive activity or a calm, relaxing craft session, this one brings pure joy and wonder.
What You’ll Need
- Pipe cleaners, white or any color (3 pieces — use more for larger or multiple snowflakes)
- Borax (6 tablespoons — available in the laundry aisle)
- Water (2 cups)
- Glass jar or bowl (to hold the snowflake as it crystallizes)
- String (1 piece, to hang the snowflake)
- Pencil or stick (1 piece, to rest across the jar)
- Optional: food coloring or glitter for added sparkle and color
Step 1: Create Your Snowflake Shape
Take 3 pipe cleaners and twist them together to form a star shape. Bend the ends to create the points of your snowflake. Let the kids feel the texture of the pipe cleaners as they shape them — it gives each snowflake its own unique silhouette.
Step 2: Prepare the Borax Solution
Boil 2 cups of water in a pot. Add 6 tablespoons of Borax to the boiling water, stirring until it dissolves completely. You will see the hot water swirling and feel the resistance of the Borax as it dissolves — that is the science happening!
Step 3: Attach the Snowflake to the Jar
Tie a piece of string around the center of the snowflake shape. Rest the pencil or stick across the top of the jar or bowl so the snowflake hangs down, submerged in the Borax solution but not touching the bottom.
Step 4: Let It Crystallize
Allow the jar to sit undisturbed for 6–8 hours or overnight. This is the hard part — waiting! Watch as the crystal formations begin to grow into a truly mesmerizing sight.
Step 5: Reveal Your Creation
Carefully remove the snowflake from the jar and rinse it under warm water to remove any excess Borax. Let it dry on a paper towel and admire your beautiful, sparkly snowflake!
Tips & Variations
- Customize shapes: experiment with different pipe cleaner shapes like hearts or stars.
- Add color: mix a few drops of food coloring into the Borax solution for colored crystals.
- Use different containers: try various shapes of jars or bowls to see how they affect the final look.
- Add glitter: sprinkle glitter on the wet snowflake before it dries for extra sparkle.
Frequently Asked Questions
Can I use other crystals instead of Borax?
Yes — you can try sugar or salt crystals for a different effect, but results may vary in size and shape.
How long do these snowflakes last?
Properly dried, your crystal snowflakes can last indefinitely. Store them in a dry place to avoid moisture.
Can I reuse the Borax solution?
It can be reused, though its effectiveness may decrease with each use. A fresh solution gives the best results.
What if my crystals aren’t forming?
Make sure the water is fully saturated with Borax and that your snowflake is not touching the bottom of the container.
Ways to Enjoy Them
- Create a whole collection in different sizes and colors to hang in a window for a winter wonderland effect.
- Pair your snowflakes with LED lights in a glass jar for a beautiful nightlight.
- Use them as unique gift tags for presents this holiday season.
We would love to see your versions! Share your creations and tell us what colors you tried — happy crystal crafting!



