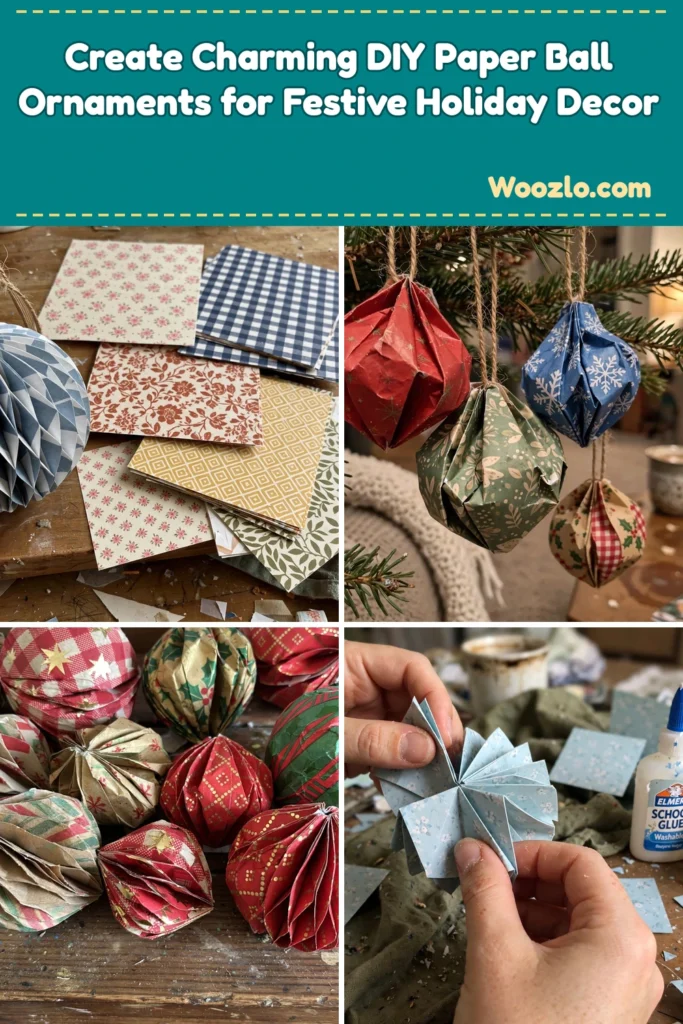
Create Charming DIY Paper Ball Ornaments for Festive Holiday Decor
Are you looking for a cheap, easy holiday craft that turns quiet afternoon time into something magical? These folded paper ball ornaments are exactly that — imagine the gentle rustle of paper layered before you as the hurried world outside fades into the background. My kids love choosing the wildest wrapping paper patterns, and each finished ball hangs like a little upturned smile in our living room.
Creating DIY folded paper ball ornaments feels like a little sanctuary. Each fold becomes a meditation — you feel the materials in your hands and let their smoothness and color inspire you. Simple yet pleasing, this craft nurtures creativity while bringing you into the present moment, and every completed ball brings a spark of pride.
Materials You’ll Need
- Colorful paper (scrapbook paper, wrapping paper, or even old book pages)
- Scissors (for clean, smooth cuts)
- Glue or double-sided tape (to hold it all together)
- Pencil (for marking folds if needed)
- String or ribbon (to hang your ornaments)
- Optional: a calming drink like herbal tea to enhance your crafting experience!
Most materials are easy to find — you may already have some on hand. Lighter papers fold more easily, while sturdier ones add depth.
Step-by-Step Directions
Step 1: Choose a piece of paper that speaks to you — its color and pattern set the mood.
Step 2: Cut the paper into squares — around 6×6 inches works well. Let the motion of cutting feel soft and deliberate.
Step 3: Take one square and fold it in half diagonally, making a crisp crease down the center. Open it, then fold it the other direction, creating another crease.
Step 4: Fold each corner inward toward the center — the paper will start resembling a small envelope.
Step 5: Turn the paper over and repeat the inward folding on this side, creating a layered effect.
Step 6: Hold the folded paper like a little pouch. Slowly pinch the two opposite sides together, forming a gentle dome.
Step 7: Use a dab of glue or tape to secure the edges so they hold their shape.
Step 8: Repeat these steps until you have several folded shapes — each ball decoration builds upon the last.
Step 9: Once dry, thread a piece of string or ribbon through one of the creases and tie a loop for hanging.
Step 10: Display your creations wherever feels right — over a mantel, on the tree, or across a window.
Enjoying the Finished Piece
The gentle sway of these ornaments catches the light beautifully, creating a dance of shadows and colors throughout your home. Hang them up or use them as table centerpieces — and rearrange with the seasons!
Gentle Tips & Variations
- Use scrapbook paper with personal significance — prints that evoke cherished memories.
- Make ornaments in varying sizes for visual interest; smaller ones hang gracefully in clusters.
- Explore different shapes — stars or hearts add a festive twist.
- Incorporate natural elements like dried flowers or foliage for new texture and scent.
- Invite a friend to craft alongside you — share the journey over warm drinks and good conversation.
FAQs
What type of paper is best?
Any colorful paper works. Thinner scrapbook paper or wrapping paper glides easily when folding; cardstock offers sturdiness.
How long do these ornaments last?
With gentle care, several seasons — store them safely to maintain shape and color.
Can I personalize them?
Absolutely — add drawings, stickers, or messages to make each piece unique.
Can this be more eco-friendly?
Use recycled paper, old book pages, or any paper you have at home.
Can I make a larger ornament?
Scale up your squares — just keep the folds manageable for your hands.
Storing & Reusing
Nestle finished ornaments between layers of soft tissue paper or in a protective box to keep them safe for next year. To refresh them, add a new ribbon, a splash of glitter, or extra embellishments. Cherish the process — and let your creativity guide your next making journey!



