Create a Stunning Pressed Flower Candle Holder with Your Kids
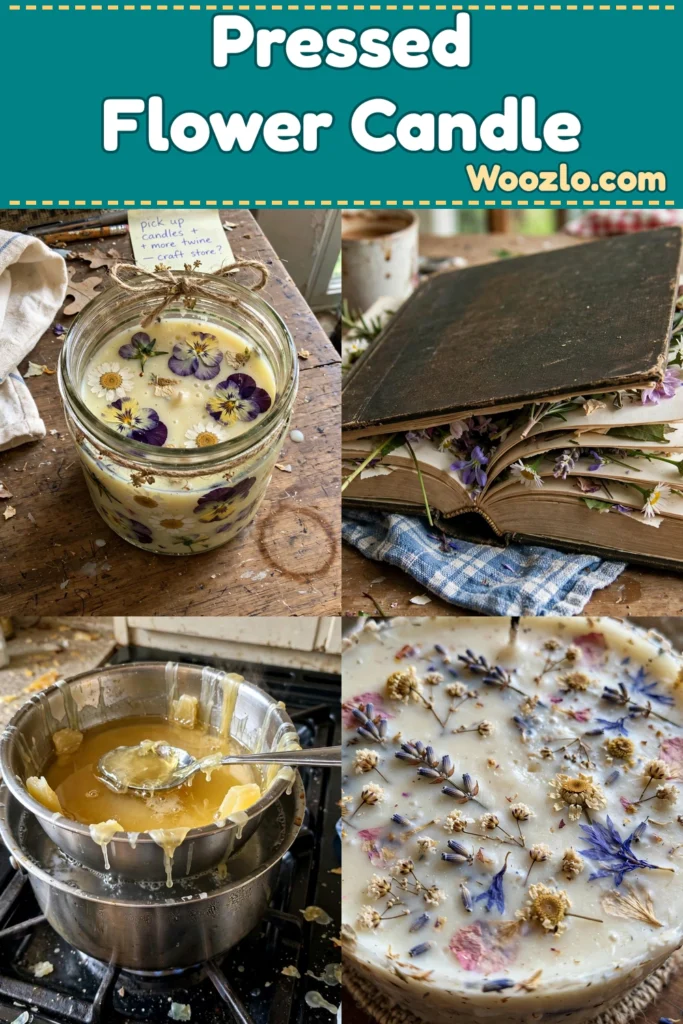
The soft flicker of candlelight, delicate petals encased in glass glowing softly — a pressed flower candle holder weaves together memories of joyful spring days into a cozy nighttime ritual. This project is a journey: gathering blooms, pressing them for a week or two, and then melting wax to embed them into a beautiful candle.
An important note before you begin: this project involves melting wax and open flame — always supervise children closely, work on a heat-resistant surface, never leave a burning candle unattended, and keep it away from kids, pets, and drafts. (Prep: 30 minutes; wax melting: 10 minutes; flower pressing: 1–2 weeks.)
Materials You’ll Need
- Fresh flowers (daisies, pansies, or roses — softer flowers press best)
- Heavy book or flower press
- Clear glass candle holder or small jar
- Candle wax (paraffin or soy wax)
- Wicks (pre-tabbed wicks work best)
- Double boiler (for melting the wax)
- Stirring stick or spoon
- Heat-resistant surface (to work on)
- Optional: fragrance oil (for scented candles)
Step 1: Prepare the Flowers
Fill a book or flower press with your fresh flowers. Make sure they lie flat without overlapping. Close the book gently — the anticipation begins now.
Step 2: Press the Flowers
Leave the flowers to press for about one to two weeks. Check on them occasionally, enjoying the quiet transformation as they dry.
Step 3: Melt the Wax
When your flowers are ready, fill the bottom pot of the double boiler with water and bring it to a gentle simmer. Add the wax to the top pot and stir slowly, watching it melt into a smooth pool.
Step 4: Set the Wick
While the wax melts, secure the wick in the center of your candle holder with a small amount of melted wax, ensuring it stands straight.
Step 5: Add Fragrance (Optional)
Once the wax is fully melted, mix in a few drops of fragrance oil for a delightful aroma.
Step 6: Layer the Flowers
Pour a small amount of melted wax into the holder first. Let it cool and harden slightly, then place your pressed flowers in — this keeps them suspended beautifully.
Step 7: Pour the Final Layer
Once the first layer is set, pour more wax over the flowers, filling the holder to the desired height. Leave a bit of space at the top for the wick.
Step 8: Finish Up
Allow the candle to cool completely, then trim the wick to about 1/4 inch above the wax. This gives a nice flame when it burns.
Enjoying the Finished Piece
Place it on a side table, your desk, or a cozy nook. As the candle flickers, it creates a soothing ambiance for reflection or reading. Light it during quiet time — a constant of comfort even on the most hectic days.
Caring for Your Candle Holder
Keep it in a cool, dry place away from direct sunlight to preserve the flowers’ vibrancy. Burn on a heat-resistant surface. Once the wax has burned down and cooled, clean the holder, refill with more wax, and start anew.
Tips and Variations
- Seasonal flowers: Autumn leaves for fall, daisies and violets for spring.
- Shapes and sizes: Small tea lights or larger pillar candles change the atmosphere.
- Wax colors: Add dye for colorful layers that complement the flowers’ hues.
- Gift versions: Make smaller holders as gifts, with handwritten notes about the flowers’ meanings.
- Different waxes: Soy wax or beeswax work beautifully too.
Quick Questions
What flowers work best? Softer flowers like pansies, daisies, and violets — they retain charm and color after drying.
Can I use different wax? Absolutely — soy wax or beeswax are delightful alternatives.
How long does the candle last? Depends on size and burn frequency — typically several hours.
Will the flowers fade? They may fade slightly with time or light; it adds character.
Can I reuse the holder? Definitely — clean, refill, and start anew.