Build a Fun DIY Paper Bag Tree with Kids
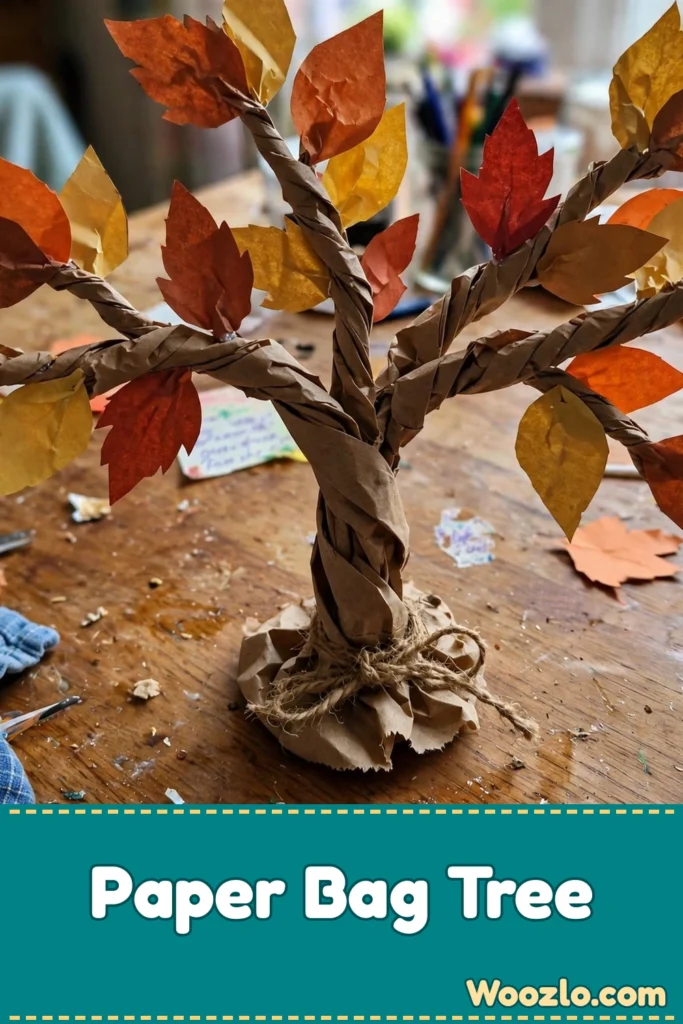
Are you looking for a craft that turns literal trash into treasure? This paper bag tree is it! One plain brown lunch bag becomes a twisty, realistic tree trunk with branches — and then the kids go wild decorating it with colorful paper leaves. It’s honestly amazing what you can create from nothing more than a simple paper bag.
The best part? This is super cheap and easy — a paper bag, some cardboard, and paper scraps are the whole supply list. It’s an engaging craft for elementary-aged kids, or even preschoolers with a little help from mom or dad. Cutting, twisting, and gluing make it fantastic fine-motor practice, and it works for every season — a perfect rainy-day activity for home or the classroom!
Supplies Needed
- Brown paper lunch bag
- Small piece of cardboard
- Colorful paper (for the leaves)
- A ruler
- Pencil
- Scissors
- Craft glue
Step 1: Mark the Strips
Use a ruler and pencil to draw approximately ½-inch-wide strips on the lunch bag, starting at the opening and extending about halfway down the bag.
Step 2: Cut the Strips
Use scissors to cut along each strip, stopping where your pencil lines end. Don’t worry if the cuts aren’t perfectly straight — once the strips are twisted into branches, any little imperfections will disappear.
Step 3: Twist the Trunk
Open the bag and stand it upright. Hold the bottom of the bag with one hand, then gently twist the center to form the tree trunk.
Step 4: Twist the Branches
Twist two of the paper bag strips together to form a branch. Repeat with the remaining strips until all of them have been twisted into branches.
Step 5: Add a Base
Cut a circle from a piece of cardboard that is about the same size as, or slightly larger than, the bottom of the paper bag. Glue it under the base to help support the tree trunk and keep it standing upright.
Step 6: Make the Leaves
Cut or tear colored paper into small leaf shapes. You can also use tissue paper, pom-poms, dried leaves, or just about any craft supplies you already have at home to decorate your tree!
Step 7: Decorate the Tree
Take your prepared leaves and glue them all over the branches, layering them as you go to create a full, leafy tree. Keep adding leaves until you’re happy with how full and colorful your tree looks. There’s no right or wrong way to decorate it, so have fun and make it your own!
Helpful Tips
- Build a landscape: Cut a larger circle or square of cardboard for the base, then decorate it with a layer of green “grass,” fallen leaves, or other nature-inspired details to create a fun little landscape around your tree.
- Customize for any season: Bright green leaves for spring or summer, shades of yellow, orange, and red for a colorful fall tree. Add blossoms, apples, acorns, birds, or anything else you can imagine!
- Leaves from almost anything: Colored paper, tissue paper, pom-poms, or lightweight fabric scraps all work. You could even use light brown pipe cleaners to add extra branches.
Why It Works Year-Round
Whether you’re looking for a fun fall craft, a cheery spring project, or a budget-friendly classroom activity, this DIY project is a winner all year long. It’s especially great for kids in 2nd grade and up — just the right amount of challenge to keep them engaged, while still easy enough to complete with confidence. It’s inexpensive to make, encourages creativity and fine motor skills, and gives old paper bags a brand-new purpose!