Craft a Brilliant DIY Rotating Cardboard Desk Organizer
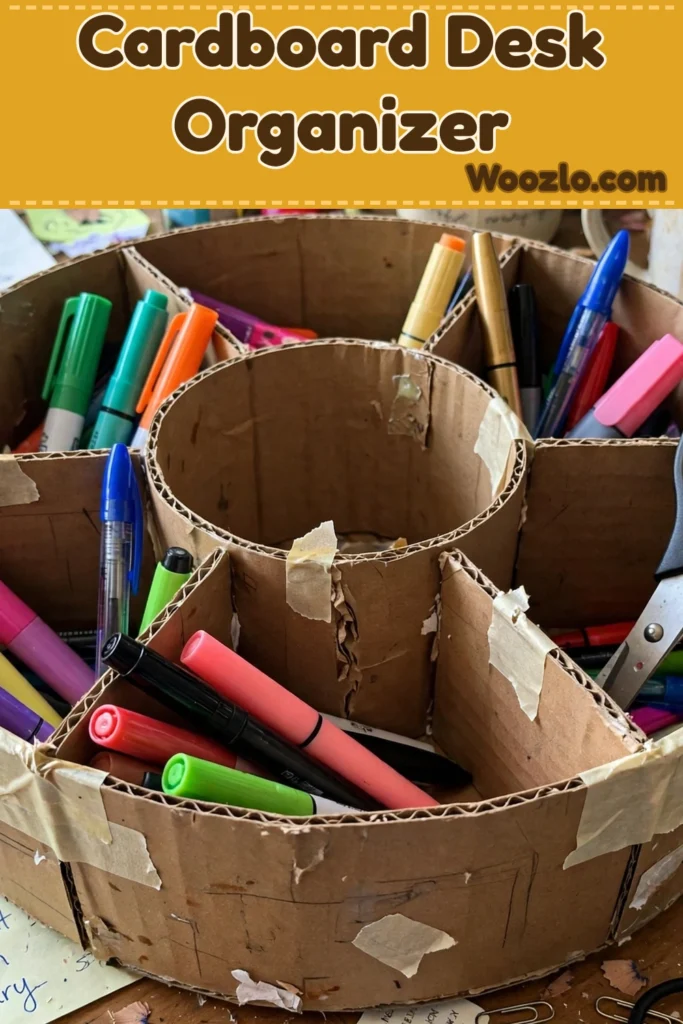
Are you looking for a fun project that will tame the chaos on your desk or your kids’ homework station? This DIY Rotating Cardboard Desk Organizer is it! I am such a fan of crafts that are both useful and soothing to make — and this one is both. Picture a sunny, quiet corner of your kitchen table, scissors gliding through cardboard, and twenty minutes later you’ve got a sturdy little turntable that spins your pens, scissors, and markers right to your hand.
The best part? This is a super cheap and easy project — recycled cardboard boxes work wonderfully, and you probably have every other supply already. Let the kids decorate it and suddenly tidying the desk becomes fun. Fine-motor practice with cutting and gluing, built right in!
What You’ll Need
- Cardboard (recycled boxes work wonderfully)
- Scissors or a craft knife (be mindful with sharp tools)
- Ruler (for measuring neat lines)
- Pencil (for marking your cuts)
- Glue — a strong craft glue or hot glue gun
- Optional: paint or decorative paper (to personalize your organizer)
- Optional: small rubber feet (to add stability)
Step 1: Prepare Your Cardboard
Begin by laying out the cardboard flat on your workspace. Feel the rugged texture under your hands, and take a moment to appreciate its potential.
Step 2: Measure and Mark
Use the ruler to measure out the pieces you need. Aim for a circular base and several walls — around four or more, depending on your design. Use the pencil gently to mark your cuts.
Step 3: Cut the Cardboard
Take your scissors or craft knife and carefully cut along the lines you’ve marked. Let the rhythm of each snip guide you — enjoy the crisp sound as the cardboard yields.
Step 4: Assemble the Base
Create a sturdy circle for the base that will support your organizer. Secure it with glue, allowing it to dry slightly. This moment is about patience and intention.
Step 5: Build the Walls
Take each wall piece and gently curve it into a circular form. Attach it to the base using glue, making sure to hold it in place for a few moments so the bond sets.
Step 6: Create the Rotating Element
For the rotation mechanism, make a small hole in the center of your base and a corresponding hole in a small round piece of cardboard for the top. Use a thin rod or sturdy straw to connect them, allowing for a gentle spin.
Step 7: Personalize Your Organizer
With the structure complete, let your creativity shine. Use paint or decorative paper to add color and flair. The soothing act of painting can be a calming experience all on its own.
Step 8: Final Assembly
Once everything is dry, assemble your finished parts. Test the rotation and adjust if necessary. This is your chance to see your creation come alive.
Step 9: Fill It Up
Begin putting your favorite pens, papers, and tools into your organizer. Notice how the space feels as it transitions from clutter to calm.
Making It Last
A protective layer of clear sealant or varnish helps shield the cardboard from wear and tear. Place it in a spot where it won’t be moved too often, and should it develop any scuffs, a gentle wipe with a damp cloth will revitalize the surface — just don’t soak it, as too much moisture may weaken the cardboard.
Small Ways to Make It Your Own
- Mix textures: Integrate fabric or felt to create pockets or soft barriers for delicate items — visually appealing and adds softness.
- Nature-inspired decor: Small stones, twigs, or pressed flowers incorporated into the design give a truly unique finish.
- Thematic colors: Soft, earthy tones evoke calmness, while vibrant hues inspire creativity.
- Inspirational words: Write or paint gentle reminders or quotes on the sides — little whispers of motivation as you work.
- Adjustable sections: Use dividers that can be rearranged as your needs change — even more functional as your workspace evolves.
Quick Questions
What cardboard works best? Recycled cardboard boxes are perfect and promote sustainability — just avoid overly thin cardboard, which may not hold up.
Can I make it larger or smaller? Absolutely — adjust the pieces to whatever height and diameter suit your needs. That’s the beauty of DIY.
Will the glue hold under the weight of my supplies? Yes — strong craft glue or a hot glue gun creates a solid bond for everyday items. Just make sure it’s fully dry before adding weight.
How do I clean it? A soft, damp cloth gently wipes away dust and smudges without damaging the cardboard.
Can I decorate it? Certainly! Paint, stickers, or fabric — make it as colorful and unique as you like.
A Note Before You Go
Let this little organizer be a reminder of the beauty found in simplicity. Your creative hands have transformed ordinary cardboard into something vibrant and useful — an organizer that nurtures not just your workspace, but your spirit. Enjoy the quiet joy of making!