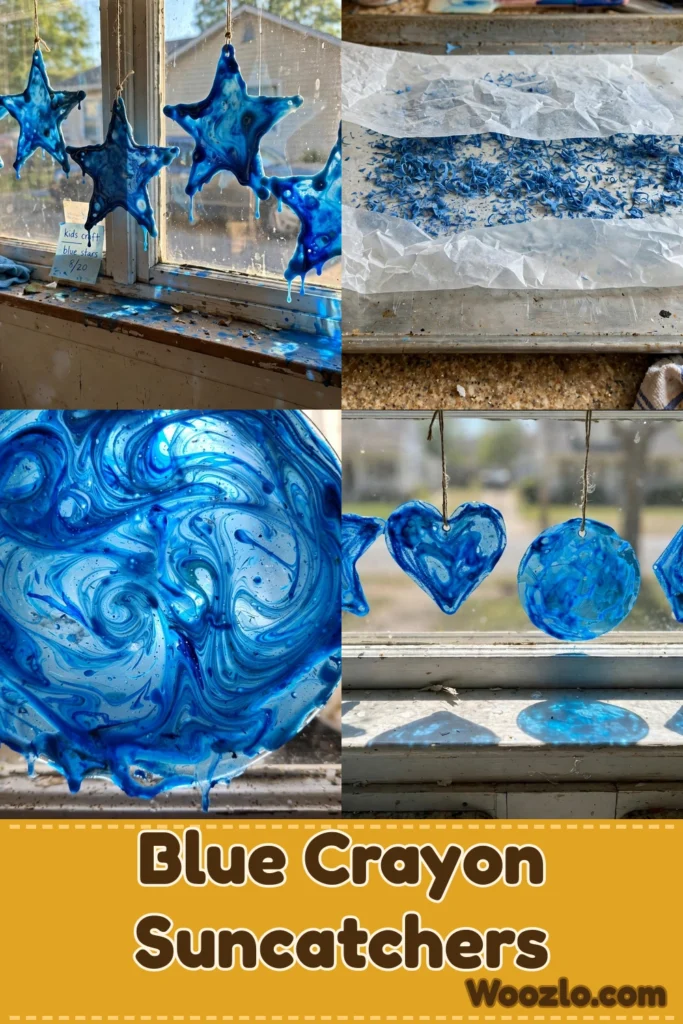
Transform Your Space with Stunning Blue Crayon Suncatchers for Easy Window Art
Picture sunlight streaming through your window, casting blue rays across your living space — soft, shimmering hues dancing on the walls. These blue crayon suncatchers bring a subtle magic into your home: melted crayon wax, transformed into beautiful window art.
It’s a soothing sensory experience — the richness of crayons in your hands, the sweet aroma of warming colors, the hypnotic melt. Use an iron on a low setting and work slowly (melted wax can soften if exposed to high heat, so these are best indoors).
Materials You’ll Need
- Blue crayons (or various shades for added depth — any colors work)
- Wax paper or parchment paper
- A baking sheet
- An iron (set on a low setting)
- Scissors
- A craft knife (for detailed cutting)
- A string or ribbon (for hanging)
- Optional: cookie cutters (for shapes)
Step 1: Peel the Crayons
Peel the wrappers off the blue crayons. The tactile sensation of the wax beneath your fingers feels satisfying and grounded.
Step 2: Cut into Pieces
Cut the crayons into small pieces. As they snap, listen to the light crackling sound — part of the journey.
Step 3: Lay the Base
Place a piece of wax paper flat on your baking sheet.
Step 4: Arrange the Pieces
Arrange the crayon pieces on the wax paper, mixing different shades of blue. There is no right or wrong here.
Step 5: Top with Wax Paper
Top it with another piece of wax paper. This protects your iron and keeps everything contained.
Step 6: Iron Gently
Gently press the iron over the top layer of wax paper. Move slowly and allow the heat to melt the crayon bits — you’ll see mesmerizing patterns of color blending and swirling.
Step 7: Reveal
Once melted, carefully remove the top layer of wax paper. This feels like revealing a hidden treasure.
Step 8: Cool Completely
Let the melted crayon art cool completely. When it hardens, it will have a soft sheen.
Step 9: Cut Shapes
Use scissors or a craft knife to cut out shapes or simple squares. Each piece feels like its own unique story.
Step 10: Hang and Admire
Punch a hole at the top and add a string for hanging. Step back to admire your work.
Enjoying the Finished Piece
Display them where the morning sun shines through — kitchen windows, a quiet corner. The vibrant colors catch the light beautifully, creating a soothing atmosphere. Every time sunlight filters through, pause and take in the gentle hues.
Storage and Repurposing
Store in a cool, dry place away from direct sunlight when not displayed. The melted crayon surface is forgiving — melt them down again to create new pieces, letting the creative cycle continue.
Tips and Variations
- Other colors: Delicate greens or warm yellows deepen the visual impact; a rainbow of suncatchers brings vibrance.
- Cookie cutter shapes: Hearts, stars, or leaves add whimsy.
- Layering shades: Experiment with different shades when melting for captivating effects.
- Framing: Mount onto a colorful background for added charm.
- Make it social: Share the calming act of making with friends or family.
Quick Questions
Can I use crayons that aren’t blue? Absolutely — any colors that speak to you.
What if the crayons don’t melt properly? Gently reapply the iron at a lower setting for longer — patience is key.
Can they withstand outdoor conditions? Best indoors — melting wax softens in high heat.
Is it safe to use an iron on wax paper? Yes — use a low setting and work slowly, don’t overheat.
How long do they last? With proper care, they can last for years — handle gently.