Transform Your Space with DIY Mini Beaded Plants: A Fun Craft Idea
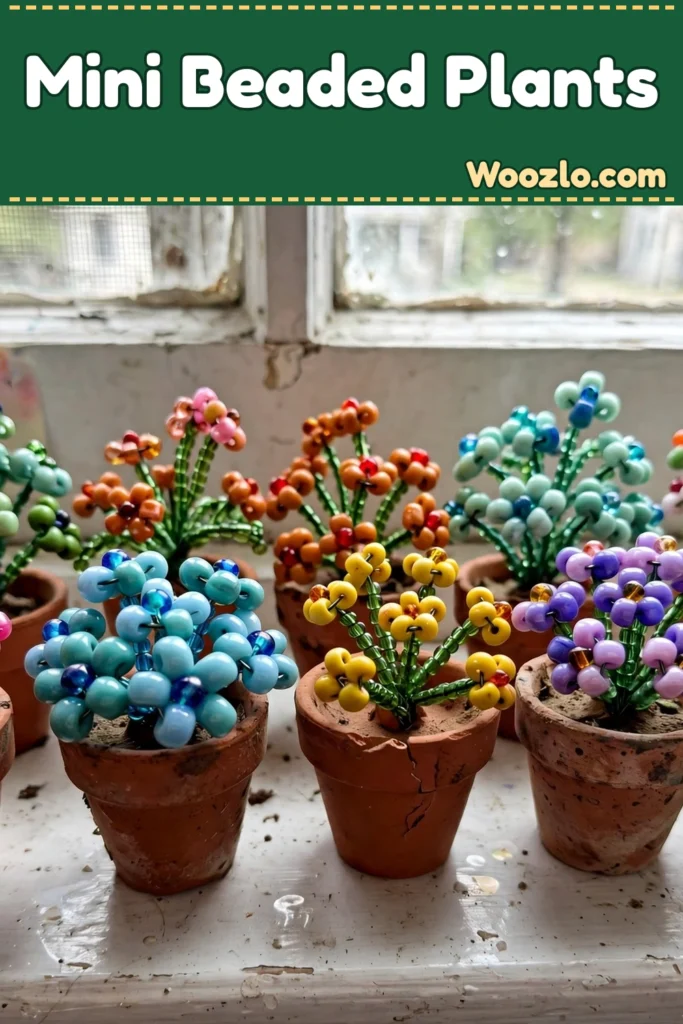
Picture a cozy afternoon: sunlight filters through the window onto the kitchen table, and you sit with soft materials spread around you, stringing smooth, cool beads onto pliable wire. These DIY mini beaded plants turn a handful of beads into a tiny everlasting garden — a gentle, mindful project that’s as relaxing to make as it is to display.
Each bead feels smooth against your fingertips; the soft clink as they slide along the wire is like a gentle melody harmonizing with your thoughts. Place them on a bright windowsill or a serene desk as a reminder to take it slow.
Materials You’ll Need
- Beads in various colors and sizes (wooden, glass, or plastic — any that fit comfortably on the wire)
- Floral wire or sturdy craft wire
- Green floral tape or green yarn (optional)
- Small pots or containers for display
- Wire cutters
- Pliers (optional)
Step 1: Cut the Wire
Cut a length of wire about 12 inches long — this will be the stem of your plant. Let it feel flexible in your hands.
Step 2: Slide on the First Bead
Choose a bead to begin. Slide it onto the wire until it rests about halfway down, noticing how it catches the light.
Step 3: Twist to Secure
Hold the wire upright and twist it just below the bead. This keeps it in place while adding a sculptural feel.
Step 4: Keep Adding Beads
Continue adding beads along the wire, twisting to secure each one. Watch how their colors blend, creating a joyful pattern.
Step 5: Form the Root
Once you reach the desired height, bend the wire at the base to create a small loop. This forms the root of your plant, giving it stability.
Step 6: Wrap the Wire
Wrap the exposed wire with floral tape or yarn for a softer touch. This adds warmth and ties your design together.
Step 7: Pot Your Plant
Place your finished plant in a small pot or container. Add more plants to create a little garden.
Enjoying the Finished Piece
These pieces bring life to any corner of your home — a bright windowsill where the sun can caress their vibrant colors, a desk as a reminder to slow down. They won’t wilt like real plants, so with gentle handling they can be enjoyed for years.
Storage and Reuse
Wrap in a soft cloth if relocating. Want to refresh? Carefully remove the wire and beads and create a new design — this project can evolve with you as seasons change.
Tips and Variations
- Color play: Use beads that mirror the nature around you — light greens, deep reds, bright blues.
- Textural elements: Add small stones or dried moss in the pots for depth.
- Group arrangements: Craft several plants of varying heights and widths for a mini garden.
- Personal touches: Attach a small tag or note with a sentiment tied to each piece.
- Great gifts: The personal touch of handmade carries more sentiment.
Quick Questions
Can I use any beads? Absolutely — any beads that fit comfortably on the wire will work beautifully.
How do I keep plants from tipping over? Weight the pots with pebbles or sand at the bottom.
Are these good gifts? Yes — they make delightful, sentimental gifts.
How long do they last? With gentle handling, they can be enjoyed for years — they never wilt.
Is this suitable for children? Children can participate with adult supervision due to the wire and small beads.