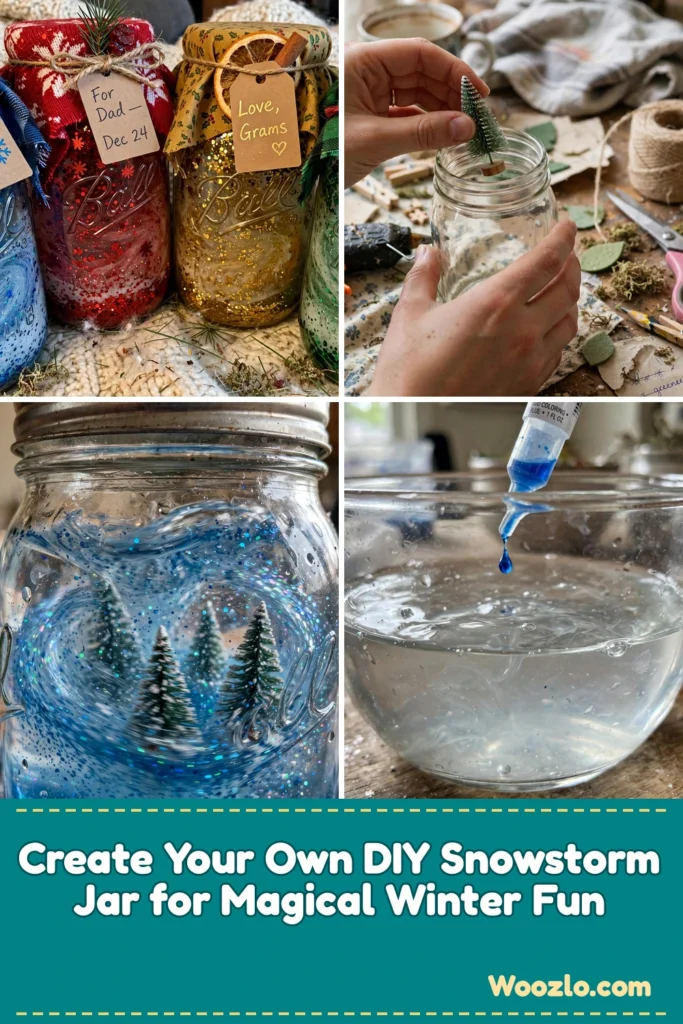
Create Your Own DIY Snowstorm Jar for Magical Winter Fun
Are you looking for a cheap, easy winter craft the whole family will love? Creating your very own “Snowstorm in a Jar” is a delightful way to capture the magic of a snowstorm indoors! This easy-to-follow project uses simple materials you likely have at home — and the result is an enchanting scene that swirls and sparkles like freshly fallen snow. Perfect for kids and adults alike!
Plus, it’s educational — kids learn about density and motion hands-on — and it makes a charming handmade gift!
Materials
- Clear glass jar with a lid
- Distilled water
- Vegetable glycerin (optional, for thicker snow)
- Glitter or artificial snow
- Small decorations (like mini trees or figurines)
- Blue food coloring (optional)
- Funnel (optional, for easy pouring)
Step 1: Prepare the Jar
Clean and dry the jar — ensure it’s spotless to showcase the snowstorm beautifully.
Step 2: Add Decorations
Arrange small figures: place your mini trees, figurines, or other winter-themed decorations at the bottom of the jar. Secure them if needed.
Step 3: Mix the Water and Glycerin
In a separate bowl, mix 1 cup of distilled water with 1–2 tablespoons of vegetable glycerin. The glycerin slows the descent of the glitter, creating a dreamy snowfall effect!
Step 4: Color the Liquid (Optional)
Drip in a few drops of blue food coloring for a wintry touch and stir to combine.
Step 5: Fill the Jar
Using a funnel, pour the mixture into the jar, filling it almost to the top — leaving a little space for the lid.
Step 6: Add Glitter or Snow
Sprinkle in 1–3 tablespoons of glitter or artificial snow. Adjust the amount based on how much “snow” you want!
Step 7: Seal and Shake
Cap the jar tightly and give it a gentle shake — watch as the glitter dances and swirls, just like a real snowstorm!
Tips & Variations
- Change colors: use different food coloring for a unique look or festive holiday themes.
- Use different glitters: try chunky glitter, fine glitter, or foam “snow” for varied textures.
- Incorporate scents: add a drop or two of peppermint oil for a sensory winter experience.
- Create layers: pour colored water in layers for a dynamic visual effect.
Frequently Asked Questions
Can I use tap water instead of distilled water?
Tap water works, but distilled is recommended — fewer impurities means less cloudiness.
What if I don’t have glycerin?
You can skip it, but the snowfall will descend more quickly. Try using just water.
How can I make it last longer?
Keep the jar out of direct sunlight and avoid unnecessary shaking.
Can I use bigger decorations?
Yes — just make sure the jar is large enough and the lid still fits.
More Ideas
- Create holiday-themed jars (Christmas or Halloween) with specific colors and decorations.
- Use this craft in classrooms to teach kids about snow, weather patterns, or density.
- Wrap your jar in a festive bag or box for a lovely gift!
This wonderful winter craft brings joy and creativity into your home — we’d love to see your versions!



