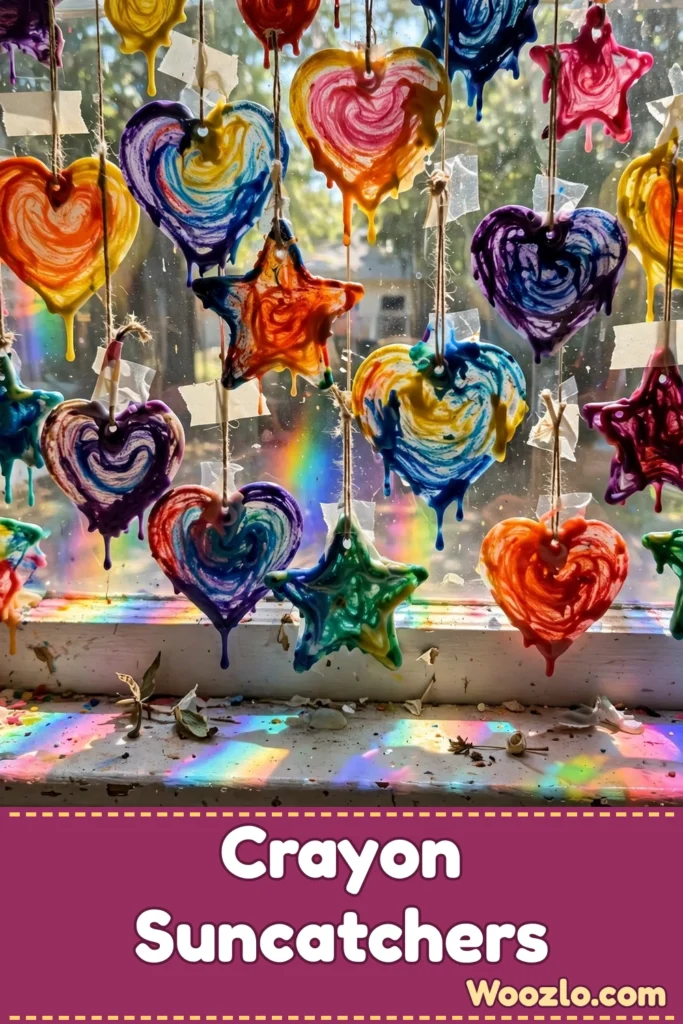
Create Stunning DIY Crayon Suncatchers for Any Window
There’s something almost magical about sunlight filtering through melted crayon wax — it casts gentle rainbows across the room and turns an ordinary window into stained glass. Crayon suncatchers are one of those classic projects that never get old, and the technique is so simple you’ll wonder why you waited.
The process is half the fun: cutting crayons into bits, arranging the colors, then ironing them into swirling melted designs. Kids love choosing their palette, and the results genuinely look like something from a craft fair. Hang them in a child’s room, a reading nook, or a kitchen window and watch the light do its thing.
What You’ll Need
- Crayons (any kind works — Crayola melts the smoothest; mix colors for a unique palette)
- Wax paper or transparency sheets
- An iron (set to low — well-regulated to avoid burns)
- A baking sheet (place your wax paper on this to catch drips)
- Scissors
- A pencil or marker (for tracing shapes)
Step 1: Choose Your Colors
Begin by selecting your favorite colors of crayons. Let your intuition guide you — choose colors that feel calming or joyful.
Step 2: Cut the Crayons
Use scissors to carefully cut the crayons into small pieces. The sound of the crunches adds to the sensory experience — savor each moment.
Step 3: Lay Out Your Canvas
Lay a piece of wax paper or transparency sheet on the baking sheet. This will be the canvas for your melting.
Step 4: Arrange the Pieces
Scatter the crayon pieces onto the wax paper in a playful, abstract arrangement. Choose where you want colors to blend, creating your own unique masterpiece.
Step 5: Cover It
Cover your arrangement with another piece of wax paper. This helps contain the drips and makes the process easier.
Step 6: Iron the Colors
Set the iron to a low setting. Move it gently over the top of the wax paper, allowing the heat to melt the crayon bits inside. Watch as colors merge and create swirling designs. Keep moving the iron for an even melt.
Step 7: Cool
Once you see a beautiful blend of colors, carefully lift the top piece of wax paper. Let it cool for a minute.
Step 8: Cut Your Shapes
Cut your melted creation into desired shapes — hearts, stars, or abstract forms. Feel the slight warmth as you cut through the paper, transforming your creation into unique pieces perfect for hanging.
Step 9: Hang in the Window
Use tape or glue to attach pieces to a window, where they can interact with the light. Step back and admire as gentle rays illuminate your colors.
Making Them Last
Keep suncatchers away from direct contact with water — this keeps colors bright and vivid longer. Dust them occasionally with a soft cloth, and avoid extended direct sunlight. If colors fade, think of it as an opportunity for a new creative session! You can always melt new crayons and layer them on top of old pieces for evolving art.
Customization Ideas
- Play with contrast: Layering contrasting shades gives depth, while softer hues invite calmness.
- Cut meaningful shapes: Hearts, stars, or abstract forms add a personal touch.
- Add texture: Incorporate bits of glitter or small pieces of tissue paper among the crayons before melting — they create interesting effects in the light.
- Go seasonal: Crimson and gold for autumn, pastels for spring, vibrant colors for summer.
- Let kids design: Allow children to design their own suncatchers as a creative outlet — a soothing experience for both of you.
Quick Questions
Can I use any crayons? Yes — though less expensive brands may not melt as smoothly. Crayola gives the best results due to consistent wax quality.
What if I don’t have an iron? Try a hot water bath: place crayon bits in a safe heatproof container, pour hot water over them, let them melt, then pour carefully onto the wax paper.
How long will they last? With proper care, months or even longer. Keep them out of extended direct sunlight and avoid water exposure.
What if I burn my suncatcher? Don’t worry — each imperfection tells a story. Embrace the uniqueness, or simply start again.
Can I use this technique for other crafts? Absolutely — the same melting works with waxed paper or melting beads for unique art projects.