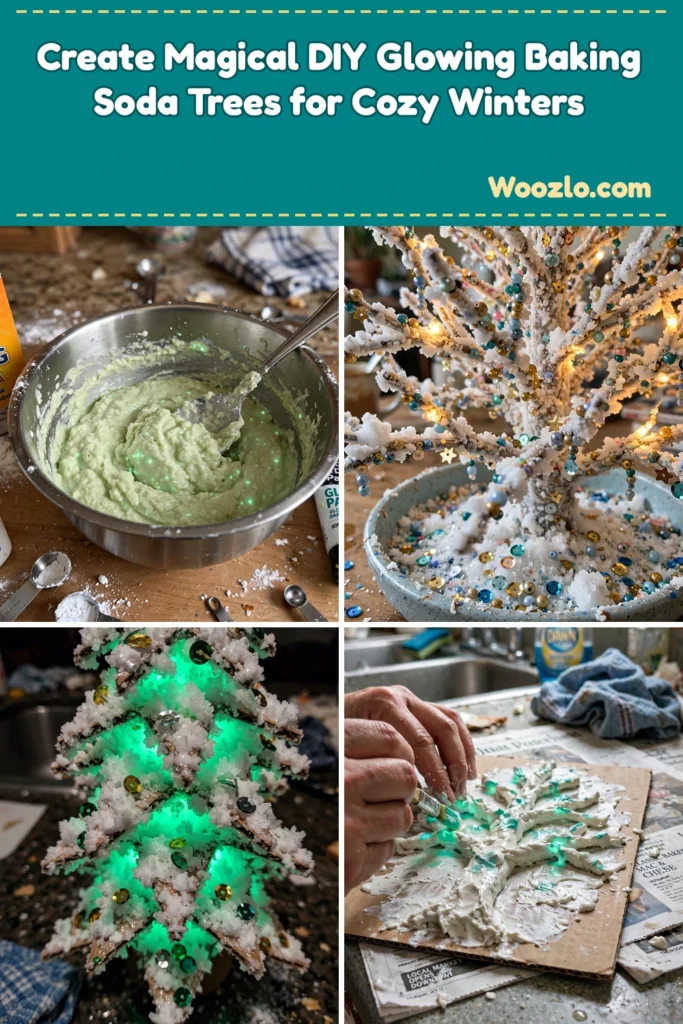
Create Magical DIY Glowing Baking Soda Trees for Cozy Winters
Are you looking for a cheap, easy holiday craft with a serious wow factor? This glowing baking soda tree is it! We mixed up a batch after dinner, shaped our little trees, and when we turned off the lights — my kids absolutely lost it. It glows! Simple household ingredients, zero fancy supplies, and a craft that doubles as a science lesson about chemical reactions.
The Glowing Baking Soda Tree is a delightful and easy craft project perfect for families and crafters of all ages. It combines the fun of traditional crafting with the excitement of glowing colors — an excellent addition to holiday decorations or a unique gift for friends and family. And you’ll revel in the wonder of watching it shimmer in the dark!
Materials
- 1 cup baking soda
- 1/3 cup white glue (PVA)
- 1/2 cup water
- 2–3 teaspoons of glowing paint (or glow-in-the-dark powder)
- Cardboard or a base for the tree (can also use a small wooden base or an old book)
- Plastic or acrylic paintbrush (for applying decorations)
- Optional: decorative beads or sequins for embellishment
Step 1: Prepare Your Workspace
Cover your work area with newspaper or a plastic tablecloth to catch spills. Gather all your materials so they’re easy to reach.
Step 2: Mix the Base
In a mixing bowl, combine 1 cup of baking soda, 1/3 cup of white glue, and 1/2 cup of water. Stir until you achieve a smooth, thick paste. Add the glowing paint or glow-in-the-dark powder and make sure it’s well incorporated.
Step 3: Create the Tree Shape
Using a piece of cardboard as your base, mold the mixture into a tree shape — leave the base wider for stability. Use your fingers or a spatula to shape the trunk and branches, giving it texture.
Step 4: Drying Time
Allow the tree to dry for at least 24 hours in a warm, dry area. Flip it over halfway through to dry the base.
Step 5: Final Touches
Once fully dried, enhance your tree with decorative beads or sequins using glue. Expose your creation to light, then dim the lights to see it glow!
Tips & Variations
- Colors: experiment with different colors of glow-in-the-dark paint for a multi-hued tree.
- Textures: add sand for a rough texture, or mix thin glitter into the paste for a sparkling finish.
- Base: try a small wooden base or repurpose an old book for added charm.
- Lights: incorporate small LED lights around your tree for an enhanced glowing holiday display.
Frequently Asked Questions
Can I use regular paint instead of glowing paint?
Not advisable — regular paint won’t glow in the dark. Use glow-in-the-dark paint for the best effect.
What if my tree collapses while drying?
Make sure the base is wide enough and the mixture is thick. If it collapses, you can remold it while it’s still wet.
Will the glow diminish over time?
It may fade after prolonged exposure — but recharging it in light restores brightness.
Can young children participate?
Absolutely — just supervise the mixing and use appropriate safety precautions.
Make It a Party
- Host a crafting party to make several trees together — everyone showcases their creativity.
- Create a scene with several trees of varying sizes, adding fairy lights or figures for a magical diorama.
We’d love to see your creations! Share your glowing trees and tell us how you personalized yours. Happy crafting!



