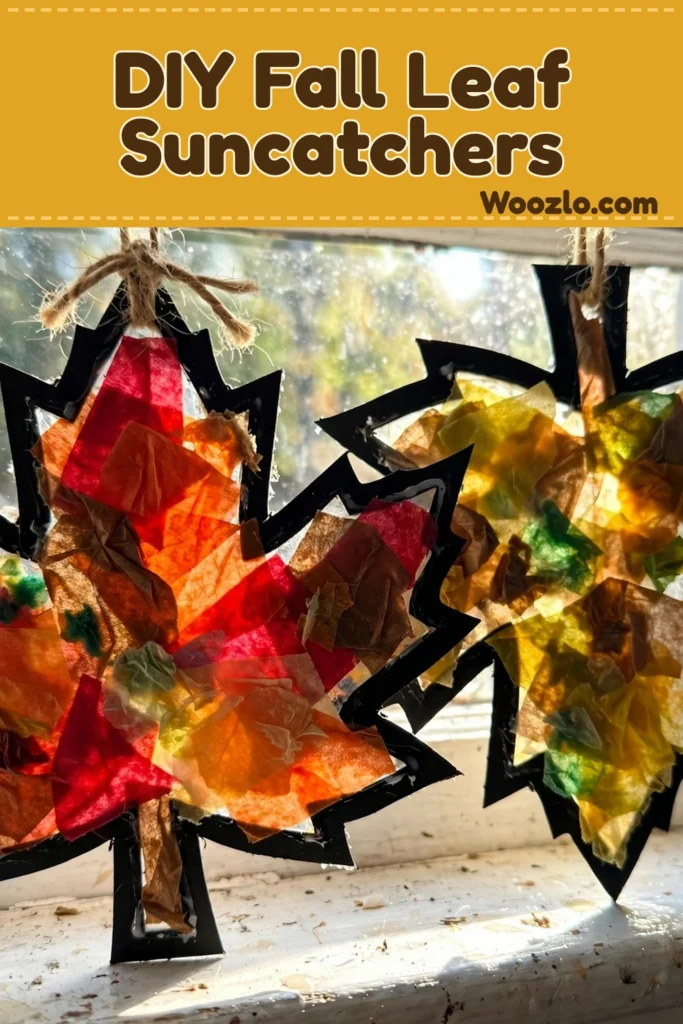
Create Gorgeous DIY Fall Leaf Suncatchers for Kids
Are you looking for a fun fall craft to do with your little ones this season? These DIY fall leaf suncatchers are it! I am completely obsessed with how these look hanging in my kitchen window — the afternoon light shines right through the tissue paper and throws the prettiest warm glow across the whole room. It feels like autumn moved indoors.
The best part? These tissue paper suncatchers are super cheap and easy. You just need colorful tissue paper, black cardstock, and clear contact paper — that is honestly the whole trick. There is even a free printable leaf template (with 2 leaf options!) that makes it practically foolproof, and my kids go absolutely wild overlapping all the colors.
What You’ll Need
- Clear contact paper
- Variety of tissue paper in fall leaf colors (red, orange, yellow, green, and brown)
- White cardstock (for printing the template)
- Black cardstock or construction paper (for the leaf frame)
- Scissors
- Free printable leaf template (optional — you can also draw your own leaf shape)
- Double-sided tape (for hanging)
Step 1: Make the Leaf Frame
Print the leaf template on white cardstock and cut it out. Trace the template onto thick black paper, or draw your own leaf shape if you prefer. Then, draw a second line around the outside of the traced leaf to create a thick border for the suncatcher frame. Cut out the leaf frame.
Step 2: Stick It Down
Place your leaf frame onto a piece of clear contact paper with the backing removed and the sticky side facing up. The frame sticks right in place — easy peasy.
Step 3: Fill It with Tissue Paper
Cut or tear the tissue paper into small pieces, then arrange them on the sticky contact paper inside the leaf frame. Overlap the colors to create a pretty stained-glass effect. There is no need to make it perfect — the different shapes, colors, and overlapping pieces are what make every leaf unique! It is perfectly fine if some of the pieces overlap the black frame a little — this will be the back of your suncatcher, so it will not show when you are finished.
Step 4: Seal the Suncatcher
Place another piece of clear contact paper over the tissue paper-covered leaf, sticky side down, to sandwich everything securely together. Then, carefully cut around the outside edge of the leaf frame to remove the excess contact paper and reveal your finished suncatcher!
Step 5: Hang and Admire
Hang your suncatcher in a sunny window using double-sided tape and watch it come to life! The light shining through the colorful tissue paper creates a beautiful mosaic of warm fall colors that looks absolutely magical. I recommend making a few — they look even more beautiful and impressive grouped together for a colorful fall display.
Tips from My Kitchen Table
- Make a whole collection: Try both template leaf shapes in different color combos — red-and-orange for a classic maple look, or yellow-and-green for something softer. Grouped together in one window, they are adorable.
- Little hands: Tearing the tissue paper is a wonderful fine motor workout for toddlers and preschoolers — way less frustrating than cutting, and just as pretty.
- All ages: This is a great fall craft for kids and adults alike. It is inexpensive, easy to customize, and requires just a handful of basic craft supplies.
Template credit: the free printable leaf template with 2 leaf options comes from KidsKubby — print it out, and you are ready to craft your way into fall!



