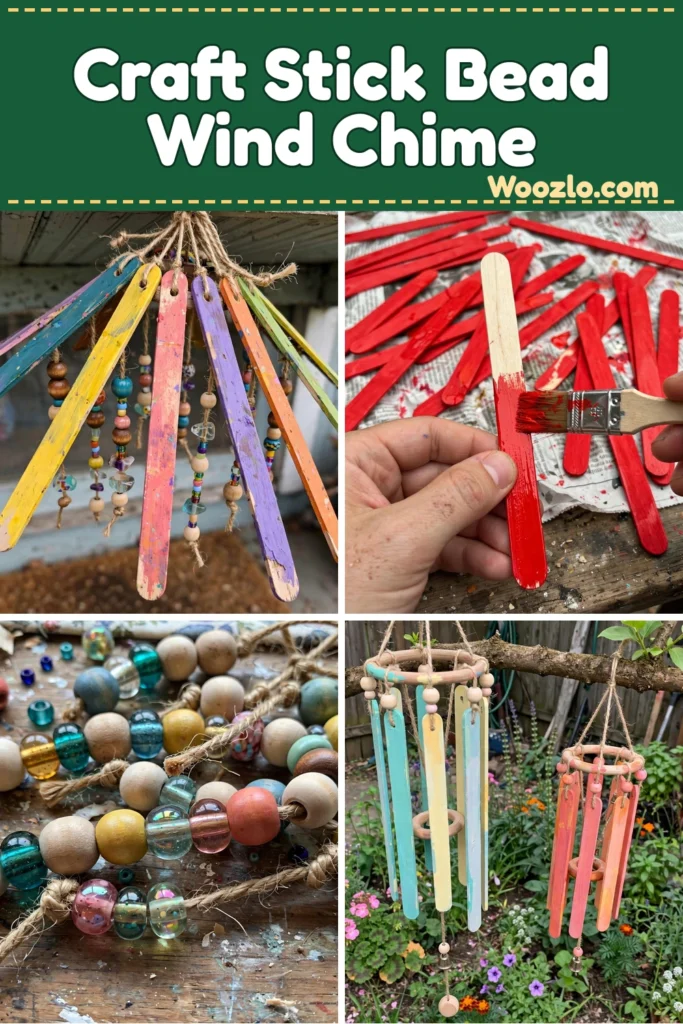
Create a Colorful DIY Craft Stick and Bead Wind Chime
Painted craft sticks, beads, and twine come together in a lively wind chime that adds color and gentle movement to an outdoor space. This is a fun one for the weekend: paint some sticks, drill a few holes, string it all together, and hang it where you can watch it dance in the breeze.
Two things worth knowing up front. First, the beads are your instrument — wooden beads give softer sounds, glass beads a clearer chime. Second, painted sticks are not fully weatherproof, so plan on a sheltered spot or a coat of clear waterproof varnish.
What You’ll Need
- Painted craft sticks (available at craft stores, or paint your own)
- Colorful beads (a variety of sizes and shapes)
- Twine or string
- Scissors
- A small drill or a sharp tool (to create holes in the craft sticks)
- Optional: paint and brushes (to personalize your craft sticks)
Step 1: Paint the Sticks
Choose your craft stick colors. If you are painting them, take your time and coat them in vibrant hues. Allow the sticks to dry completely before moving on.
Step 2: Plan the Layout
Arrange your craft sticks on a flat surface. Look at the patterns and colors and visualize how they will hang together — play with combinations.
Step 3: Drill the Holes
Using a small drill or sharp tool, make holes at strategic points along each craft stick. These are the guide points for the twine.
Step 4: Cut the Twine
Cut several lengths of twine. Keep them even, or vary the lengths if you want different hanging heights — asymmetry looks great.
Step 5: String and Knot
Thread the twine through the holes in the order you envision, tying knots as you go. Make sure everything feels secure.
Step 6: Add the Beads
Add beads to the twine before tying the final knot. This adds visual appeal and soft sounds when the chime sways. Experiment with bead types — wooden for softer tones, glass for a clearer chime.
Step 7: Hang It
Find a sturdy, sheltered spot — protected from strong winds and direct sunlight to preserve the paint. Use a sturdy hook or nail. Then step back and admire it dancing in the breeze.
Make It Your Own
- Experiment with color: mix and match paints, or use washi tape for unique designs.
- Add natural elements: shells or small pinecones connect the chime to the outdoors.
- Vary sizes: wind chimes of different sizes and shapes make a fun, eclectic grouping.
- Tune the sound: wooden beads = softer, glass beads = clearer. Mix to find your tune.
- Make it communal: invite friends or family to paint their own sticks for one big collaborative chime.
FAQs
How weather-resistant is it? Painted sticks handle light rain, but seal them with a clear waterproof varnish for real protection.
Can I change the design later? Easily — untie the knots, switch out beads, or repaint the sticks. The design evolves with you.
Can I use heavy beads or larger sticks? Yes, but mind the balance — heavier items change how the chime moves and sounds. Light items give a more delicate tune.
How long will it last? Several seasons with gentle care. Bring it inside during extreme weather.
Where should I hang it? Somewhere sheltered from strong winds and direct sun, on a sturdy hook or nail.
Care and Storage
Think of the wind chime as a seasonal treasure. If you take it down for winter or bad weather, store it in a cool, dry area — hanging it if possible to preserve its shape — wrapped gently in a soft cloth. The twine can be untied and replaced with new designs as seasons change, so each renewal brings fresh inspiration.