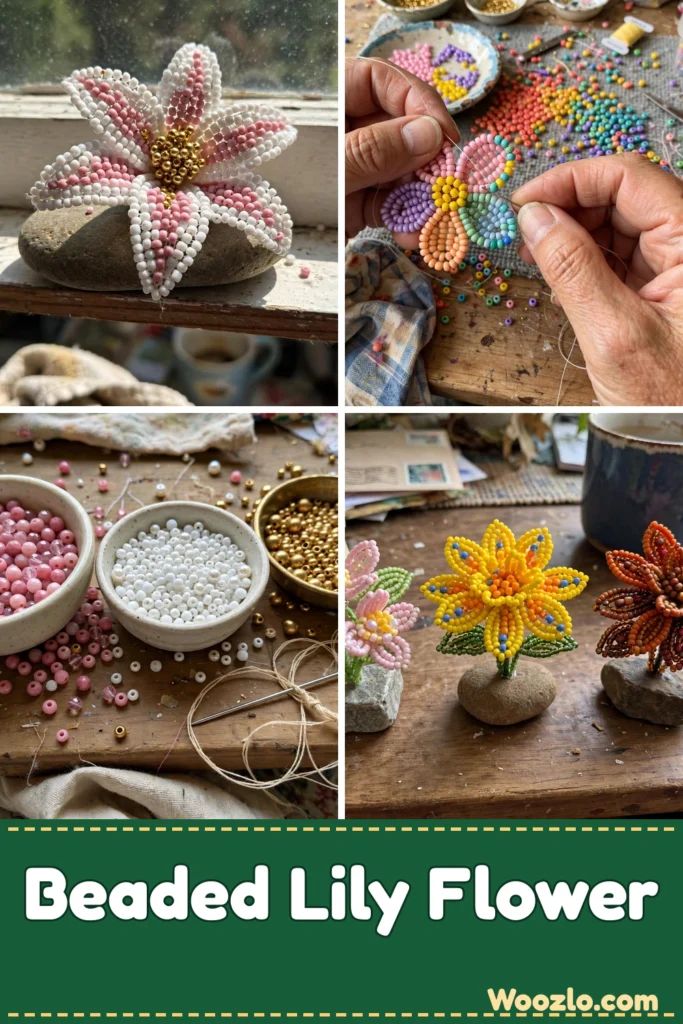
Craft a Charming DIY Beaded Lily Flower on Stone Base
There is something so peaceful about a beaded lily resting on a smooth stone — it looks like a little treasure you found in a fairy garden. With a handful of beads, beading thread, and a flat natural stone, you can stitch together this calming little flower and display it where it catches the light.
The stringing and arranging is meditative work, and there are truly no wrong choices — trust your instincts on the colors. A base of three or six petals gives you a classic lily shape, with warm gold or yellow beads for the center.
What You’ll Need
- Natural stone base (flat and smooth, easy to find)
- Beads in various colors and sizes (choose your favorites)
- Beading thread (strong yet thin, easy to handle)
- Beading needle (fine enough to fit through bead holes)
- Scissors
- Hot glue gun (to secure the flower to the stone, optional)
- Wire (thin and flexible for additional structure, optional)
- Floral tape (for a neater finish, optional)
Step 1: Choose Your Stone
Choose a natural stone that feels right in your hand. It should have a flat surface to support the flower. Take a moment to appreciate its unique texture and color.
Step 2: Design Your Bead Palette
Lay out your beads in a design that inspires you. Experiment with colors and arrangements until you find something harmonious — there are no right or wrong choices.
Step 3: Cut and Thread
Cut a length of beading thread about three times the height of your intended flower. Thread your needle and prepare for your creative journey.
Step 4: Make the Petals
Slide several beads onto the thread, spacing them evenly. For a lily, consider a base of three or six petals, depending on your design.
Step 5: Secure the Petals
Tie a knot where you want the petals to stay. Once you are satisfied with the placement, breathe in the sense of achievement.
Step 6: Add the Center
Continue adding beads for the center of the lily. Gold or yellow hues draw in the warm light — layer them as your vision guides you.
Step 7: Attach to the Stone
Carefully attach the flower to the stone base using hot glue. Place it down slowly, feeling the weight of the flower connect with the smooth surface. (No glue gun? Craft glue or wire works too.)
Step 8: Finish and Display
If desired, wrap floral tape around the base of the flower for a polished finish. Allow the glue to set fully, then find a lovely spot — a windowsill where sunlight illuminates the colors, or a desk as a reminder to pause and enjoy the moment.
Make It Your Own
- New floral shapes: add leaves or other flowers for a bouquet effect.
- Mix materials: fabric or natural fibers on the base add layered texture.
- Meaningful beads: use beads that are gifts or memorable finds — each carries a story.
- Seasonal versions: create different flowers for spring, summer, fall, and winter.
- Craft together: invite a friend for a cozy shared session.
FAQs
Can I use other stones? Absolutely — any smooth stone with a flat surface that stands securely works.
Do I need a glue gun? Optional — craft glue or wire also secure the flower.
Alternatives to beading thread? Fishing line or thin yarn work, as long as they support your beads.
How do I clean it? Gently dust with a soft, dry cloth; lightly wipe with a damp cloth if needed, but avoid soaking.
Can I change the design later? Yes — take it apart gently and let creativity flow anew.
Care
Store your beaded lily in a soft, padded container away from direct sunlight to prevent fading. To reuse the stone base, remove the beads with warm water to weaken the glue. Keep the materials in a dedicated craft box so you can revisit them whenever inspiration strikes.