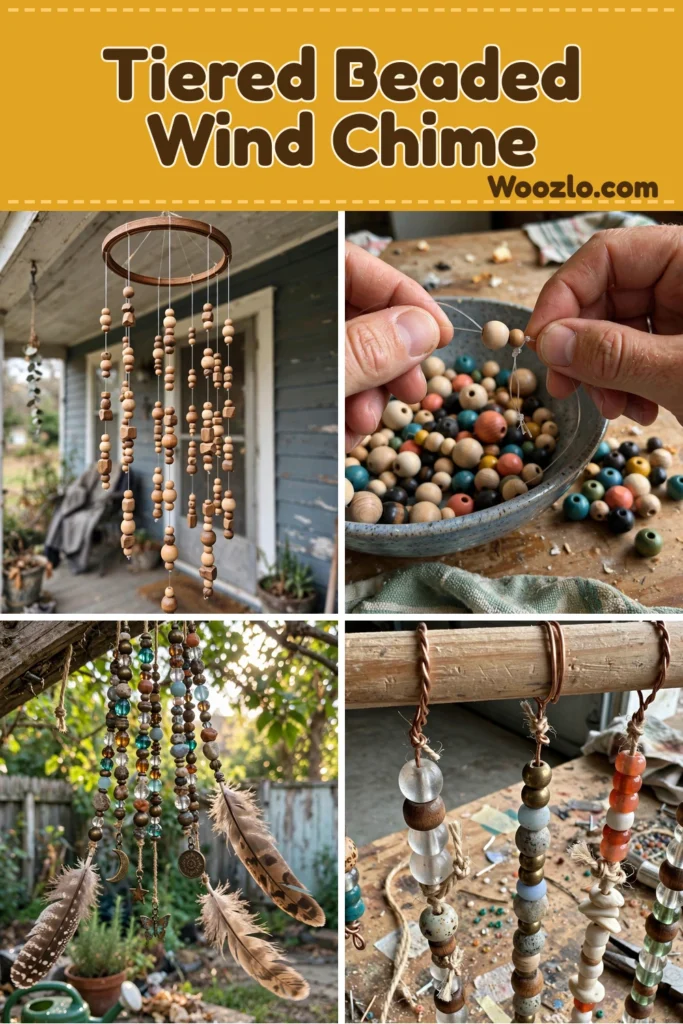
Create a Stunning DIY Tiered Beaded Wind Chime for Your Porch
A tiered beaded wind chime is one of those builds that looks impressive and is genuinely simple to make. Cut some line, string some beads, tie them to a hoop or dowel — and you get a piece that sounds as good as it looks when the breeze hits it. Plan for an afternoon, and do not rush it.
The tiered part is the whole trick: varying the strand lengths gives you that cascading look and a nicer, layered sound. Everything here is cheap and easy to find, and the design is endlessly tweakable.
What You’ll Need
- Wooden beads in various sizes (easy to find in craft stores or online)
- Clear fishing line or sturdy thread
- Metal or lightweight wire (flexible but holds its shape)
- Wooden dowels or embroidery hoops (for the tiered structure)
- Scissors
- Pliers (for bending wire or securing knots)
- Optional: charms or feathers for personalization
- A small bowl or tray (to keep materials organized)
Step 1: Cut Your Strands
Cut your fishing line into varying lengths. Longer pieces create cascading tiers; shorter ones add layered fullness near the top.
Step 2: String the First Bead
Slide a wooden bead onto the line.
Step 3: Knot Below the Bead
Tie a small knot below the bead and pull it tight. This anchors each bead in place.
Step 4: Build the Pattern
Alternate colors and sizes, threading beads in intentional patterns until you reach your desired length.
Step 5: Tie Off
Tie off the string securely. Let the end hang loosely for now.
Step 6: Repeat for More Strands
Repeat for additional strings, varying the lengths and bead choices to add depth and harmony to the chime.
Step 7: Attach Strands to the Frame
Attach the strings to your wooden dowel or hoop, spacing them evenly for balance. Picture how they will sway as you work.
Step 8: Secure Everything
Secure the strings with small knots or twists of wire.
Step 9: Add Charms or Feathers
For added charm, attach light charms or feathers at the bottom of each string — they add visual interest and extra rattling sounds.
Step 10: Hang and Listen
Step back and check how your wind chime hangs. Then hang it somewhere it can catch a gentle breeze — porches, gardens, or open windows — and let it sing.
Make It Your Own
- Play with color: soothing pastels or vibrant hues, whatever resonates.
- Add meaning: incorporate charms that hold special meaning or small trinkets from your travels.
- Go natural: shells or stones bring a calming, organic feel.
- Adjust strand length: longer or shorter pieces transform both the look and the sound.
- Bring a friend: this is a great shared project — everyone makes their own version.
FAQs
How long does it take? Plan for an afternoon, depending on your pace and design.
Can I use different types of beads? Absolutely — mixing wood, glass, or clay beads creates great textural contrast.
What if I don’t have fishing line? Substitute any sturdy string or twine, as long as it can hold the weight of the beads.
Where should I hang it? Anywhere with a gentle breeze: porches, gardens, or open windows.
Can it stay outside? A sheltered spot protects it from weather and extends its life. Secure it well when winds pick up.
Care and Storage
If hanging indoors, keep it away from direct sunlight to protect the colors from fading. When not in use, gently wrap it in a soft cloth and store it in a dry place to protect from dust and scratches. The design is easy to deconstruct, so beads can be repurposed or reimagined into a new creation later.