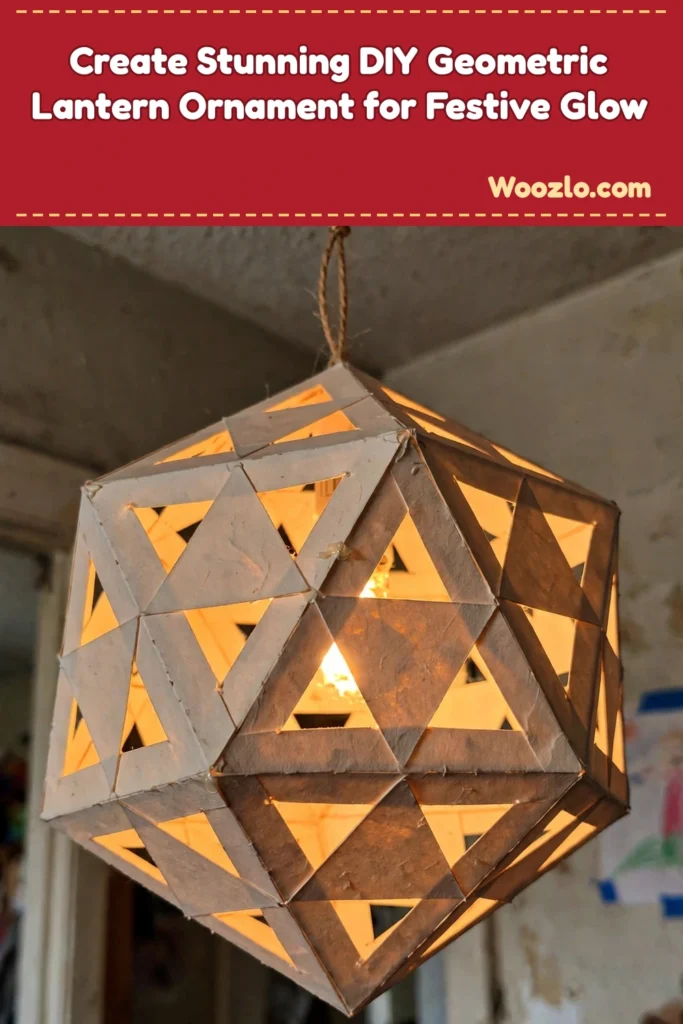
Create Stunning DIY Geometric Lantern Ornament for Festive Glow
Are you looking for a cheap, easy paper craft that glows with cozy light? Creating a DIY geometric hanging lantern ornament invites tranquility and focus — drawing both heart and hands into a soothing task! Imagine the smooth paper sliding between your fingers, the gentle snip of scissors, and the warm glow of a candle flickering in anticipation of your finished piece. Each action adds a layer of calm and creativity.
This project becomes a gentle reminder to slow down and appreciate the beauty in creation — and the finished lantern casts the prettiest light patterns through its geometric cutouts!
Materials You’ll Need
- Colored or patterned cardstock paper (easy to find)
- Scissors (optional: craft knife for precision)
- Ruler (to guide your cuts)
- Pencil (for marking measurements)
- Glue stick or double-sided tape (for easy adhesion)
- String or twine (to hang your lantern)
- A candle or small LED light (to illuminate your lantern)
Step-by-Step Directions
Step 1: Prepare Your Paper. Select a piece of cardstock. Using your ruler and pencil, mark a square that is 8 inches by 8 inches.
Step 2: Cut the Square. Slowly cut along your pencil lines with scissors for clean edges.
Step 3: Create the Pattern. On the same square, draw a geometric pattern of your choice — simple triangles, diamonds, or more intricate designs.
Step 4: Cut Out the Pattern. Carefully cut along the lines of your geometric design. Imagine how the light will dance through these openings!
Step 5: Fold the Sides. Bring the edges of the square together to start forming a cube shape. Fold gently to create sharp creases.
Step 6: Secure the Edges. Using your glue stick or double-sided tape, adhere the edges together firmly.
Step 7: Create a Top. Cut another square of the same size for the top — decide if you want holes or a solid, closed look.
Step 8: Attach the Lantern Top. Glue or tape the top onto your geometric shape, completing the main structure.
Step 9: Prepare for Hanging. Cut a length of string or twine, make a loop, and glue it to the top of your lantern.
Step 10: Add Light. Place your candle or LED light inside — and watch the light shine through the geometric cutouts!
Enjoying the Finished Piece
Hang it in a window, on a bookshelf, or from a ceiling beam — the gentle glow will cast a beautiful aura. Let the lantern remind you of the calming moments spent creating; each flicker ignites a cozy feeling in any room it graces.
Keeping It for Later
When the season changes, repurpose it — change the cardstock color or light type for a fresh look. Store gently in a box or on a shelf, free from dust. Let it be a reminder of cozy moments spent making, season after season.
Gentle Tips & Variations
- Different shapes: try a hexagon or octagon base for a unique design.
- Light sources: experiment with LED colors — soft blues for calm, warm yellows for cozy evenings.
- Personal touches: add dried flowers inside or fairy lights around the outside.
- Make a series: craft multiple lanterns in varying sizes and shapes for a beautiful display.
- Leave a message: write a gentle word or mantra inside, illuminated with the light!
FAQs
What type of paper works best?
Thicker cardstock is ideal — it holds shape well while remaining easy to cut. Textured or patterned cardstock adds visual interest.
Can children do this project?
Definitely — with supervision. Use kid-friendly scissors and simple patterns for little hands.
How do I keep my lantern safe?
Always opt for LED lights instead of candles to avoid fire hazards.
What if I make a mistake while cutting?
Embrace imperfections — they add character! Work mistakes into your design.
How do I clean and maintain it?
Gently dust with a soft cloth; check LED batteries regularly.
Creating this lantern is a form of nurturing your spirit — a mindful experience that fosters calmness. Invite its warmth to glow gently in your space!



