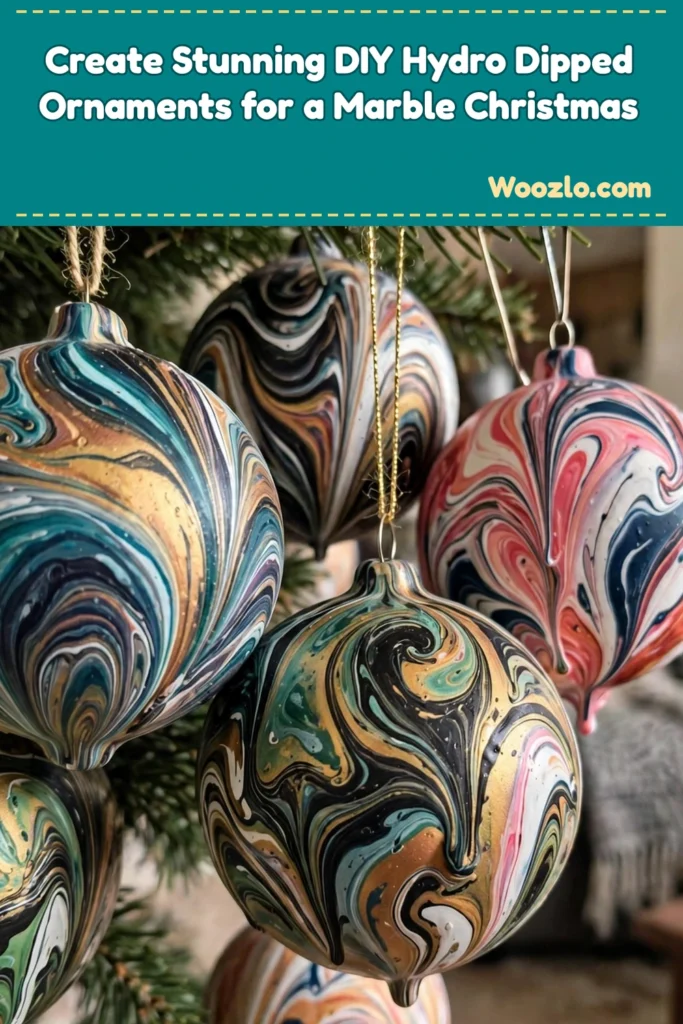
Create Stunning DIY Hydro Dipped Ornaments for a Marble Christmas
Are you looking for a cheap, easy Christmas craft that looks like high-end decor? Hydro dipping is the answer! You swirl paint on water, dip an ornament, and pull out a one-of-a-kind marbled masterpiece. My kids gasp every single time — no two ornaments ever look alike. It’s the most “how did you make that?!” craft we do all season.
Hydro dipping transforms simple ornaments into unique pieces with a flowing marbled finish and distinctive color patterns. Imagine the sound of water gently lapping, the cool ink-infused water on your hands, colors blending and swirling — each ornament emerges with its own story. It’s a gentle mindfulness practice disguised as holiday crafting.
Gathering Your Materials
- Plain ceramic or glass ornaments (easy to find in craft stores)
- Acrylic paints (bright colors work best — acrylics’ viscosity makes them ideal for hydro dipping)
- Shallow container (like a plastic tub)
- Warm water (helps the paint float)
- Wooden skewers or toothpicks (for swirling)
- Gloves (optional — keep your hands clean)
- Paper towels or old newspaper (for drying and cleanup)
- Sealant (optional — to protect your design)
Step-by-Step Directions
Step 1: Fill your shallow container with warm water until it’s about two inches deep — the warmth helps the paint float beautifully.
Step 2: Shake the acrylic paint bottles to mix well. Open a few inspiring colors, then gently squeeze drops onto the water’s surface and watch them spread into puddles.
Step 3: With a wooden skewer, lightly swirl the colors together. Move slowly — enjoy the way the paints dance and mix.
Step 4: Pick up one ornament and hold it at a slight angle above the water’s surface.
Step 5: Dip the ornament into the paint-covered water — submerge about halfway, then pull out slowly, letting the paint cling to the surface.
Step 6: Place the wet ornament gently on a paper towel to dry, and admire the swirling colors.
Step 7: After about an hour, check if it’s dry. Add sealant now if you’d like to protect the design.
Step 8: Once fully dry, display your creation — each piece carries your creativity.
Enjoying the Finished Piece
Place them where they’ll catch the light so their colors shimmer softly. Hang them on the tree, use them as gift tags, or rest them on a shelf as a reminder of your calming creative day.
Small Ways to Make It Your Own
- Experiment with unexpected color combinations for an even more unique look.
- Add glitter or metallic paints on top of base colors for sparkle.
- Play with the dipping angle — a slight tilt yields different marbling.
- Use assorted ornament shapes — bulbs, stars, and other silhouettes add variety.
- Invite friends or family — each person’s touch tells an entirely different story.
FAQs
Can I use any type of paint?
Acrylics work best because of their viscosity and vibrant colors.
How long do they take to dry?
Usually about an hour — let them sit a few hours before using for best results.
Is this messy?
It can be! Cover your workspace with newspaper or plastic, and wear gloves to keep hands clean.
Can I remove paint if I don’t like the result?
Yes — if not fully set, gently wash off with warm soapy water and start fresh.
How should I hang or display them?
Use fishing wire for hanging, or place them on decorative stands.
Storing & Reusing
Store in a cool, dry place, wrapped gently in tissue paper inside a sturdy box. To reuse, clean off old paint with gentle soap and warm water — a fresh canvas whenever inspiration strikes. Let each moment of creation ground your spirit!



