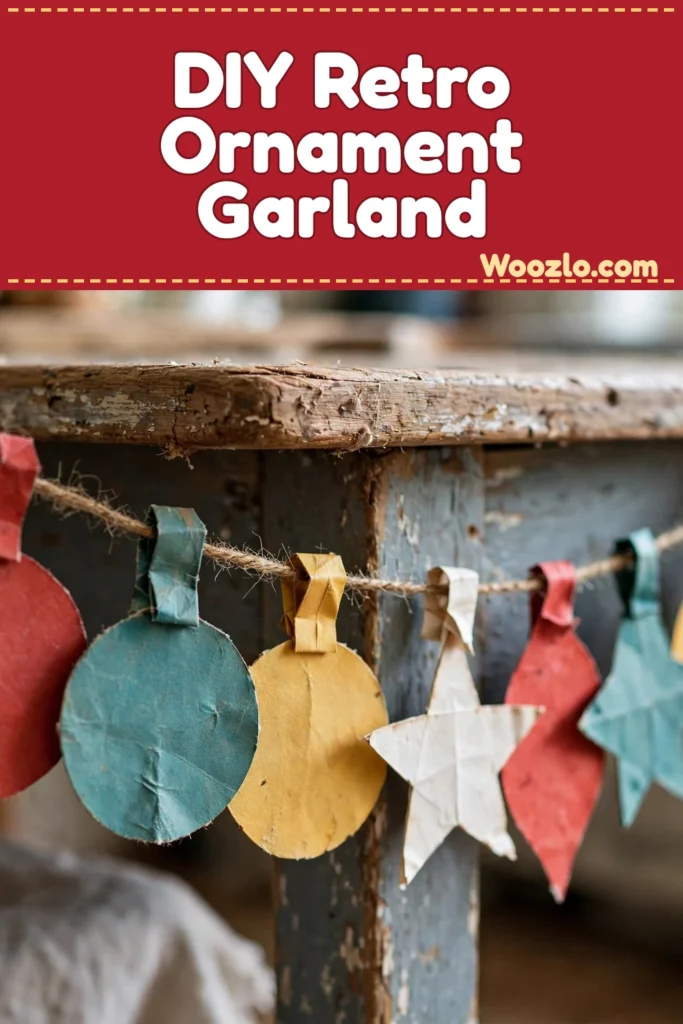
Create Stunning DIY Retro Paper Ornament Garland for Christmas
Looking for a cozy, inexpensive way to dress up your home for Christmas? This retro paper ornament garland is calling your name! Imagine gently folding, cutting, and gluing colorful papers while your kids decorate their own ornaments beside you — the soft textures, the crisp snip of scissors, the little stories every paper piece tells. My kids think the retro ornaments look like little vintage treasures, and I have to agree.
The best part? This DIY garland is super cheap and easy — you probably have most of the supplies sitting in your craft drawer right now. Colored paper, scissors, glue, and some twine turn into the sweetest garland for your mantel, door frames, or shelf. It is the perfect afternoon project when everyone needs a calm, creative reset.
What You’ll Need
- Colored paper (scrapbook paper or old book pages work beautifully)
- Scissors (a pair that feels comfortable in your hand)
- Glue stick or craft glue (look for one that dries clear)
- Twine or string (soft, durable options work best)
- Optional decorative elements: glitter, stickers, or fabric scraps for added texture
Step 1: Choose Your Papers
Start by selecting the colored paper you want to use. Feel their weight and texture as you lay them out — this is the fun part! Let the kids pick their favorites; odd color combos often turn out the cutest.
Step 2: Cut Your Shapes
Cut your papers into various shapes — circles, stars, or even freeform designs. Let little hands guide the scissors here (with supervision for the tiny ones). Every ornament comes out different, and that is half the charm.
Step 3: Fold a Small Hook
For each shape, fold a small part to create a hook. It helps hold the string later and adds a little character to your ornaments. This step is great for older kids — it builds fine motor skills and patience.
Step 4: Decorate
Using the glue stick, adhere any decorative elements you like. A sprinkle of glitter, a fabric scrap, a sticker or two — let the kids be inspired by what feels joyful. Set the ornaments aside and let the glue dry completely.
Step 5: Cut Your String
Once dry, cut lengths of twine or string to serve as suspensions for the garland. Measure roughly against where you plan to hang it so you do not come up short.
Step 6: String Them Together
Thread each paper ornament onto the string, spacing them out in a way that feels balanced. Keep going until all your ornaments are strung together — the colors and shapes will start to dance against the light, and it is just lovely.
Step 7: Hang and Admire
Find a place to hang your garland — drape it across the mantel, around a door frame, or above a shelf. Step back, breathe, and admire your work. There is an uplifting energy to seeing something your family crafted with care.
Tips from My Kitchen Table
- Make it last: Use cardstock or laminate each ornament for extra durability. Store the garland in a soft cloth bag or sturdy box, layering gently so nothing gets crushed.
- Swap the seasons: Change out the ornaments by season — autumn colors for Thanksgiving, pastels for spring. One string, endless garlands!
- Make it personal: Press flowers, tuck in snippets of old letters, or pick a color theme that matches your decor. Small touches turn a simple decoration into a keepsake.
- Kid-friendly: Prep the materials in advance, then let the kids handle the cutting, decorating, and stringing. It is a wonderful fine-motor and creativity workout.
This garland takes a couple of hours to an entire afternoon, depending on how many ornaments you make — no rush, no pressure. Crafting is just as much about the calm it brings as the beautiful thing you hang up at the end.



