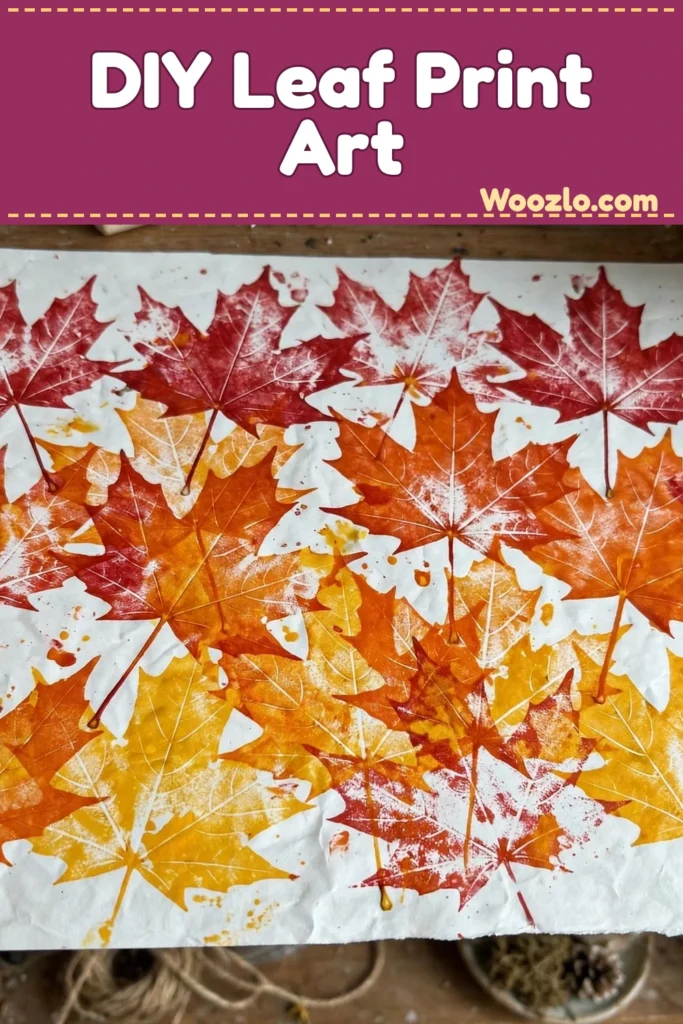
Create Gorgeous DIY Leaf Prints for Kids This Fall
Are you looking for a fun, creative activity for your little ones this fall? These DIY leaf prints are it! My kids and I went on a leaf-hunting walk around the block (half the fun, honestly), came home with a basket of gorgeous autumn leaves, and five minutes later we were printing the most beautiful leaf art you have ever seen.
And here is the best part: this craft is super cheap and easy. Leaves are free, and you probably already have paint and paper in the craft box. The prints come out so detailed — every vein and edge of the leaf — that they look like real botanical art. We framed ours for the mantel, printed a few on fabric for placemats, and my 5-year-old was so focused, beaming with pride, over every single print.
What You’ll Need
- Paint — for printing on paper: tempera paint, gouache paint, watercolor (the soft form in tubes), or acrylic paint. For printing on fabric: fabric paint or acrylic paint.
- Paper or fabric — card stock, regular office copy paper, or watercolor paper all work beautifully. Most fine textured cotton or linen fabrics are great too.
- A rubber brayer/roller (a silicone rolling pin works too and is cheaper, or just use a wooden rolling pin)
- Paint brushes, and a palette or anything you can mix paints on
- A fine mist bottle (handy, especially with acrylic paint)
- Paper towel, scrap paper, or plastic sheets (for the printing process)
Step 1: Find the Best Leaves
The best leaves for printing are relatively flat, not too soft, with nice vein textures (usually on the back side), and not too small. Look for leaves from maple, tulip tree, certain oak trees, ginkgo, sassafras, ash, poplar, or sycamore. You can use fresh leaves, or press them for a day before using — pressed leaves stay flat and print much more cleanly. Think about how you want to use your prints (wall art, table linens, Thanksgiving cards, fall decorations) to decide what sizes you need.
Step 2: Paint One Side of a Leaf (3 Secret Tips!)
I thought leaf printing was as simple as smearing paint on a leaf and rubbing it onto paper. Nope — my first attempts had ugly white empty spots, or I used too much paint and got a smudged mess. After lots of testing, I figured out 3 secrets that make all the difference:
- Secret 1 — Pick the right paint. Gouache (opaque watercolor), watercolor, and tempera paint can all be reactivated with water, which makes them forgiving and easy to work with on paper. Tempera is especially great for kid crafts — cheap and less pigmented. Acrylic paint is more permanent once dry, so it is the best choice for printing on fabric (and it works on paper too), but it is much harder to clean off brushes once dry. With acrylic, work fast and keep a mist bottle handy so the paint does not dry out before you print.
- Secret 2 — Dampen the paper. For thicker paper like card stock or watercolor paper, mist it with a fine mist bottle or brush it with clean water first, and let it absorb the moisture while you paint your leaf. (Skip this on thin paper like office paper.)
Now paint the leaf: protect your work surface with plastic or sheets of paper, and spread a thin layer of paint over one side of the leaf — the back side usually has the most interesting vein textures. The paint consistency should be like ketchup or a bit thicker. Most of the time you do not need to add water; watery paint causes smudges and bleeds. Try using different colors on one leaf! I keep a designated brush for each color so I can work quickly.
Step 3: Print Your Leaf Art
By now your paper should have absorbed the moisture — damp to the touch, with no water sitting on the surface. Place the leaf painted-side down on the paper, and lay a piece of paper or paper towel on top.
Secret 3 — Roll, don’t rub. Use your rubber brayer/roller or rolling pin and apply a LOT of pressure as you roll and press the leaf onto the paper or fabric, keeping the pressure steady so the leaf does not shift. This works so much better than rubbing with your fingers — the impressions come out even and full of detail. Then carefully lift the leaf and admire your gorgeous leaf art!
Tips from My Kitchen Table
- Bonus watercolor trick: If your prints have too much white showing, take a brush dipped in clean water and gently go over the prints made with gouache, watercolor, or tempera. The water reactivates the paint and creates a lovely watercolor effect.
- Fabric printing: Use fabric paint or acrylic on cotton or linen, and your leaf prints become custom table linens, tote bags, or Thanksgiving napkins.
- Little hands: Painting the leaves is a fantastic fine motor workout — the brush control and careful rolling build hand strength and hand-eye coordination.
- Gift idea: These prints make beautiful fall and Thanksgiving cards — frame a few for grandparents and they will melt.
Source project: the 5-minute leaf prints art tutorial from apieceofrainbow.com — I rewrote it in my own words, but every material, measurement, and technique comes straight from the original.



