Create Cozy Baking Soda Crystals into Glassy Art for Peaceful Moments
Watching a shimmering row of crystals form along a jar — each one reflecting light in its own unique way — is a quiet kind of joy. This project turns two everyday substances, baking soda and water, into delicate glass-like art through nothing more than time and patience.
It’s a meditative process: gentle boiling, slow stirring, then days of watching fragile shapes emerge. Set it aside in a quiet corner and check back — the slow unfolding mirrors nature’s own cycles. Total hands-on time is about 10 minutes; the rest is 48 hours of anticipation.
Materials You’ll Need
- 1 cup baking soda (common and easy to find)
- 1 cup water
- Food coloring (for added beauty, optional)
- A heat-resistant container or glass jar
- Spoon or stick for stirring
- Parchment paper or a tray (to catch any spills)
- A little patience and creativity
Prep time: 10 minutes · Total time: 48 hours · Yield: 1 piece of art
Step 1: Boil the Water
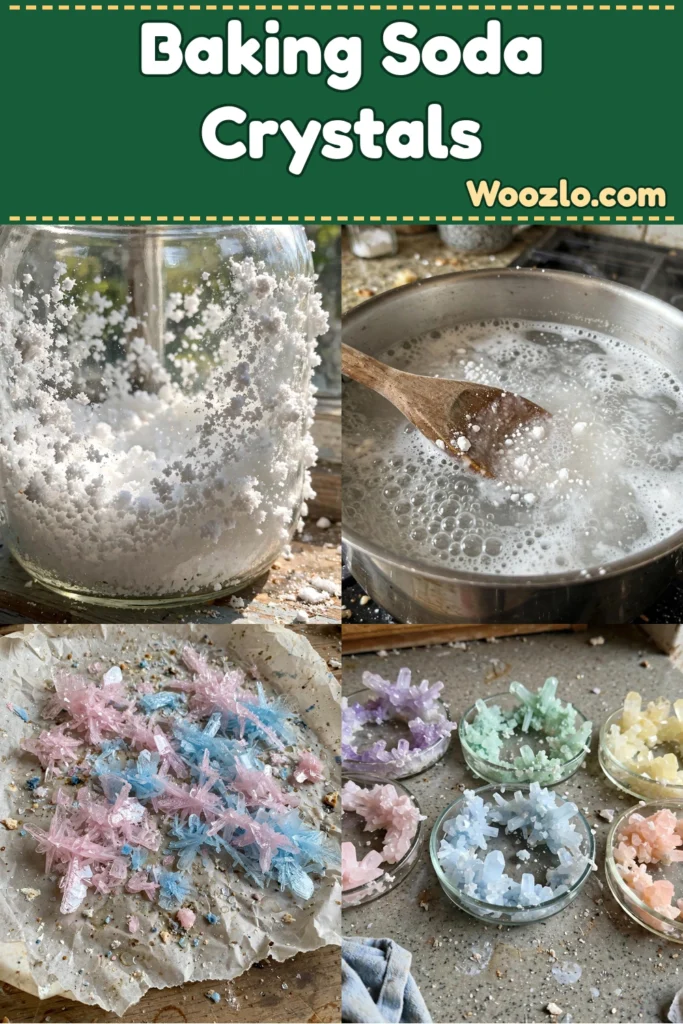
Begin by heating 1 cup of water in a saucepan until it reaches a gentle boil. The warmth helps the baking soda dissolve effectively.
Step 2: Add the Baking Soda
Gradually add 1 cup of baking soda to the boiling water. Use a spoon to stir slowly, feeling the mixture thicken as the granules dissolve — let yourself become attuned to the changing textures.
Step 3: Add Color (Optional)
Once fully combined, remove the saucepan from heat. If desired, add a few drops of food coloring and swirl gently until the color is uniform.
Step 4: Pour into the Container
Pour the mixture carefully into your chosen heat-resistant container, swirling to create movement in the liquid.
Step 5: Let the Crystals Form
Set the container in a quiet area away from disturbances and wait patiently. Over the next few hours, crystals will start to form along the sides and bottom.
Step 6: Harvest After 24 Hours
After 24 hours, check your creation. Gently scrape any excess crystals from the sides of the container, letting them fall onto parchment paper for drying.
Step 7: Rest Another 24 Hours
Let the crystals rest for another 24 hours, experiencing the joy of anticipation as you wait to see their final transformation.
Step 8: Display Your Art
Once dry, your unique piece of art is ready to display — an intricate reminder of your crafting journey. They make vibrant centerpieces for dining tables or calming accents on windowsills, catching the light from every angle.
Storage and Reuse
Place creations in a safe spot to avoid breakage and dust. Stored properly, they can last indefinitely. And when you want a fresh start, gently rinse the crystals with water to dissolve them back to their original form — ready for another round of creativity.
Tips and Variations
- Rainbow effect: Use different colors of food coloring to create a striking rainbow in your crystals.
- Container shapes: Tall jars yield long, elegant crystals; shallow dishes create intricate patterns.
- Add texture: Sprinkle a few coarse salt grains into the mixture before pouring for extra visual appeal.
- Invite nature: Add small flowers or leaves to the mixture for an organic feel.
- Add scent: A few drops of essential oils in the mixture bring a subtle fragrance.
Quick Questions
Can I use other containers? Absolutely — glass jars, dishes, or silicone molds all work beautifully. Just make sure they’re heat-resistant.
Do these crystals dissolve in water? Yes — immersing them in water dissolves them, making cleanup or a fresh start easy.
How long will my crystals last? If stored properly, these creations can last indefinitely.
Can I add scents? While baking soda itself is neutral, a few drops of essential oils add a subtle scent.