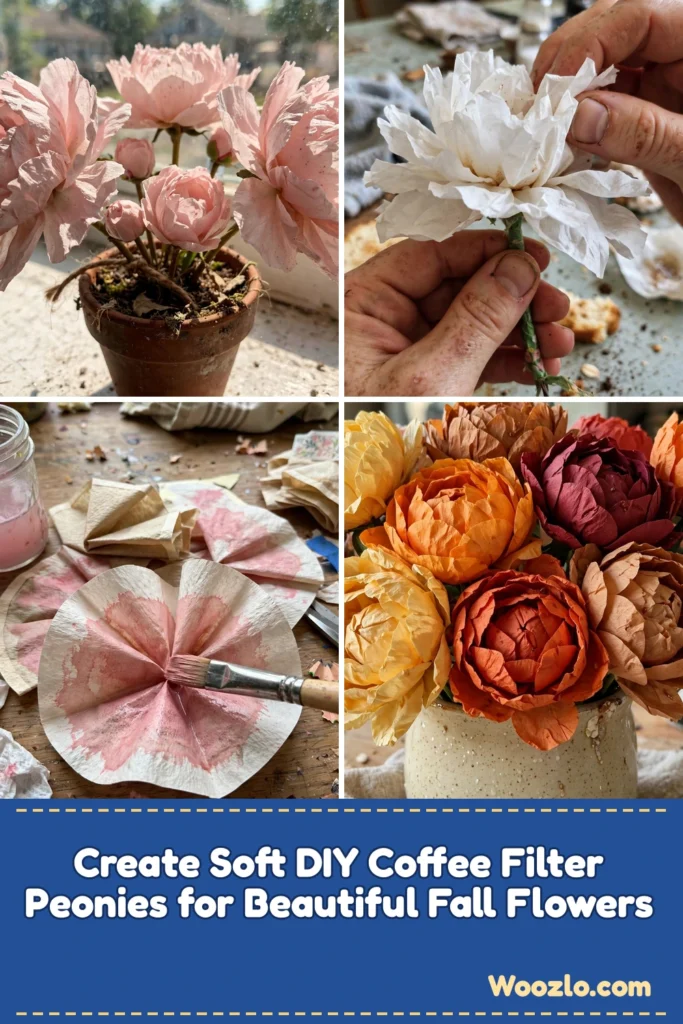
Create Soft DIY Coffee Filter Peonies for Beautiful Fall Flowers
Are you looking for a cheap, easy flower craft that feels like meditation? Creating a soft, delicate peony from coffee filters invites a soothing ritual — as you lift the paper between your fingers, notice the gentle crinkle. The light shines through, illuminating shades of creamy white and blush. Each fold, each twist reflects care and intention, and the finished bloom is absolutely stunning!
This project is a meditation that whisks life’s noise away. Engaging with simple materials draws you into a quiet space where time feels suspended — and the peony’s soft presence brightens corners of your home with warmth and thoughtfulness.
Materials You’ll Need
- Coffee filters (white or colored work well)
- Scissors (safety scissors are perfect for a gentle touch)
- Green floral wire (available at craft stores)
- Floral tape (soft and stretchy)
- Optional: watercolors or food coloring (for adding color)
- Optional: small cup of water (for dipping)
- Optional: paintbrush (for applying color)
Step-by-Step Directions
Step 1: Take several coffee filters — stack about five to seven together for a fuller bloom.
Step 2: Gently fold the stack in half, then in half again, creating quarters — this forms the base of your blossom.
Step 3: With scissors, round the edges of the folded filters while they remain stacked. Visualize soft petals as you shape the edges.
Step 4: Unfold the filters partially to create a layered look — this reveals the delicate rounds, like petals opening in the sun.
Step 5: To add color, dip your paintbrush in water and gently apply it to the filters. Let the colors blend softly — experiment with different intensities!
Step 6: Take your floral wire and twist it around the center of the folded filter, securing it tightly — this forms the stem.
Step 7: Slowly pull each layer of the filter upwards, starting from the bottom. Take your time, watching the bloom take shape.
Step 8: Wrap floral tape around the wire stem, moving from the base of the flower downwards — this gives structure and hides the wire.
Step 9: Adjust the petals with a gentle hand. Shape and fluff until you achieve your desired look.
Step 10: Your peony comes to life! Find a lovely spot for it — or share it with someone who needs a little cheer.
Enjoying the Finished Piece
Place it on a sunny window sill where light plays delicately against the layered petals — or gather several in varying hues for a joyful bouquet. Each petal captures moments of tranquility, inviting calm into busy days.
Gentle Tips & Variations
- Layer different colors of filters for a textured look — gradients add dimension.
- Add leaves made from green paper or filters shaped like foliage.
- If children or friends join you, let them add their personal flair.
- Use a small flower pot as a base — it becomes a lovely centerpiece.
- Keep a journal nearby while you create, writing thoughts as you craft.
FAQs
Can I use something other than coffee filters?
Yes — tissue paper or thin crafting paper work, though they create different textures.
How long does it take?
Usually 30–60 minutes (prep 15, crafting ~30) — allow yourself to enjoy the time.
Can I change the petal shape?
Absolutely! Different cuts lead to varied looks, making each flower unique.
Is it safe for small children?
Many steps are kid-safe, but supervise with scissors.
How do I keep my peony looking fresh?
Store in a cool, dry place; dust gently. Refresh petals with a light mist of water, and reshape with your hands as needed.
Keeping It for Later
Preserve your delicate peony away from direct sunlight — a gentle box or soft display surface works well. With gentle adjustments, these blooms retain their beauty much longer. Embrace the quiet joy of making and let it bloom both in your heart and your home!



